




Lid Bumper WR02X10540

Official part for General Electric, Hotpoint, Kenmore

Easy 

30 - 60 mins 

Part Location Diagram of WR02X10540 GE Lid Bumper
See part 500 in the diagram
Replacing your General Electric Refrigerator Lid Bumper
( Grid squares measure 1x1 inch )
Proudly Canadian
$13.95
Special Order
 Fits your GSS25LSWJSS!

About This Part

What it does. Why it matters. Everything you need to know for an easy fix.

Lid Bumper Specifications

The lid bumper or evaporator fan motor bumper in your refrigerator prevents the fan motor from scraping against the side bracket. If your refrigerator/freezer is noisy, the bumper could be worn down or missing, and the sound could be a result of the motor scraping the side bracket. You will find it between the fan motor and the side bracket on the evaporator fan motor assembly. To access the bumper, you will need to remove the evaporator fan motor assembly from the freezer. This part is made of orange rubber and is less than half an inch in diameter. It has a rounded top and a slightly pointed bottom, and is sold individually.
Part #WR02X10540
Manufactured by GE for General Electric, Hotpoint, Kenmore

You May Also Need

Genuine OEM: Original Parts. Lasting Repairs.

Because quality isn't optional.

OEM stands for Original Equipment Manufacturer. This means that the company who made your appliance is also supplying the replacement part.

How Buying OEM Parts Can Save You Time and Money
Features OEM Generic
Genuine brand name
Guaranteed to fit
Superior Quality
Long term value

Part Videos

Watch our pros, then fix it yourself.

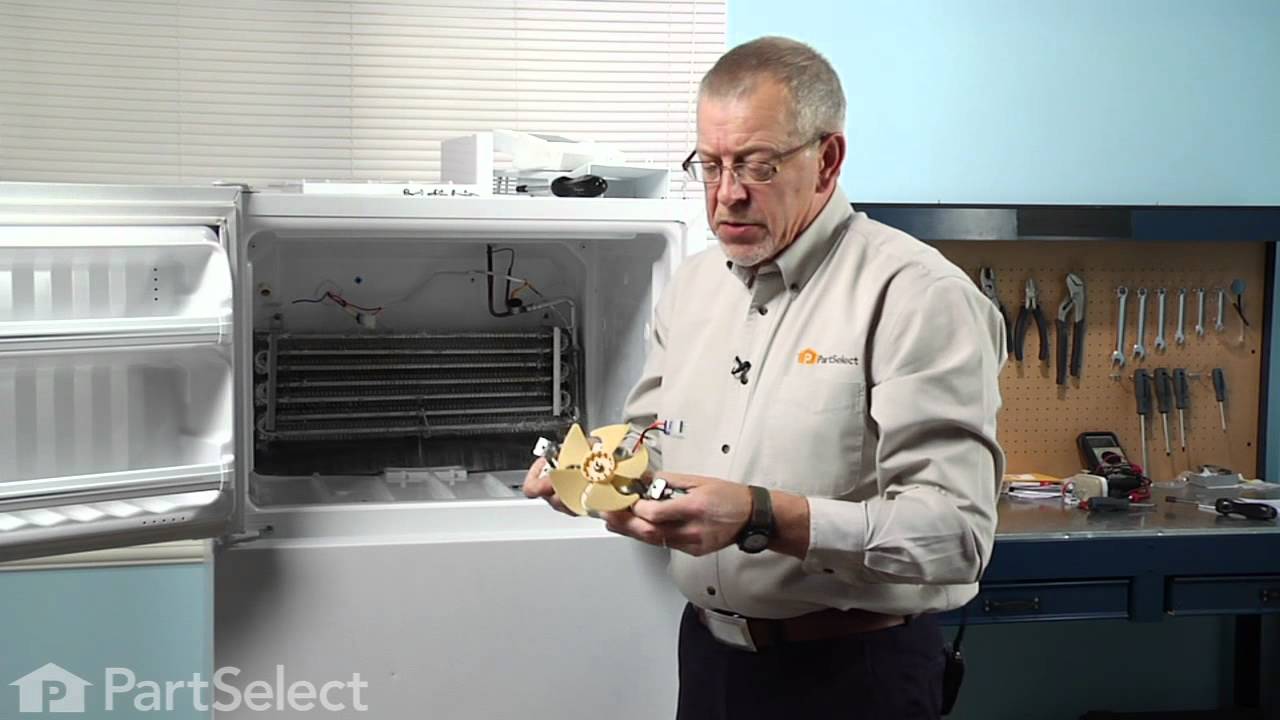
Replacing your General Electric Refrigerator Lid Bumper

Replacing your General Electric Refrigerator Lid Bumper

About this fix

Common problems and models this part fixes.

Easy 

30 - 60 mins 

What this part fixes:
  • Noisy
  • Fridge too warm
Works with the following products:
  • Refrigerator
  • Freezer
  • Range
  • Dryer
Part# WR02X10540 replaces these:
AP3414570, 912732, 123C8091P002, WR02X11329, WR2X10540

Repair Tips

See how others fixed this model. Time, tools, difficulty, and steps that lead to victory!

Easy 

30 - 60 mins 

Average repair rating from 14 real customers like you

Sort by:
  • 1
  • 2
Sorry, we couldn't find any existing installation instruction that matched.
Loud high pitch whining noise behind freezer
80 of 112 people found this instruction helpful.
  • Darren from Renton, WA
  • A Bit Difficult
  • 30 - 60 mins
  • Pliers, Socket set, Wrench set
Ref. still worked but had this loud high pitch whining noise coming from inside freezer for a few months. It's probably a bad bearing or motor.

1) Remove all shelves and ice dispencer
2) Remove (x2 screws / a green wire that's clipped on) and the evap cover
3) Remove (x3 screws) cover motor/solenoid and unplug harness
3) Remove (x2 screws) icemaker and unplug harness
4) Remove/Loosen (x2 screws bottom / x2 screws top) Duct air freezer
5) Remove (x2 screws) Orifice evap fan and unplug harness
note: will need to remove right screw to get green ground wire off. And be careful on to damage the gasket.
6) Once Orifice out of refrig, disassemble.
7) Main thing to replace is the Motor DC Evap fan, and maybe CapDust, BumperLid, GrommetEvpFan.
8) now just go in reverse order...
That's it . . . wasn't too hard and NO MORE whining!!! Save at least a couple of hundred by not having a prof. come out and do it. Easy enough for most DIY person.
Was this helpful?
Thank you for voting!
freezer and ice maker worked fine but bottom(cooler)did not cool innoff .Freezer compartment was also forming a lot of ice all over. l
62 of 94 people found this instruction helpful.
  • Israel from Concord, NC
  • Really Easy
  • Less than 15 mins
  • Nutdriver
Removed covers on the freezer compartment to gain access to the evaporator fan motor.The motor was turning but not fast innoff to move air true tthe evaporator coil.The evaporator fan it is the one that will cool the bottom and top of your refrigerator.
Was this helpful?
Thank you for voting!
High Pitch Noise from the Evaporartor Fan
53 of 78 people found this instruction helpful.
  • Murtaza from E. Amhurst, NY
  • A Bit Difficult
  • 30 - 60 mins
  • Nutdriver, Pliers, Screw drivers, Socket set
Firt Removed the Ice Maker Tray and the full ice maker assembly. Removed the plastic shroud that sits over the fan assembly. Since the original connector (or the plug)for the motor had also a temperature sensor attached to it and did not know how to remove and trabsfer to the new motor connector I spliced the new motor to the old connector. It was fairly straight forward. Overall the job was not that difficult and since I was trying to be more meticulous it took a little longer. An average person can do it in around 30 to 45 minutes.
Was this helpful?
Thank you for voting!
Evap Fan was sqeeling
41 of 60 people found this instruction helpful.
  • David from Raleigh, NC
  • Difficult
  • 1- 2 hours
  • Nutdriver
First I removed the shelf and light cover, then removed 3 screws from the ice make. Then I removed 6 screws from the moter cover (back wall of the freezer) and removed it. I then removed the 2 screw holding the moter. This is where the soldering iron comes in. The wire leads from the old motor were molded into a 3" rubber holder and the end wire plastic connector held 6 prongs (2 from a thermo tube). The new motor only held the 4 moter prongs, 2 were empty. To resolve this problem I cut the wires on both the new and old motor. I then attached the old connector to the new moter with the soldering iron and shrink tubing. Replaced all the parts I had removed and started it up. Works like a champ.....
Was this helpful?
Thank you for voting!
loud whinning noise of fan in freezer section
41 of 70 people found this instruction helpful.
  • Daniel from MIAMI, FL
  • Easy
  • 30 - 60 mins
  • Nutdriver, Pliers, Screw drivers
1. content of freezer was put in an ice box
2. panel covering rear of freezer compartment was removed, a few screws
3. old fan now accessible was removed an new fan mounted.
4. modular wiring plug broke, wires had to be soldered and wrapped in heat shrunk insulation
5. compartment was cleaned an rear inside panel closed

Thanks for all those who shared their experience and the schematics available on website. It gave me the confidence to to this myself. Its my second repair in freezer (previous being a defective heater)
Was this helpful?
Thank you for voting!
unit making whining noise
11 of 19 people found this instruction helpful.
  • timothy from aransas pass, TX
  • Really Easy
  • 30 - 60 mins
  • Nutdriver, Pliers, Socket set
i removed srews from area until i could access the fan unit and removed it. wires were not identical so i had to splice some together, most likely could not have been avoided. the exploded parts diagram helped me to be sure that i would have all replacement parts on hand so i wouldn't have to wait for something i had forgotten.
Was this helpful?
Thank you for voting!
Evap Motor - loud noise
9 of 11 people found this instruction helpful.
  • James from Floral Park, NY
  • Easy
  • Less than 15 mins
  • Nutdriver, Screw drivers
The evap fan, based on research, appears to be built to only last a few years. Pay attention to your order of removal for all pieces and it will go back rather easily in reverse.Remove items from freezer. UNPLUG FREEZER. Pop out the shelf. Use screwdriver to remove plastic piece in back. Pop out styrofoam piece. Use screwdriver to remove back metal section of freezer. Use nutdriver to remove screws holding the fan to the back. Unplug the motor. Pop off the fan. Pay attention to location of all these pieces. Put them on the new motor. Reassemble in reverse. Piece of cake.
Was this helpful?
Thank you for voting!
Evaporating fan not working
7 of 8 people found this instruction helpful.
  • flor from glen cove, NY
  • Really Easy
  • 30 - 60 mins
  • Nutdriver, Pliers, Screw drivers, Socket set, Wrench (Adjustable)
I did folllow the instructions on the video step by step.
Was this helpful?
Thank you for voting!
The fan motor on our 48" GE Monogram refrigerator was making a lot of noise
6 of 6 people found this instruction helpful.
  • David from NEW ORLEANS, LA
  • A Bit Difficult
  • More than 2 hours
  • Screw drivers, Socket set, Wrench (Adjustable)
Emptying the refrigerator and freezer and sliding that beast out of the cabinet was half the battle. Once the unit was out, it was a bit difficult removing the top and back panel to gain access to the fan motor (all of that is on top on our fridge). Once I gained access, replacing the fan motor was relatively simple. Although the video on Parts Select showed a model where the fan motor was located in the freezer compartment, the rest of the instructions in the video for changing out the fan motor and splicing the new motor wires to the existing wire harness (different connection) were very helpful. I was glad I purchased new rubber bumpers and grommets and a new compression ring to hold the fan in place. The old rubber grommets were pretty worn. I also took the opportunity to vacuum out all the dust that had accumulated over the years in areas that aren't accessible from the front. The next most difficult part of the repair was maneuvering the unit back into the cabinet. Probably would have been easier if I had a helper. The new fan has been running well and quietly since the repair. Thanks Parts Select!
Was this helpful?
Thank you for voting!
Noisy freezer fan
6 of 9 people found this instruction helpful.
  • Robert from PITTSBURGH, PA
  • Really Easy
  • 30 - 60 mins
  • Nutdriver, Pliers, Screw drivers
Fast and easy-great video instructions for each part ordered.
All parts perfect fit.
My refrigerator is running like new again-good for another 10 years!
Was this helpful?
Thank you for voting!
  • 1
  • 2

DIY Questions and Expert Answers

Be the first to ask our experts a question about this part!

This Part Also Fits These Models

Don't see your model? Use our Fit Checker to confirm!

Check Part Fit
Part #WR02X10540
Brand
Model Number
Description
General Electric
36211XBMBRWW
Refrigerator
General Electric
36211XBMDRWW
Refrigerator
General Electric
36211XBMERWW
Refrigerator
General Electric
36211XBMFRWW
Refrigerator
General Electric
36211XBRERWW
Refrigerator
General Electric
36211XBRFRWW
Refrigerator
General Electric
36411XBRERWW
Refrigerator
General Electric
36411XBRFRWW
Refrigerator
General Electric
37511KBSARWW
Refrigerator
General Electric
37511KBSERWW
Refrigerator
General Electric
38181KBRARWW
Refrigerator
General Electric
38185KBRARBB
Refrigerator
General Electric
38187KBRARCC
Refrigerator
General Electric
38341FBMERWW
Refrigerator
General Electric
38341FBMFRWW
Refrigerator
General Electric
38351HBMERWW
Refrigerator
General Electric
38351HBMFRWW
Refrigerator
General Electric
38351HBRERWW
Refrigerator
General Electric
38351HBRFRWW
Refrigerator
General Electric
38451HBRERWW
Refrigerator
General Electric
38451HBRFRWW
Refrigerator
General Electric
38481KBRARWW
Refrigerator
General Electric
38481KBRCRWW
Refrigerator
General Electric
38481KBRDRWW
Refrigerator
General Electric
38481KBRKRWW
Refrigerator
General Electric
38481KBRORWW
Refrigerator
General Electric
38481KBRTRWW
Refrigerator
General Electric
38481KBRVRWW
Refrigerator
General Electric
38485KBRARBB
Refrigerator
General Electric
38485KBRCRBB
Refrigerator