




















A284 Maytag Washer - Instructions
Keep searches simple. Use keywords, e.g. "leaking", "pump", "broken" or "fit".
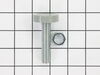
Threads on old legs had been damaged in moving to new location.
Removed the damaged legs, replaced with parts from this site and leveled the washer .
Parts Used:
-
Wayne from SEDONA, AZ
-
Difficulty Level:Really Easy
-
Total Repair Time:30 - 60 mins
-
Tools:Wrench (Adjustable)
4 of 4 people
found this instruction helpful.
Was this instruction helpful to you?
Thank you for voting!
Part replacement and hookup
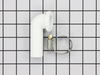
My wife got the washer for free but the elbow where the water is released got snapped off when it was removed from its previous location. I looked up the schematics online, ordered the part, and it came a day and a half later. The installation video on the PartSelect.com website was perfect. I followed it step-by-step and installed the part in just a few minutes. The hardest part was hooking up the washer without leaks. Everything went great and I will definitely use the service again when needed. Best part? My wife is happy.
Parts Used:
-
George from RESEDA, CA
-
Difficulty Level:Really Easy
-
Total Repair Time:15 - 30 mins
-
Tools:Nutdriver, Pliers
4 of 4 people
found this instruction helpful.
Was this instruction helpful to you?
Thank you for voting!
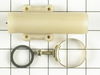
After 27 years of faithful service, our May tag washer was leaking during the spin/drainage cycle.
The instructional video clearly told me how to remove access panels. I was able to observe the leak during operation, and determined it was coming from the siphon break and running down the internal drain hose. The video clearly showed me how to access the part and replace it. This saved me a $300 service call for sure. Thank-you for your excellent guidance. We're going for 30 years of operation from this appliance!
Parts Used:
-
Victor from NEW ORLEANS, LA
-
Difficulty Level:Really Easy
-
Total Repair Time:15 - 30 mins
-
Tools:Nutdriver, Pliers, Screw drivers
4 of 4 people
found this instruction helpful.
Was this instruction helpful to you?
Thank you for voting!
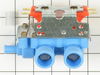
Letting to much water in.
Turn water off, removed water hoses. removed plug from elec. outlet.Then remove water inlet valve.very simple.
Parts Used:
-
Harold from CLERMONT, FL
-
Difficulty Level:Really Easy
-
Total Repair Time:15 - 30 mins
-
Tools:Nutdriver, Pliers
4 of 4 people
found this instruction helpful.
Was this instruction helpful to you?
Thank you for voting!
Water was leaking from under the front of the washer when it was used.
After turning the water off and unplugging the machine, I took the front panel off the washing machine. I then slipped the belt off the pump sprocket. The pump was right in the front and easy to remove. All I needed was a screwdriver, for the hose clamps, and a 5/16" socket to remove the old pump. I then installed the new pump, with the existing screws, re-attached the 2 hoses, slipped the belt back on, and popped the front panel back into place. The new pump works great and the leak is gone. The whole job onlt took about 30 minutes.
Parts Used:
-
Greg from Manhattan, KS
-
Difficulty Level:Really Easy
-
Total Repair Time:15 - 30 mins
-
Tools:Screw drivers, Socket set
5 of 7 people
found this instruction helpful.
Was this instruction helpful to you?
Thank you for voting!
The washing machine would fill up with water when it was not in use.
I turned the water off, detached the hoses and unscrewed the water inlet valve. I unhocked the wires and reattached the wires in the correct sequence on the water inlet valve. Done in 15 minutes.
Parts Used:
-
MARK from ENGLEWOOD, OH
-
Difficulty Level:Really Easy
-
Total Repair Time:15 - 30 mins
-
Tools:Screw drivers, Wrench set
6 of 10 people
found this instruction helpful.
Was this instruction helpful to you?
Thank you for voting!
No cold water -- only hot
My washing machine would only run hot water. Told my husband and we were ready to call the repair man when I suggested we try to order a part. So I Googled "washing machine repair". Clicked on the first sight I saw and 'searched 'no cold water' amd immediately saw explanation of our exact problem. The solution explained that MOST of the time the problem was the water inlet valve. So I ordered the part. My husband put the part on the machine and the process would have taken less than 10 minutes however the clamp was so rusted to broke and that required a trip to the hardware store. But I suppose clamp-life does not exceed 20 years. So mission accomplished and a great big thanks to all those who explained what they did to solve the problem!
Parts Used:
-
Darla from Loves Park, IL
-
Difficulty Level:Really Easy
-
Total Repair Time:Less than 15 mins
-
Tools:Pliers, Screw drivers, Socket set
4 of 5 people
found this instruction helpful.
Was this instruction helpful to you?
Thank you for voting!
Resin balls on which the top loader lid hinges had broken.
Cleaned the cavities. Lubed them with olive oil. Inserted one ball on left side, while holding tension against that side to hold the ball in the lid and top indentations. Applied olive oil to right hand side indentation, and placed the new ball into lid indentation. Put lid down into closure cavity with ball, and with lid vertical, began pushing it rearward so as toslightly spring metal lid rolled edge and top metal away from one another UNTIL the new ball snapped into the hinge indentation in the machine cover. Done.
Parts Used:
-
EL from O'Fallon, IL
-
Difficulty Level:Easy
-
Total Repair Time:Less than 15 mins
5 of 8 people
found this instruction helpful.
Was this instruction helpful to you?
Thank you for voting!
I broke the syphon break elbow pulling the washing machine out from the wall
First I removed the 4 screws holding the old elbow in place. Then I removed the screw holding the cover over the upper access hole on the below the syphon break elbow. I reached up through the access hole and removed the old elbow from the inside. I slid the new elbow up through the hole, aligned it with the housing plate and then screwed the screws back in to hold it in place. I had to cut about 3" off my old drain hose, because the outside diameter of the old syphon break elbow was about 1/16" larger and had stretched the end of the hose too much to fit tightly on the new elbow. I then attached the drain hose to the new elbow and tightened the hose clamp and reinserted the hose into the drain and pushed the washer back into place. (I used the old hose clamp rather than the one included with the new elbow because it still worked fine and looked sturdier than the enclosed one.)
Parts Used:
-
JANET from CAMPBELL, CA
-
Difficulty Level:Easy
-
Total Repair Time:15 - 30 mins
-
Tools:Wrench set
4 of 5 people
found this instruction helpful.
Was this instruction helpful to you?
Thank you for voting!
Noisey water shut-off after fill cycles
I unscrewed the bottom two front phillip screws. Lifted the front panel at a right angle then popped off downward. Used a 3/8 socket to unscrew the two screws inside in the upfront corners holding the top to the sides. Pulled off the top bleach line.
Lifted the lid upward until it rested on the back wall. Unscrewed the water fill tube connected to the top side panel which to reach the inlet valve area. wrote down which color of the four wires went where. Unscrewed the back plate and disconnected the valve wires. Reversed procedure for installation. Cleaned other parts while I was in there. Installation went quick and smooth.
Lifted the lid upward until it rested on the back wall. Unscrewed the water fill tube connected to the top side panel which to reach the inlet valve area. wrote down which color of the four wires went where. Unscrewed the back plate and disconnected the valve wires. Reversed procedure for installation. Cleaned other parts while I was in there. Installation went quick and smooth.
Parts Used:

-
Brian from Ashburn, VA
-
Difficulty Level:Easy
-
Total Repair Time:15 - 30 mins
-
Tools:Pliers, Screw drivers, Socket set
4 of 5 people
found this instruction helpful.
Was this instruction helpful to you?
Thank you for voting!
Leaking at top of tub when filling with water
Did repair as instructed by video, I'm 74 years old if I can do it anybody can!
Parts Used:

-
Frank from Patterson, CA
-
Difficulty Level:Easy
-
Total Repair Time:1- 2 hours
-
Tools:Nutdriver, Pliers, Screw drivers, Socket set
4 of 5 people
found this instruction helpful.
Was this instruction helpful to you?
Thank you for voting!
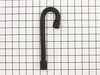
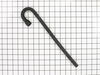
Hot water overflow injector, ran onto floor
You will need 2 hose clamps not sold as maytag parts.
Remove front washer panel screws.
Remove bolts holding front of top to side panels
Remove hose clamp from front hose to injector sleeve.
Twist fill hose ccw 90 degrees at tub fitting to remove.
Clean corrosion at tub attachment point wuth wire brush.
Paint bare metal to seal. Allow to thoroughly dry.
Remove injector sleeve and injector hose.
Trim new injector hose to match length of removed hose (I cut off abt 4 inches)
Install injector hose and plastic sleeve. Ensure clocking is correct on hose.
Install gasket on fill hose fitting.
Insert fitting into tub. Rotate 90 deg CW to latch.
Install gear clamps loosely on fill tube.
Attach fill tube to fill fitting and injector sleeve.
Slide clamps onto tube ends ensuring clamp clocking provides access and clears tub top..
Test tub fill to ensure injector works without leaks
Remove front washer panel screws.
Remove bolts holding front of top to side panels
Remove hose clamp from front hose to injector sleeve.
Twist fill hose ccw 90 degrees at tub fitting to remove.
Clean corrosion at tub attachment point wuth wire brush.
Paint bare metal to seal. Allow to thoroughly dry.
Remove injector sleeve and injector hose.
Trim new injector hose to match length of removed hose (I cut off abt 4 inches)
Install injector hose and plastic sleeve. Ensure clocking is correct on hose.
Install gasket on fill hose fitting.
Insert fitting into tub. Rotate 90 deg CW to latch.
Install gear clamps loosely on fill tube.
Attach fill tube to fill fitting and injector sleeve.
Slide clamps onto tube ends ensuring clamp clocking provides access and clears tub top..
Test tub fill to ensure injector works without leaks
Parts Used:
-
Padraic from SAINT PAUL, MN
-
Difficulty Level:Easy
-
Total Repair Time:30 - 60 mins
-
Tools:Nutdriver, Screw drivers, Socket set
4 of 5 people
found this instruction helpful.
Was this instruction helpful to you?
Thank you for voting!
Washer leaking water
After figuring out how to open the washer I could not find where the leaking water had come from. I ran the washer without the front cover (cold water) and it didn't leak. When I finally accidentally blocked the intake on the tub did it squirt out inside the washer. It turned out that it would only leak with both hot and cold water combined was the pressure big enough to leak. The place it leaked was about halfway between the intake valve and where it entered the tub in what looked like a small plastic housing with slots. The functionality of this thing is still in question. I call it the Kazoo because it makes noise so you can tell the water is going in. I can see that it also holds back pressure so the washer does not fill too fast if the incoming pressure is too high, but I have my doubts about this. It turns out the intake hose is interrupted with by a jet inside a 3 inch black rubber tube (valve) that extends into the second hose. The water pressure expands the rubber (valve)and makes noise. The way I see it old rubber had maybe shrunk and lost its ability to resist pressure so it overflowed because too much water was coming through. The new piece I ordered was 3/8 inch longer then the one that came out. Maybe a planned obsolence part. (My wife wanted to buy a new washer and dryer at the first sign of trouble.) Anyway the repair was pretty simple. No clamps needed the old one is easy to undo and you just replace the kazoo. By the way while I was waiting on the parts to get here I just throttled the water pressure on the wall so it wouldn't leak. On this maytag washer you take off the screws on the front towards the bottom to start. I did not notice them untill I had damn destroyed the lid. After you remove the front cover there are 2 screws in the top front corners to remove and the the top pops off. They repair is easy understanding it took some thinking. Good luck.
Parts Used:
-
Prosper J from Gretna, NE
-
Difficulty Level:A Bit Difficult
-
Total Repair Time:More than 2 hours
-
Tools:Screw drivers, Socket set
3 of 3 people
found this instruction helpful.
Was this instruction helpful to you?
Thank you for voting!
Not agitating ; top shaft seizing up
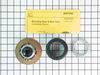
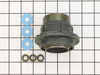
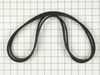
Removed tubs per prescribed videos. Removed transmission per video. Disassembled transmission per video. Used heat and penetrating oil to free top shaft. Lubricated top shaft and bushings with grease and reinstalled. Reassembled washer with replacement parts from partselect. Problem solved. My wife loves this washer. It lasted 30 years before I had issues, many of the internals looked brand new. They dont make' m like this anymore. With the self- help videos, and OEM parts from partselect, I'll get another 30, Thank you so much.
Parts Used:
-
JAMES from Hickory, NC
-
Difficulty Level:A Bit Difficult
-
Total Repair Time:More than 2 hours
-
Tools:Pliers, Screw drivers, Socket set, Wrench set
3 of 3 people
found this instruction helpful.
Was this instruction helpful to you?
Thank you for voting!
now i know the problem, it was the transmission.
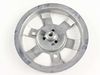
well i first put on 2 new belts because they were worn and smoking. the new belts did not fix the problem. you suggested putting in a new pulley. it went against my better judgement that the pulley was defective. well i put in the new pulley and now the real problem has surfaced. the transmission is not working. now i want to order a new tranny and low and behold it is no longer available. well why did you sell me a $99 pulley when that was not the next part to change after the belts were replaced. now i have a new pulley on a washer that is going to the recycle center as metal trash. well on my part i will reward maytag by buying a ge washer now. plus i will not count on using you as my parts supplier.
Parts Used:
-
stephen from E NORTHPORT, NY
-
Difficulty Level:A Bit Difficult
-
Total Repair Time:30 - 60 mins
-
Tools:Screw drivers
3 of 3 people
found this instruction helpful.
Was this instruction helpful to you?
Thank you for voting!