Real ratings from other people who bought this part.
Average Rating:
★★★★★
★★★★★
13 Reviews
4.9
Out of 5
5 Stars
12
4 Stars
1
3 Stars
0
2 Stars
0
1 Star
0
Search reviews left by others. DIY doesn't mean you have to do it alone. Use simple keywords like "fit", "broken", "easy", or "quality" to find reviews that match!
Search filter:
Clear Filter
Your search term must have 3 or more characters.
Sort by:
Prev
1
2
Next
Sorry, we couldn't find any existing reviews that matched. Try using some different or simpler keywords.
★★★★★
★★★★★
ALEKSANDAR V - June 3, 2020
Verified Purchase
Easy repair, quick delivery
It’s all in the title. I ordered over the phone the guy was really helpful. Fixed my stove! Yesssssss
★★★★★
★★★★★
Anthony P - January 11, 2019
Verified Purchase
Great parts.
Bought aftermarket from another vendor but it was garbage. Bough from partselect and a big difference in the quality of parts and with an easy installation. Will use again????
★★★★★
★★★★★
Anthony P - September 15, 2018
Verified Purchase
Great OEM parts
Parts’s came fast and my appliance is back in order. Great service as usuall!
★★★★★
★★★★★
Michael D - April 6, 2024
Verified Purchase
Wasn’t the problem the computer board is gone
Yes this wasn’t the problem after all the computer board in the back is gone to one side of the stove
★★★★★
★★★★★
AZHAR M - May 15, 2020
Verified Purchase
it was easy, convenient and simple.
it came on time. Thankfully, it prevented me from purchasing the whole appliance.
★★★★★
★★★★★
Sandeep K - August 16, 2019
Verified Purchase
Parts are good and working fine...
Parts are good and 2 out of 4 are working fine. I did not use the other 2 yet.
★★★★★
★★★★★
Kyle H - September 29, 2020
Verified Purchase
Easy repair. Great part!!!
Part was easy to install. Stove works like new again!!!
★★★★★
★★★★★
William P - March 6, 2023
Verified Purchase
Fire station stove
The parts came quickly and I repaired the stove , now the firemen are back to cooking again ??
★★★★★
★★★★★
Ignacio C - July 11, 2020
Verified Purchase
Worked as expected
The part was in perfect condition and it arrived fast
★★★★★
★★★★★
Marian P - November 10, 2020
Verified Purchase
Perfect part for the job
The part came in exactly as described in the instructions were easy to follow. My stove element is back in working order.
Prev
1
2
Next
Repair Tips
See how others fixed this model. Time, tools, difficulty, and steps that lead to victory!
Really Easy
15 - 30 mins
Average repair rating from 18 real customers like you
Sort by:
Prev
1
2
Next
Search repair tips from other customers using simple keywords like "replace", "fit", "remove", "inspect". DIY doesn't mean you have to do it alone!
Search filter:
Clear Filter
Your search term must have 3 or more characters.
Sorry, we couldn't find any existing installation instruction that matched.
Stove would not heat up
84 of 104 peoplefound this instruction helpful.
Tim from Pittsford, NY
Easy
15 - 30 mins
Screw drivers
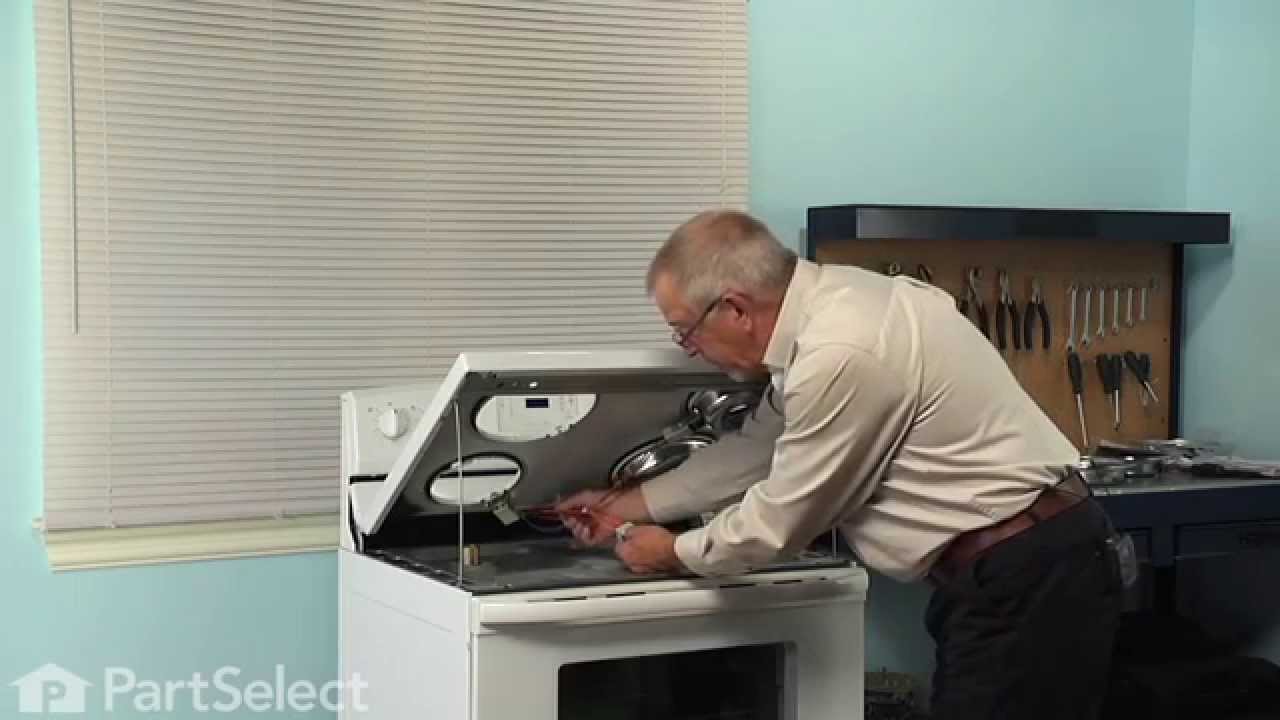
Cut old wires to receptacle, striped the wires, wire nutted to new receptacle, screwed new receptacle into stove and installed heating element.
Piece of cake, but then again my degree is in electrical engineering so I should be able to handle a couple of wire nuts.
After turning off the circuit breaker, I removed the elements and pans, raised the top and cut the wires to the receptacle assembly. Stripped the wires, slid on the shrink tubing and applied the wire nuts. I used a hair dryer rather than a match to shrink the tubing. Reinstalled the drip pans and inserted the elements. The instructio
... Read morens were clear and the project was easy. The stove works like new.
This was the second repair of the same problem. I realized this time that there was a poor connection between the burner and the receptacle causing a arch, creating extra heat and burning out the receptacle. All that I had to do was to cut two wires to the existing receptacle assembly and use the wire nuts to connect the new asse
... Read morembly and one philips screw holds it in place...The kit required me to assemble it first and there were four items to put together. No problem....
3 burners had stopped working and drawer glides broke.
11 of 14 peoplefound this instruction helpful.
Tracy from Green Cove Springs, FL
Really Easy
30 - 60 mins
Pliers, Screw drivers
Removed the old burners and lifted top assembly. It made it easier to work with the wires by removing the top, easily remove the screws holding the wire harness and ground wire, then slid the top to the right and it came right off. splicing the wires in was very easy and all the parts required were sent with the kits. reassembled stov
... Read moree and it worked like a champ. The drawer was very easy as well the plastic glides were all broken or worn out, and one screw each to replace. like a new oven now, saved at least 300 by not purchasing a new one.
It was very easy, the element is held in place by a point that protrudes from the element's frame through a hole in the stove top. This hole is located directly across from the electrical socket your bheating element plugs into, under the stove top. Push the heating element in towards the socket and the heating element can now be lifted u
... Read morep and out of the burner tray. Remove the burner's reflector tray. Remove the single screw securing the elements electrical socket to the stove top. Lift the stove top up and secure. Remove socket and cut wires about 4 inces from the old socket. place shrink wrap over each wire and wire nut new socket to existing wires. place shrink wrap over wire nuts and heat to secure. reverse proceedure and test.
First I disconnected the power, removed the screw that hold the element in place. Then, I pulled the element out and cut the two wires. I connected the two wires with the new element as the instruction provided by Part Select. I put the element back and screwed it in place. I plugged in the power and turned on the burner. It works. It is
... Read morereally easy to repair.
Read less
Was this helpful?
Thank you for voting!
Contacts for burner plugin was burnt
3 of 3 peoplefound this instruction helpful.
Dennis from WISC RAPIDS, WI
Very Easy
15 - 30 mins
Nutdriver
Easy fix. Lift the top of the stove and change the connector. No problem because the parts were exactly what was needed.
Removed back plate, replaced infinite switch. Replaced receptacle holder. Took a moment to see how to install wires into the receptacle, no instructions on orientation of wires into the receptacle. Wired receptacle per instructions. Placed receptacle into holder and installed burner. Burner Burner would not lay flat, receptacle longe
... Read morer than original. Removed receptacle from holder, plugged in burner and placed burner into position.
Unscrewed the switches and let the switch hang while replacing one wire at a time. Followed instructions on wire replacement. Exact parts, only shaft on 6" switch was too long -- okay, because it is designed to break off a piece on end of shaft, then the knob fit. Everything was perfect.
Ask our experts a question about this part and we'll get back to you as soon as possible!
We may have answered a similar question already! Search questions and answers left by others using simple keywords like "fit", "broken", "easy", or "quality" to find questions that match.
Search filter:
Clear Filter
Your search term must have 3 or more characters.
Sort by:
Prev
1
Next
Sorry, we couldn't find any existing answers that matched.Try using some different or simpler keywords, or submit your new question by using the "Ask a Question" button above!
Carlos - For model number WFC150M0EW0
April 30, 2018
My oven doesn't heat at all. The clock doesn't work but all of the top elements will burn. What could be the causing this problem. Please help! Thanks
Hi Carlos,
Thank you for your question. There are a few parts that you could check. I would suggest testing your elements and your temperature sensor. You can test all three of those parts with a multi meter. If they are all working then it may be your electronic control board that is the issue. I hope that helps. Good luck with your repair.
5 peoplefound this instruction helpful.
Was this helpful?
Thank you for voting!
Deborah - For model number WFC150M0EB0
January 14, 2019
Trouble with burners on stove they will heat up to high when they are set on low.
Hi Deborah, thank you for your question. Be sure to cut power to your appliance and remove any parts before doing tests. There are a couple of parts that could cause this issue specifically. You will need a multi meter to be able to test the parts. The first part you will want to check is your element. It should be reading between 0 - 50 ohms to be working correctly. The other part to check would be your infinite (or surface burner) switch. When you remove that part from the appliance, connect each probe from your multi meter to the prongs and then turn the switch to an on position. If you get no continuity then the switch is the issue. It could also be your wiring that is the issue but you should see visual damage on that part in most cases. I hope that helps. Good luck with your repair.
3 peoplefound this instruction helpful.
Was this helpful?
Thank you for voting!
Earl - For model number RF365PXMW1
November 17, 2019
Replaced receptacle and stove top burner, burner still doesn't work. What can be the issue?
Hi Earl, the only thing left would likely be the switch for the burner. Thank you for your question and good luck with your repair!
2 peoplefound this instruction helpful.
Was this helpful?
Thank you for voting!
Merlin - For model number Rf303pxkq2
March 10, 2023
The stove top heating element heats up than it shuts off and than doesn't come back on
Hi Merlin, thank you for the question. According to our research, there are two sizes of surface elements on the cooktop in this model. If your element size is 8 inches, we recommend checking the infinite switch, part number PS11740775. If this is fine, most likely the burner surface element, part number PS11747315, is faulty and needs to be replaced. Similarly, if your element size is 6 inches, we suggest inspecting the infinite switch, part number PS11740785. If this is fine, most likely the burner surface element, part number PS11753286, is faulty and needs to be replaced. We hope this is helpful!
I have made sure that my stove is leveled properly - inside oven rack and range top are both level front-to-back and side-to-side. Each of the elements, however, are not level. This makes cooking really challenging because when I add oil or other liquid to my pan, it all flows to one area of the pan. What do you think the problem is? Thanks for your help.
Hello Stormi, thank you for contacting us. According to our research, the terminal block might have become loose, burnt, or physically detached from its mounting bracket under the cooktop. This component provides the structural support for the burner prongs, and any sagging or misalignment here will force the entire heating element to tilt. We would suggest replacing the terminal block, part number PS389217, to fix the issue. We hope this sorts out your problem!
Was this helpful?
Thank you for voting!
Prev
1
Next
✖
Ask a Question
Ask our experts a question on this part and we'll respond as soon as we can.
Item is in stock and is estimated to be delivered in 2-3 business days via Standard Shipping.
On Order
Item is not in stock and usually ships 3-5 business days from the time you place your order.
Special Order
Item is not in stock and usually ships 10-15 business days from the time you place your order.
NLA - No Longer Available
This item is no longer being made by the manufacturer, and cannot be added to your shopping cart.
[{"position":0,"name":"Home","title":"Home","url":"/"},{"position":1,"name":"Wire Plug or Connector","title":"Wire Plug or Connector","url":"/Range-Wire-Plugs-and-Connectors.htm"},{"position":2,"name":"814399","title":"814399","url":""}]



 My Orders