What it does. Why it matters. Everything you need to know for an easy fix.
Water Inlet Valve with Mounting Bracket Specifications
The valve body of this part could be blue or green in color. There are two ports for water to enter, and this valve is compatible with a half inch ID hose. It has two 3/4-11x1/2 NHT hose threads.
Part #285805
Manufactured by
Whirlpool
for Whirlpool, Kenmore, KitchenAid, Roper
OEM stands for Original Equipment Manufacturer. This means that the company who made your appliance is also supplying the replacement part.
Features
OEM
Generic
Genuine brand name
Guaranteed to fit
Superior Quality
Long term value
Part Videos
Watch our pros, then fix it yourself.
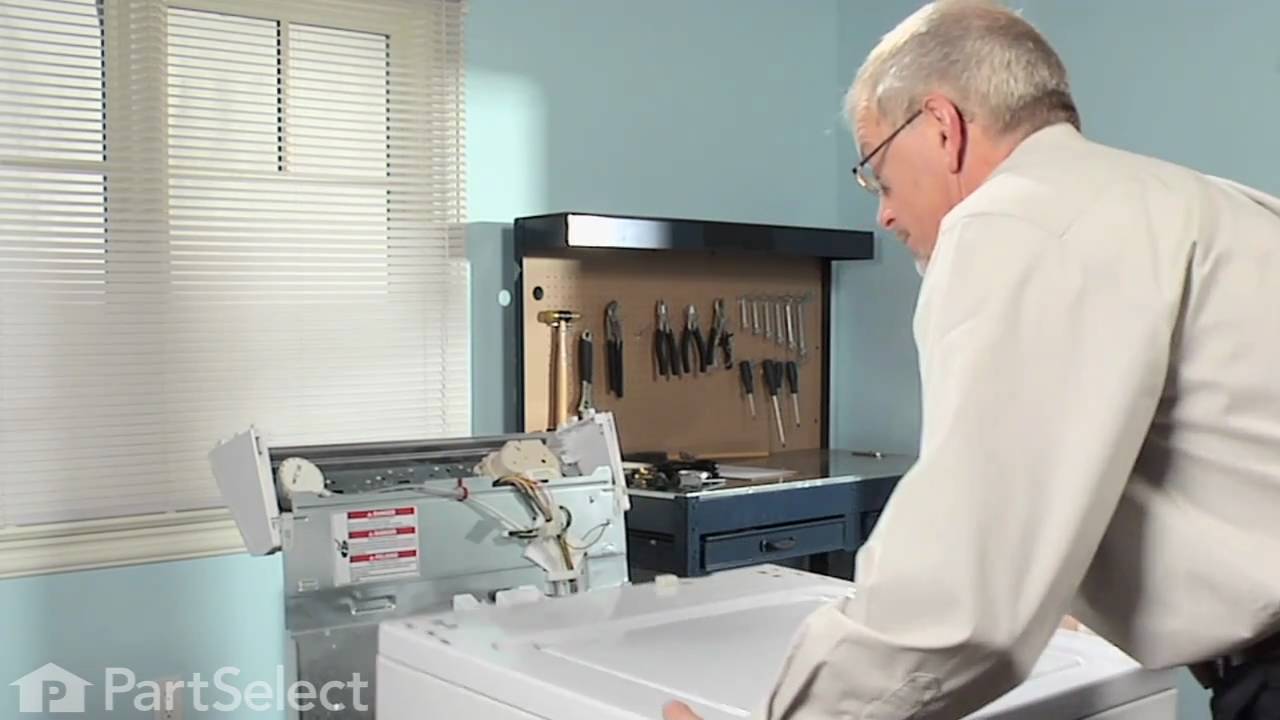
Replacing your Whirlpool Washer Water Inlet Valve with Mounting Bracket
About this fix
Common problems and models this part fixes.
Easy
30 - 60 mins
Rated by verified customers
What this part fixes:
No hot or cold water
Leaking
Water Filling Issues
Will Not Start
Works with the following products:
Washer
Washer Dryer Combo
Part# 285805 replaces these:
AP3094541, 868761, 285805, 20055518, 21026, 285805, 285805VP, 292197, 3349451, 3354565, 3360387, 3360388, 3360389, 3360391, 3360392, 3429537, 358992, 370067, 388328, 3952163
...
Show more, 3952164, 3955673, 8228, 99989697, W10110517 Show less
Customer Reviews
Real ratings from other people who bought this part.
Average Rating:
★★★★★
★★★★★
41 Reviews
4.7
Out of 5
5 Stars
36
4 Stars
2
3 Stars
1
2 Stars
0
1 Star
2
Search reviews left by others. DIY doesn't mean you have to do it alone. Use simple keywords like "fit", "broken", "easy", or "quality" to find reviews that match!
Search filter:
Clear Filter
Your search term must have 3 or more characters.
Sort by:
Prev
1
2
3
Next
Sorry, we couldn't find any existing reviews that matched. Try using some different or simpler keywords.
★★★★★
★★★★★
Lorraine W - October 4, 2018
Verified Purchase
Easy repair worked great
the part worked perfectly and saved me a lot of money
★★★★★
★★★★★
Douglas P - June 18, 2026
Verified Purchase
Great part
Shipping was very fast and the valve was easy to install and fixed the problem.
★★★★★
★★★★★
Jean-Maurice M - July 10, 2019
Verified Purchase
Easy repair. Fast service.
Part work well. Fast service. Easy repair.
★★★★★
★★★★★
DAVID W - July 27, 2018
Verified Purchase
Fast shipping
Fast shipping and easy install, no more overflowing issues.
★★★★★
★★★★★
Dale W - July 19, 2018
Verified Purchase
Water Inlet Valve
Received the part in a few days, watched the video and it worked perfectly. Thank you. Didn't need to buy a new washer.
★★★★★
★★★★★
Jim Y - July 20, 2018
Verified Purchase
Spot on replacement part
The part came quickly and installed in minutes. The washer once again works as it was meant to.
★★★★★
★★★★★
Ted G - July 20, 2023
Verified Purchase
Kenmore inlet Valve Replacement
Part was perfect and arrived quickly. Thanks for the install video that was attached to my email confirmation!
★★★★★
★★★★★
Rene M - May 16, 2021
Verified Purchase
Part worked perfect!!!
Part was well packed
★★★★★
★★★★★
John K - October 23, 2018
Verified Purchase
Great parts
Great partsThe part came very quickly and I was happy with it
★★★★★
★★★★★
Gerard E - January 12, 2023
Verified Purchase
Great repair video and the part fixed the washer.
It was exactly the right part and the washer is working again. Thanks Partselect.
Prev
1
2
3
Next
Repair Tips
See how others fixed this model. Time, tools, difficulty, and steps that lead to victory!
Easy
30 - 60 mins
Average repair rating from 120 real customers like you
Sort by:
Prev
1
2
3
Next
Search repair tips from other customers using simple keywords like "replace", "fit", "remove", "inspect". DIY doesn't mean you have to do it alone!
Search filter:
Clear Filter
Your search term must have 3 or more characters.
Sorry, we couldn't find any existing installation instruction that matched.
Washer stopped at rinse cycle
705 of 749 peoplefound this instruction helpful.
Don from Wyoming, MN
Easy
15 - 30 mins
Nutdriver, Pliers, Screw drivers
Removed the top and back panels. Replaced compoments and reassembled. Test run machine. Ran like new!
My washing machine became slower and slower to fill over the past several months. It also made a loud squeeling noise during fill-up (all this was on the cold water side only). I removed the old water inlet valve and tore it down, expecting to find corrosion or trash that was blocking the valve from opening completely. Turned out to th
... Read moreat the rubber diaphragm / seal was permanently "kinked", making it difficult to open the valve. The hot water seal was fine, but to make sure, I swapped them and re-assembled the washer. Now the problem was with the hot water, confirming what I thought. I ordered a new water inlet valve on Monday night and received it Wednesday! Installed it within 30 minutes and it works perfectly now. I am very pleased with PartSelect.com. I will definitely be a repeat customer, but hopefully it won't be anytime soon. ;)
Read less
Was this helpful?
Thank you for voting!
Cold Water would not shut-off
104 of 118 peoplefound this instruction helpful.
Wendy from Dunlap, CA
Easy
15 - 30 mins
Nutdriver, Pliers, Screw drivers
To discover what the problem was, I intially tested the inlet valve by blowing into both sides - discovering that the cold side was stuck in the open position. The hardest part was removing the back of the machine. First, you unscrew the top plastic part which contains the controllers by phillips head on either side. Then you pop the c
... Read morelips out with a large slot screwdriver, then at the bottom, a nutdriver or large slot screwdriver there are two nuts to remove. The valve itself took a small nutdriver and pliers to remove the hose. Took less than 20 mintues to complete repair. Washing works like new now.
Read less
Was this helpful?
Thank you for voting!
The washer would not stop filling.
102 of 111 peoplefound this instruction helpful.
Clay from Laramie, WY
A Bit Difficult
15 - 30 mins
Pliers, Screw drivers, Wrench set
I took everything apart and put in the new inlet valve. Tried to run the washer and it was still not stopping when filling. I looked more into it and the tube that comes up from the wash basin to the load size selector switch was disconnected and that was the real problem. If this happens to you, I suggest first looking under the contr
... Read moreol panel at the clear tube and ensuring that it is connected to the switch. Then if that is connected it is probably the inlet valve. There are helpful installation videos that can be found on the part select website that I would recommend looking at before taking things apart because it will make it much easier.
Read less
Was this helpful?
Thank you for voting!
Cold water slow to fill sometimes, Hot water no problems.
The hot water worked fine on the washer. The cold water would sometimes work/fill the tub, but would only produce a trickle of water at other times.
There were 2 screws to remove at the top back of the washer (attaching the console) two nut screws at the bottom left and right and another bottom center. There were also two screw
... Read mores on front of the console attaching it to the top of the washer. All of those are easy to remove.
The water dispenser (this is the opaque plastic part that fills the tub) has two rigid/hard plastic tabs that hold it to the back of the washer. They were difficult to move/push into the slots to release. It is probably a better idea to push the water dispenser down a bit and jiggle it off the top of the tub then to try and slide those plastic attachments over and down out of the slots on the back of the washer. I spent the most time doing that than anything else.
Also do not forget to detach the rigid steel clips that hold the console on top of the washer, a standard screwdriver or pliers work fine.
Unscrewed (with socket wrench) the mounting plate for the water inlet valve and pulled off the electrical connectors. Had a bit of trouble holding the hose clamp and pulling out the nozzle, but got it. I used pliers for this, but think in retrospect a vice grip would have been easier.
Put the new part in (it came with an installation sheet, very easy to follow) and remounted/hooked everything back up again. Reattached the back of the washer, screwed everything back in and put the console back on the top and screwed that in. Remember to put the steel clips back in that you remove in the beginning, otherwise the console will be loose.
Attached the Hot water hose, then the cold, turned on the water connections from the house and plugged the washer back in.
After pushing it back into position, I turned it on using the cold setting. A big glob of gray sediment shot out and the cold water was gushing in a lot stronger than it ever did before. Hot water came in faster too.
It fixed the problem. Working great now.
Read less
Was this helpful?
Thank you for voting!
Water drips inside washing machine, suspected the inlet valve needs to be replaced
52 of 55 peoplefound this instruction helpful.
PHU from Laguna Hills, CA
Really Easy
Less than 15 mins
Screw drivers
Before ordering part, took the old valve out to make sure it looks similar to the one described online by Partselect. After ordering online, put things back together since I expected delivery would take 5-7 days. That night the water stopped dripping and has been OK ever since. I suspected that there was some rust in the electrical con
... Read morenections. By disconnecting and reconnecting the terminal, the electrical connection is better and water stopped dripping. Still keep the new part just in case (which came overnight after I ordered it).
Read less
Was this helpful?
Thank you for voting!
Slow hot water, cold water was flowing normal.
41 of 44 peoplefound this instruction helpful.
David from San Diego, CA
Really Easy
Less than 15 mins
Pliers, Screw drivers
First I disconnected power.
Next I turned off the hot and cold water supply hose bibs.
Once that's done, I pulled out the washing machine to get to the hose connections on the back of the machine, removed and drained the residual water in the hoses.
Note: Since the hoses were fairly new, I reused the s
... Read moreupply hoses but replaced the rubber washers. However, if your hoses are older than a couple of years, it's cheap insurance to go ahead and replace since you're right there.
Next was to remove the two end caps of the control unit on top of the machine. This exposes the two screws that is then removed so that the control panel can rotate up and back.
Once the panel is open, I removed the single connector attached to the top of the machine. This leads to the lid open switch.
Followed by removing the two spring clips with the help of a flat blade screwdriver and pliers to keep the clips from flying off.
Once the clips are removed, the top/front shell of the washer is free to rotate foward. At this point, it can be removed or just laid to the side (forward).
This opens up the area to be serviced.
Disconnect the quick release wire connectors, taking note that the red connector is for the hot water control valve solenoid. disconnect the mix hose going to the tub from the valve by using pliers to disengage the hose clamp (catch the residual water with a sutable container). Then I removed the old valve assembly by removing the two screws holding the assembly to the back panel.
Follow the instructions enclosed with the part to preassemble and install the valve.
Reassemble by reversing the process. Check for leaks, test hot and cold water cycle and you're done.
It actually took me more time to gather my tools and pull out the washing machine than the actual replacement of the part!
Oh, by the way, I've purchased parts from PartSelect.com many times. Each and every time has been an outstanding experience. Quality parts, fast shipping and great prices! It's always been a pleasure!
Read less
Was this helpful?
Thank you for voting!
Cold water flowed slowly
35 of 39 peoplefound this instruction helpful.
Timothy from Springfield, VA
Easy
15 - 30 mins
Nutdriver, Pliers, Screw drivers
First, be sure to take the washer apart properly! The first time I fixed my washer I took it apart the hard way to change the clutch, and believe me it took longer to put it back together! This time I was replacing both the water inlet valve and the hose leading to the disperser. First remove the two screws holding down the con
... Read moretrol panel. It then flips back and hangs out of the way behind the washer. Then remove the spring-clip holding the rear plate to the body of the washer, one on each side under the control panel. Next you need to remove the screws holding the body down to the base at the rear of the machine. I then tipped the body of the washer forward and let it rest on a bucket so I didn't have to take it completely off. Then it is easy to access the hose and the water inlet valve. Shut off the water and remove the supply hoses to the washer. Remove the two screws holding the water inlet valve to the rear of the washer using a nut driver. Next remove the wires to teh inlet valve, making sure to note which one is cold and hot, and which orientation they are. Mine was yellow on top and brown on bottom. Next remove the springs clamps holding the hose on. Replace the hose re-using the same clamps. Replace the water inlet valve reverse the process to re-assemble the washer. Tilt the body back on, put the screws in the base, clamp the back to the body, flip the contorl panel back over and insert the screws. Reattach the water supply lines and you are done!
I ordered the parts at a minimal cost compared to the repairman's quote, they arrived in 3 days. I used the laptop and put it right next to where I was working so that I could follow the directions step-by-step. The instructions were easy to follow and showed you right what to do so I never had any questions. My washer had a slightly d
... Read moreifferent configuration but I figured it out. Replacing the parts was simple, take one off, put the other on. Putting the washer front back on was a little tricky, I had to have my daughter help me hold it in place while I wiggled it around to make sure it was just right before I screwed it back together. It was easier than I thought it would be. I told my husband I loved the internet, I would never have been able to do this job without the instructional video. Thanks PartsSelect!
I'd noticed for a while that our 15-year-old Kenmore washer was filling slowly, but when it started to take 30 minutes to fill to the "medium" level, I knew something was really wrong. There was plenty of water pressure, so I replaced a hose that was loaded with minerals and cleaned the filter (also clogged with minerals). But that didn'
... Read moret help! So I ordered a new water inlet valve, and replaced that. There's nothing tricky about the repair -- the hardest part is opening and closing the washer, for which I found instructions online. (Even so, it's the most time-consuming part of the project.) The result is the washer now fills as fast as when it was new. Just for fun, I took apart the old valve and expected to find it encrusted with minerals, but it looked fine, so I'm not sure where the actual breakdown was. But since the part only cost $25 -- less than a service call, for sure -- I was very happy to use a half hour of my time and keep the machine going a while longer.
Read less
Was this helpful?
Thank you for voting!
Prev
1
2
3
Next
DIY Questions and Expert Answers
60 questions answered by our Repair Experts.
Ask our experts a question about this part and we'll get back to you as soon as possible!
We may have answered a similar question already! Search questions and answers left by others using simple keywords like "fit", "broken", "easy", or "quality" to find questions that match.
Search filter:
Clear Filter
Your search term must have 3 or more characters.
Sort by:
Prev
1
2
3
Next
Sorry, we couldn't find any existing answers that matched.Try using some different or simpler keywords, or submit your new question by using the "Ask a Question" button above!
Jacob
July 20, 2017
So when I looked through you side about slow water coming in (cold) to my washer you suggested I clean them, which I did. It worked for a little while and now its back to slow. I checked the water valves and the screens and they are clean. What should I do next? Just give up and buy new ones?
Hi Jacob, if the screens are clear then it sounds like you need to replace the water inlet valve 285805. I hope this helps!
38 peoplefound this instruction helpful.
Was this helpful?
Thank you for voting!
Paul - For model number KAWE560WWH0
July 20, 2017
Little or no hot water into machine, cold is ok. Screens in hose is clean.
Hello Paul, If you've checked the screens, and if the inlet hoses are not kinked or obstructed you will might have an issue with your water inlet valve circuit. This valve has two solenoids that operate inlets for both the hot and cold water. You can test solenoids for continuity with a multi-meter. If the solenoid has no continuity is faulty. These solenoids are normally not available separately so you will need to replace the complete valve. Make sure you shut off the power or unplug the appliance before performing this test. I hope this helps!
28 peoplefound this instruction helpful.
Was this helpful?
Thank you for voting!
Tom - For model number LSQ8520JQ0
November 9, 2017
Washer doesn't fill with any setting, cold,warm. Hot. I know the the supply to the machine is okay. Fyi i can set the timer to spin and that cycle works the timer advances. Any suggestion on which is the cause. Thanks
Hi Tom, Thank you for the question.If you've checked the screens, and if the inlet hoses are not kinked or obstructed you will might have an issue with your water inlet valve circuit. This valve has two solenoids that operate inlets for both the hot and cold water. You can test solenoids for continuity with a multi-meter. If the solenoid has no continuity is faulty. These solenoids are normally not available separately so you will need to replace the complete valve. Make sure you shut off the power or unplug the appliance before performing this test. I hope this helps!
19 peoplefound this instruction helpful.
Was this helpful?
Thank you for voting!
Lottie - For model number 11022632100
January 6, 2018
I have Kenmore top loading washing machine. When you turn it on, the water comes on and fills the tub, but does not shut off when its full and it keeps flooding the room. What is my problem?
Hello Lottie, Thank you for your inquiry. We would recommend checking the following parts to fix your issue: water inlet valve, water level switch kit with pressure hose, hose clamp, and the water pump. You can test the parts with a multimeter. If you are unfamiliar with how a multimeter functions, there are YouTube videos available to assist you. Hope this helps!
13 peoplefound this instruction helpful.
Was this helpful?
Thank you for voting!
Harper
July 20, 2017
I turned my washer on today and everything seemed normal and I walked away but when I came back I noticed it is not filling up with water (cold), what should I check for first?
Hi Harper, we suggest checking the valve that allows the cold water into your washer. It could be at fault and not staying open to allow the washer to fill properly. Please let us know if you have any further questions!
12 peoplefound this instruction helpful.
Was this helpful?
Thank you for voting!
Mike - For model number LSR6132EQ1
January 18, 2018
Our washing machine has a persistent slow drip into the tub from the top when washing machine is not in operation. I assume this would indicate the need to replace the fill valve?
Hello Mike, Thank you for your inquiry. I would also check the washers and hoses as well. Hope this helps!
9 peoplefound this instruction helpful.
Was this helpful?
Thank you for voting!
Randy - For model number 11082873800
November 5, 2018
Does this valve work for Kenmore model# 11082873800
Hi Randy, thank you for your question. Yes, this is the correct water inlet valve for your appliance. I hope that helps. Good luck with your repair.
7 peoplefound this instruction helpful.
Was this helpful?
Thank you for voting!
Ashley
July 20, 2017
My washer is taking FOREVER to fill up!! Neighbor said to check and clean the water valves but how would I go about doing that? I know where to find them but I’m not exactly sure what to do with them???
Hello Ashely, you need to remove the hose that is attached to the faucet and the valve, and then you can access the screens to push them out. we suggest soaking them in hot water with a splash of white vinegar to give them an all over clean. Best of luck with this repair!
6 peoplefound this instruction helpful.
Was this helpful?
Thank you for voting!
Terry - For model number GHW9400PT0
August 26, 2017
Does this part fit Whirlpool washer model # ghw9400pt0?
Hi Terry,
Thank you for your inquiry. The part number for the correct water inlet valve for your appliance is PS11744913. I hope this helps. Thank you and have a great day!
6 peoplefound this instruction helpful.
Was this helpful?
Thank you for voting!
Amanda - For model number LSR8233EQ0
December 30, 2017
My washer fills will water at the beginning of the wash cycle. It then washes the clothes and drains the water, but it will not fill with water again. It then continues to agitate without any water. It will also stop after the water is drained and I have to manually start the washer to fill it up with water again. What do I need to replace?
Hello Amanda,
Thanks for your question. Check the pressure tube that connects from the water level control to the tub. It may be obstructed and should be cleaned. You may also want to test the water inlet valve with a multi-meter to ensure it has continuity, and replace it if it does not show continuity. If those parts are intact, consider replacing the timer.
I hope this helps.



 My Orders