Keep searches simple. Use keywords, e.g. "leaking", "pump", "broken" or "fit".
Sorry, we couldn't find any existing reviews that matched. Try using some different or simpler keywords.
★★★★★
★★★★★
HOWARD O - June 29, 2019
Verified Purchase
Yes, everything was easy to install and worked great.
Yes, the part worked well, and my dishwasher is working great. I was also surprised that the part came a lot sooner than I anticipated. Thank you!
★★★★★
★★★★★
Moe P - April 1, 2019
Verified Purchase
simple and fast shipment
I received the part ordered much faster that expected and like that there was a video on how to install the part which made is very easy.
★★★★★
★★★★★
Francois G - March 8, 2019
Verified Purchase
Did the job
Dishwasher not draining
★★★★★
★★★★★
Cor D - November 29, 2018
Verified Purchase
Easy repair and finally NO leaking
The part was perfect and it installed easily and now the dishwasher does not leak. I also ran a dishwasher cleaner through to get rid of soap residue. It drains much faster now. Also the part came the day after I had ordered it. That made me happy!
★★★★★
★★★★★
Wendy M - November 21, 2018
Verified Purchase
Easy repair
Perfect part and video
★★★★★
★★★★★
Sylvain B - November 5, 2018
Verified Purchase
Great part and easy to repair
Was in good condition
★★★★★
★★★★★
George M - October 29, 2018
Verified Purchase
Easy peasy.
The part came quickly and was very easy to install, only took 5 minutes. The machine is back in action. Definitely cheaper than a new machine.
★★★★★
★★★★★
Margaret L - October 2, 2018
Verified Purchase
Easy repair great service
Exactly what I needed and saved me probably 100$ as my son took all of 10 minutes to change. it.
★★★★★
★★★★★
Mostafa N - August 29, 2018
Verified Purchase
It was a easy repair for our dishwaher. This part fixed the problem of leftver water in dishwasher after finishing the cyclle.
It works very good to replace this part and no water will be leftover in dishwasher when cycle is done.
★★★★★
★★★★★
Kathryn H - August 25, 2018
Verified Purchase
The Right Fix
This part arrived in Metro Vancouver in two days. Thank you. The assembly made our old dishwasher drain efficiently.
< Prev
1
2
Next >
Customer Repair Stories
Average Repair Rating: 4.3 / 5.0, 70 reviews.
What's this?
< Prev
1
2
3
Next >
Sort by:
Search filter:
Clear Filter
Your search term must have 3 or more characters.
Keep searches simple. Use keywords, e.g. "leaking", "pump", "broken" or "fit".
Sorry, we couldn't find any existing installation instruction that matched.
Dishwasher wouldn't fully drain
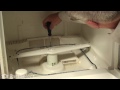
I removed the four screws holding the screen and molded plastic cage inside the rear of the dishwasher to expose the check valve assembly. I then unscrewed the piston and nut assembly with my hand and replaced it with the new one. I found that the rubber cone shaped valve on the old piston and nut assembly was entirely disintegrated. This easy repair solved the problem.
Other Parts Used:
Dan from Minnetonka, MN
Difficulty Level:
Really Easy
Total Repair Time:
Less than 15 mins
Tools:
Nutdriver
189 of 204 peoplefound this instruction helpful.
Was this instruction helpful to you?
Thank you for voting!
Dishwasher would not drain completely,
Found a forum on the internet that said the Air Check Valve located under the screen on the bottom of the back wall inside the wash compartment may be the culprit. Took it out by using nut driver to remove screen, and twisting the part out. The seal was deteriorated. Repleacing the part was simply the opposite, and very easy.
I also replaced the screen on the floor of the wash compartment because the rubber was deteriorating there too. Here I had to remove the spray arm by carefully prying the locking tabs outwards and lifting the entire spray assembly upwards. Then, then plastic covers need to be unscrewed and removed. The new part had the plastic cage molded into it. So I discarded the old plastic cage. There are a couple of retaining clips that are a little tricky to get off the plastic posts. But, they can be removed by prying a standard screw driver underneath and working them off the post. Do not break the plastic post, and save the retaining rings. The new part does not come with any screws or retainers, so you will need to re-use them. Simply, place the new screen in position, slide on the retaining clips, and screw down the cage. The spray assembly is just slid back onto the shaft and snaps into place. A lot of writing, but was rather simple to do. 15-20 minutes.
Washing poorly, leaving particles of food on top of the dishes, not draining completely, ceiling spray arm not spinning (bent up to the ceiling)
The lower spray arm unscrews. From inside the dishwahser, put a screwdriver through the tab slots and unscrew the tower from the floor. It's pretty tight for plastic. The upper spray arm has screws on the top of the dishwasher. You must slide the dishwasher out from underneath the countertop to get to the screws. Normally that's just the two screws above the door that screw into the countertop. Pull the insulation back and unscrew the arm from the top of the dishwasher. Reverse to reinstall. Piston and nut assembly for check valve: Inside the dishwasher at the back there are 2 screws that hold a screen down. Remove the screen. Take out the check valve and replace it. It was still functional in mine, it looked like food gunk had built up on it and impeded the check valve action. The flapper chec is a rubber flap in the drain tube that connects to your sink drain. You have to pull the dishwasher out from under the sink to get to the end of the drain tube that connects to the dishwasher. Take the hose clamp loose and remove the drain tube from the dishwasher. Then unscrew the plastic fitting that you just took the drain tube off of. The flapper chec is there. It had turned brittle and didn't flap anymore. It is a similar setup to the rubber seal at the end of your garden hose.
Removed 4 screws in washer then removed cover. Then piston and nut assembly which just needs turned loose.Pull out and then,put new one back in,tighten up, put cover back on put 4 screws back in. Then unhooked water line, power cord, drain hose. Pull washer out and drained water out of system with drain hose. put a towel down to catch excess water. Loosen nut at end of drain hose with a pliers, remove flapper put new one back in tighten drain hose . Put washer back in hook water, power and drain hose. Run thourgh cycle and it should work much better.
Standing water in dishwasher after final rinse cycle
Disconnect the dishwasher power supply and water connector.Then disconnect the drain hose.Take off the hose from the pump and on the plastic valve is the black valve flapper.Mine was swollen twice the size of the new one.Replace with the new one.You have to pull the dishwasher out and turn it over to do this. The check valve was totally worn out.You must turn the dishwasher back to it's in use position and open up the door.Inside the lower rear wall is a plastic cover with 4 screws remove these and the cover.Then unscrew the piston and nut assembly and remove the check valve.Simply replace with the new parts and reinstall the cover. I replaced the gasket before I reinstalled the check valve even though it looked ok.To do this you need to turn the dishwasher over again and remove the 4 screws dolding the resevoir the check vave is in.Replace the old gasket with the new one and reinstall the new gasket.Do this after removing the old check valve and before intalling the new one. On the bottom inside the dishwasher I noticed the large white gasket on the floor was falling apart so I replaced that also.I'm glad I did because below this assembly there is a reusable plastic filter that was totally plugged that I cleaned and reinstalled before relacing the filter gasket assembly.To do this you must remove the plastic water jet.With a screw driver there are 2 plastic tabs that must be carefully pulled out so you can pull out the water jet.Remove the 2 screws and plastic cover on top off the gasket assembly.Retain the 2 screws but you will not need the cover it is part of the new gasket assembly.There are two clips you need to carefully pry off.Then lift out the old gasket assembly and replace with the new one.Reinstall the 2 screws that held the old cover before and If reinstall the old clips if not damaged.You can purchase new ones but usually not needed.Then gently snap the water jet in place. Put the dishwasher back under the counter and reconnect the power,water line and drain hose.
Nutdriver, Pliers, Screw drivers, Socket set, Wrench set
21 of 29 peoplefound this instruction helpful.
Was this instruction helpful to you?
Thank you for voting!
Nothing more than a worn out check valve,easilly accessible and easilly changed. The valve wouldnt close fully due to deteriation of the piston stopper.
Removed bottom tray from the dishwasher and in the back there is a screen with 5 hex head screws. Removed the screws and then lifted the screen out to expose the vavle. Unscrewed the valve by hand an installed the new one,hand tighten only. Reversed order for reassembly.
Other Parts Used:
Kevin from Roanoke, VA
Difficulty Level:
Really Easy
Total Repair Time:
Less than 15 mins
Tools:
Nutdriver
17 of 19 peoplefound this instruction helpful.
Was this instruction helpful to you?
Thank you for voting!
Dishwasher not draining
Found great information on this site describing the problem. My 9 year old GE Triton dishwasher has not been draining. I thought at first it was something stuck in float somewhere or perhaps a bad pump, but after searching around, I found this site and other stories similar to mine. Most of the reports suggested a worn check valve in the floor of the dishwasher tub, apparently a common issue with some GE models. I removed the strainer located at the back of the tub (4 screws removed w/ 1/4" nutdriver), then unscrewed the check valve to inspect it. Saw that the valve seat was very worn. Ordered the replacement part, received it 4 days later and installed in less than 10 minutes. The best part was I didn't have to remove the dishwasher or crawl underneath to complete the repair. Well worth the $20 for parts & shipping.
Other Parts Used:
Philip from Norton, MA
Difficulty Level:
Easy
Total Repair Time:
Less than 15 mins
Tools:
Nutdriver
14 of 14 peoplefound this instruction helpful.
Was this instruction helpful to you?
Thank you for voting!
Dishwasher would not drain.
I removed the four screws of the filter frame exposing the check valve (piston and nut assembly) . I unscrewed the old check valve and replaced it with the new one.
Other Parts Used:
Jonathan from Athens, GA
Difficulty Level:
Really Easy
Total Repair Time:
Less than 15 mins
Tools:
Nutdriver
13 of 14 peoplefound this instruction helpful.
Was this instruction helpful to you?
Thank you for voting!
Dishes were coming out with nasty film and chunks - gross!
Read about somebody else with the same problem and ordered the check valve. 4 screws off, twist out old valve, twist in new valve, 4 screws back in. Now dishes are see-yourself clean.
Other Parts Used:
Russell from Portage, MI
Difficulty Level:
Really Easy
Total Repair Time:
15 - 30 mins
Tools:
Nutdriver
12 of 13 peoplefound this instruction helpful.
Was this instruction helpful to you?
Thank you for voting!
Dishwasher had bad smell and visible mildew
FILTER GASKET ASM:
1. Manually unscrewed the lower dishwasher sprayer from the base of the dishwasher. (The filter gasket cannot come out with this in the way.)
2. Using a nut driver, unscrewed the old plastic filter cage in the rear.
3. Thanks to a tip from another user on this site, I carefully pried up the metal grommets on the two plastic studs in the front. I did this slowly with a flathead screwdriver, as I was worried about breaking the plastic. (Some plastic did whittle off of the studs from the sharpness of the grommets, but not so much that they were ruined.) Note, the studs look like something that can be replaced if you break them. They are not molded into the tub, as far as I can tell.
4. Removed the old (rotten looking gasket). Be careful! The edges around the filter drain are sharp. Used a turkey baster to suck out water from the filter area and wiped away mildew. The filter recess had broken glass in it and some other yucky stuff.
5. Easily reversed process with the new gasket. The new one has a lighter color and has the plastic, upside down basket thingy built-in. (No sharp edges). I pushed the metal grommets back onto the plastic studs, working them down as tightly as possible. They seem to be holding well.
Piston and Nut Assembly for Check Valve:
I wasn't sure I needed this, but ordered it anyway after seeing comments that the seal can corrode. Mine looked ok, apart from food build-up, but I replaced it anyways.
1. Removed the screened housing that covers the length of the bottom-rear using nut driver.
2. Unscrewed the existing valve manually. It was easy to do. Cleaned area out as best as I could.
Ask our experts a question about this part and we'll get back to you as soon as possible!
7 questions answered by our experts.
< Prev
1
Next >
Sort by:
Search filter:
Clear Filter
Your search term must have 3 or more characters.
Keep searches simple. Use keywords, e.g. "leaking", "pump", "broken" or "fit".
Sorry, we couldn't find any existing answers that matched.Try using some different or simpler keywords, or submit your new question by using the "Ask a Question" button above!
Jo Ann
July 24, 2017
My dishwasher will not drain completely at the end of the cycle. However, i can drain it by pressing the reset button. Is that a replacement of the piston and nut assembly?
For model number GSD3900L00WW
Hello Jo Ann, that is a great question. Yes, the piston and nut assembly are showing as the most common fix for this issue. Hope this helps and good luck with the repair!
9 people found this helpful.
Was this helpful?
Thank you for voting!
Hutch
April 13, 2018
My dishwasher stopped in the middle of the cycle. There is standing water in the bottom. It has power, but it will not turn on. I tried moving the dial in every position but it is dead. Can you please tell me which part to order?
For model number GSD3200J00WW
Hello Hutch,
Thanks for your question. You may wish to test the door interlock switch with a multimeter for electrical continuity. Replace it if it shows no continuity. You may also want to test the door latch and see if anything has shifted out of place with the door panel.
I hope this helps.
Dishwasher will not fill with water, what am i missing. Replaced the water inlet valve and the sequence switch, both GE oem parts and still won't fill. When i manually fill with water to proper level dishwasher works like new, until it drains and cycles to the next cycle and it doesn't fill to allow the water sprayers to work and do their job. Checked float switch manually and it works but dishwasher doesn't fill enough for water to engage. Please help.
For model number GSD5560G00SS
Hello Jim, thank you for inquiring. This could be caused by either a faulty or defective Water Inlet Valve part PS259368, the Motor and Pump Kit part PS260801, or the Float Switch part PS260235. Try checking the water pressure to the valve. The water inlet valve requires at least 20 psi to function properly. We hope this helps.
1 person found this helpful.
Was this helpful?
Thank you for voting!
Lenwood
August 9, 2019
My dishwasher has standing water at the end. I can turn the start dial and it will drain. Will this part fix the problem even though i can make it drain?
For model number Gsd4120y70bb
Hello Lenwood, thank you for your question. Yes, the piston and nut assembly are showing as the most common fix for this issue. Hope this helps and good luck with the repair!
1 person found this helpful.
Was this helpful?
Thank you for voting!
Kelley
October 9, 2019
Part number PS260690. Does this part require a seal? If so does, it come with it?
For model number GSD3400G00WW
Hi Kelley,
Thank you for your question. There is a gasket that is needed for the piston and nut assembly and it is sold separately. The part number listed under your model number for the gasket is PS263956. I hope this helps. Thank you and have a great day!
1 person found this helpful.
Was this helpful?
Thank you for voting!
Bob
August 17, 2021
Motor hums but will not run.
For model number GSD3630F00WW
Hello Bob, Thank you for contacting us. We have researched the model you have provided and recommend checking the following parts to fix your issue: motor and pump kit, and the door latch kit. Hope this helps.
Sometimes does not empty and leaks all over the floor
For model number GSD3200J00BB
Hello Michelle, thank you for reaching out. We would recommend checking the piston and nut assembly, part number PS260690, to fix the issue. We hope this helps!
Was this helpful?
Thank you for voting!
< Prev
1
Next >
✖
Ask a Question
Ask our experts a question on this part and we'll respond as soon as we can.