This pump and motor kit replaces many old style pump and motor kits that were manufactured since 1970. The instructions are included with this kit to help you to make it adaptable to your dishwasher.
NOTE: This is a completely redesigned kit by the manufacturer and now includes the drain solenoid.
How Buying OEM Parts Can Save You Time and Money
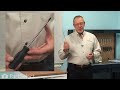
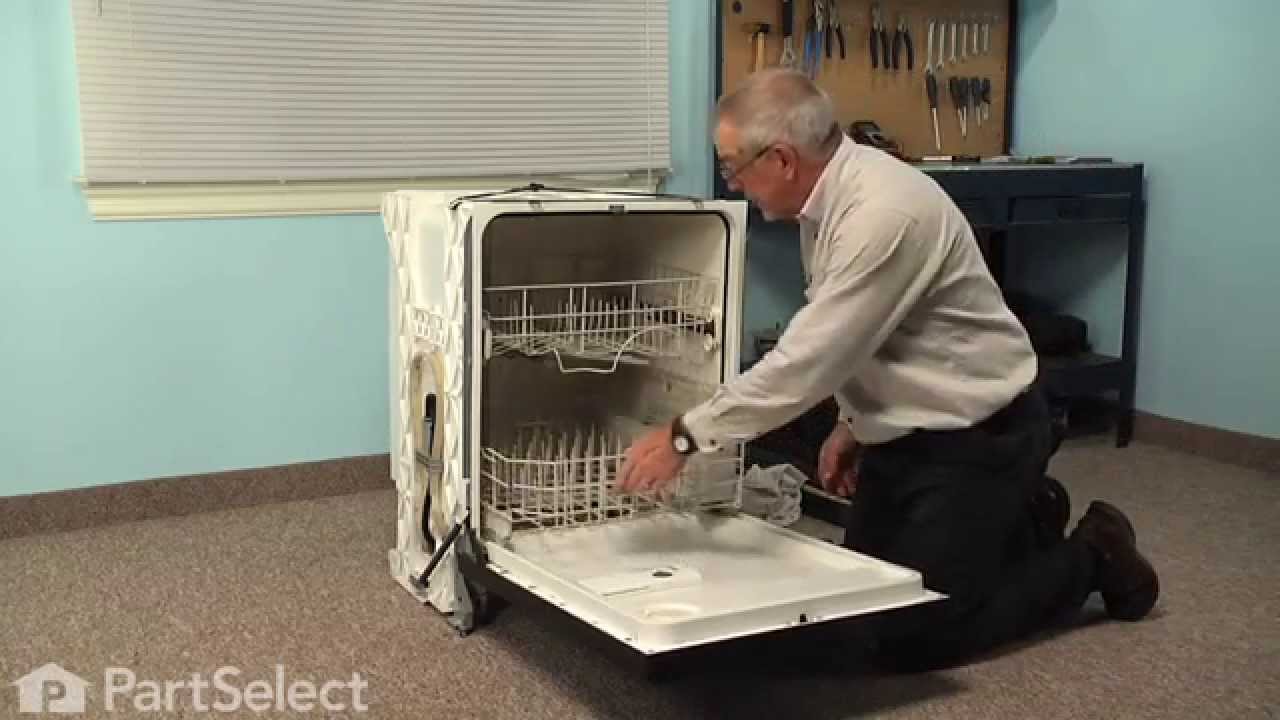
Part Videos
Replacing your General Electric Dishwasher Motor and Pump Kit
Keep searches simple. Use keywords, e.g. "leaking", "pump", "broken" or "fit".
Sorry, we couldn't find any existing reviews that matched. Try using some different or simpler keywords.
★★★★★
★★★★★
Edwin W - March 24, 2022
Verified Purchase
Easy replacement
The part was exactly what I needed and the information and instructions to install it was excellent. I was impressed. Thanks
★★★★★
★★★★★
Brian E - July 3, 2020
Verified Purchase
Easy swap
????
★★★★★
★★★★★
ROBERT B - November 23, 2018
Verified Purchase
Repair of dishwasher
The part came veyy quickly but there was a bit of a problem once it reached our town. Took a couple of days to solve the problem but it was finally located. Part was in good order. Took a bit of time to install but was just me being very careful. Got it in and the dishwasher is now working fine. Thank you.
< Prev
1
Next >
Customer Repair Stories
Average Repair Rating: 3.1 / 5.0, 57 reviews.
What's this?
< Prev
1
2
3
Next >
Sort by:
Search filter:
Clear Filter
Your search term must have 3 or more characters.
Keep searches simple. Use keywords, e.g. "leaking", "pump", "broken" or "fit".
Sorry, we couldn't find any existing installation instruction that matched.
Water not draining from dishwasher
I had never done work on my dishwasher - I was a rookie in this area. Turns out the work itself was quite simple. Pulled the dishwasher out, turned it over, and was able to easily replace the motor and pump assembly. The drain tube was also an easy replace. A couple key notes:
1. I also purchased a new drain solenoid and impeller kit. Note that both of these items are already included in the Motor and Pump kit replacement. There is no need to by both, now I have extras.
2. The end of the drain tube has to be trimmed if you are routing the drain tube to an air gap mounted on your kitchen sink. You have to cut the large diameter end of the tube to get to the narrow portion that will fit on your air gap.
3. The first cycle you run with the new motor/pump assembly is noisy. When you first fire it up the components in the pump are all dry, and they squeal until the water gets to them. I initially thought I had done something wrong, but once the water started flowing all the peculiar sounds cleared up.
Motor was getting noisier every time we used the dishwasher. We knew it was just a matter of time before it totally quit.
The most difficult part was removing the dishwasher from below the counter. Once that was complete, I simply turned the washer onto it's front surface to access the pump easier. Simply disconnected the electrical connectors, loosened the three hose clamps holding the hoses to the pump. Lastly removed a stiff arm bracket holding the pump. Reversed the order to install the new one using a longer bracket provided with the new unit. Hooked up the electrical connections last and slid the washer back in place. The washer runs like new now and is not making noise. The replacement part was a perfect match.
Other Parts Used:
Glenn from Clemmons, NC
Difficulty Level:
Easy
Total Repair Time:
30 - 60 mins
Tools:
Nutdriver, Pliers, Screw drivers
48 of 51 peoplefound this instruction helpful.
Was this instruction helpful to you?
Thank you for voting!
dishwasher pump valve leaking at shaft
took dishwasher out- put on table to work on-removed wire brace- disconected drain outlet- disconnected top drive seal- removed wire clip connector- removed motor unit---------------- installed new motor/drain unit--used new longer wire brac used adapter to connect electical leads- tightened clamps and bingo it worked and didnt' leak. good job on the supplying of all the necessary adapers.
Other Parts Used:
richard from las vegas, NV
Difficulty Level:
Easy
Total Repair Time:
1- 2 hours
Tools:
Screw drivers, Socket set, Wrench (Adjustable)
40 of 47 peoplefound this instruction helpful.
Was this instruction helpful to you?
Thank you for voting!
Blown Motor
Did the install a few days ago 4.25.11 and all went smoothly. The instructions that came with the kit were very straightforward and the diagrams were extremely helpful in locating brackets/hoses/connections. My dad thought he would just get down there and do it, but wasn't sure what to do. Using the directions with the kit, I had the motor and pump off in under 5 minutes. FOLLOW THE DIRECTIONS WITH THE KIT!
Some things to note: - Get some towels/cups/bowls, we had some water leaking from the dishwasher and hoses. - Be careful removing the dishwasher from the counters, go slow.
1. Shut off electricity 2. Shut off water. I just shut closed the line that went directly to the dishwasher. 3. Removed screws from bottom panel to expose motor and pump assembly. 4. Removed screws securing the dishwasher to the counters. 5. Slowly slid dishwasher from counter and rotated so door was facing the ground carefully to ensure wires/hoses were not pulled or crushed. 6. Removed screw from bottom of motor that was secured to the hanger. 7. Removed ground screw from bottom of motor. 8. Removed all wired connections from the motor and pump. 9. Loosened hose clamp securing the drain line and removed from motor. 10. Loosened 2x hose clamps securing the motor and pump assembly to dishwasher. 11. Ensured everything was clear and disconnected, and slowly removed motor and pump assembly from dishwasher. 12. Test fit new motor and pump assembly. 13. Reconnected 2x connections to the motor and pump. 14. Secured the ground wire to the motor and pump. 15. Slid motor and pump onto dishwasher and secured the 2x hose clamps. 16. Secured screw from the hanger cable to the motor and pump. 17. Reconnected water line to motor and pump, and tightened hose clamp. 18. Ensured all connections were made, hose clamps were tightened, and there were no extra connections. 19. Rotated dishwasher back onto feet. 20. Slowly slid dishwasher back into counters ensuring no cables or hoses were kinked or crushed. 21. Restored electricity and water to dishwasher, and then performed a quick test of one cycle to check for leeks. 22. Secured bottom panel and dishwasher to counters. 23. Enjoyed having a working dishwasher again!
Other Parts Used:
Sean from Winter Garden, FL
Difficulty Level:
Really Easy
Total Repair Time:
30 - 60 mins
Tools:
Screw drivers, Socket set
33 of 35 peoplefound this instruction helpful.
Was this instruction helpful to you?
Thank you for voting!
Pump/Drain valve leaking
The hardest part was removing the dishwasher from under the counter and cleaning up the large amount of water that poured out when I turned the unit on its side. The actual pump replacement was pretty easy except there were a lot of extra parts that were only needed for other brands or other models. I might have tightened one of the large clamps too much as there was a very slight leak after I was done. One or two drops of water per cycle, which evaporates quickly and not worth taking apart again. It was not hard but took longer than predicted. Much better than buying a new dishwasher or paying the estimated $350 to an appliance repair company.
Other Parts Used:
Stephen from Aspen, CO
Difficulty Level:
Difficult
Total Repair Time:
More than 2 hours
Tools:
Screw drivers, Socket set, Wrench (Adjustable)
23 of 27 peoplefound this instruction helpful.
Was this instruction helpful to you?
Thank you for voting!
Wouldn't Keep Water In Dishwasher - Bad Drain Solenoid
Rather than remove the dishwasher from the counter, I performed the repair inplace, which was much less work (although I did have to lay on the floor). After turning off the power, I removed the two access panels at the bottom of the unit, disconnected the wiring from the pump and solenoid, loosened the drain hose fitting and drained most of the water out of the unit and into a shallow pan (the drain solenoid was stuck open, so this was pretty easy - otherwise, I still could have manually actuated the drain valve & solenoid to drain water through this hose). There was alot of water in the unit and my pan overflowed a little. If I was doing this again, think I would have disconnected the drain hose from under the sink and drained out through that into a bucket (I could have controlled that flow better). Once the water was out, there are just two hose clamps that hold the pump onto the unit (one on top and one in the back), and a stabilizer bar that connects the motor to the front frame. Removed these and the whole unit came right out. The replacement pump & motor was exactly the same as the one that came out, so I didn't need any of the hose or wire adapters that came in the kit. Reconnected the two pump connections, motor bracket and wiring, and the unit was good-to-go!
Other Parts Used:
Christopher from Nellysford, VA
Difficulty Level:
Easy
Total Repair Time:
15 - 30 mins
Tools:
Nutdriver, Pliers, Screw drivers
20 of 24 peoplefound this instruction helpful.
Was this instruction helpful to you?
Thank you for voting!
Dishwasher leaking from pump shaft seal
first, I removed the screws holding the dishwasher to the countertop.Then I removed the dishwasher from under the counter. I turned the dishwasher on it's back and loosened the three hose clamps securing the water connections to the pump assembly. I then removed the electrical plug to the motor and the screw holding the support rod to the motor. Then I worked the loosened water connections apart and removed the pump and motor assembly. Then I removed the hose clamp and plug from one of the orifices on the new pump, and aligned all of the water connections and wiggled the new pump assembly into place. I tightened the hose clamps, Installed the new screw and support bar to the motor, and connected the electrical plug. I then turned the dishwasher upright, reconnected the power cord, water supply and drain lines and started a wash cycle to check the new system for leaks. I found that the extraneous drain solenoid that came attached to the new pump was loose and rattling, so I secured the solenoid shaft and linkage to the pump housing with electrical tape to stop the rattling.
Other Parts Used:
John from Brentwood, CA
Difficulty Level:
Really Easy
Total Repair Time:
15 - 30 mins
Tools:
Nutdriver, Screw drivers
12 of 15 peoplefound this instruction helpful.
Was this instruction helpful to you?
Thank you for voting!
leaking selenoid told repair cost would exceed replacement cost
Shut off circuit breaker to dishwasher and shut off valve to dishwasher under sink.Remove bottom access panel screws on both sides of panel. Remove both screws holding dishwasher to counter.Place old mattboard strips under legs to prevent scratching floor & slide out from under counter. Use a Shopvac to remove water and spillage. Have rags and paper towels handy. Carefully disconnect wires, drain hose and water line to free dishwasher. Fold old rug runner in half to place dishwasher on, turn on side and then gently upside down on rug to access motor. Remove butterfly clamps, hose clamps, electrical connections, and support bracket. remove old motor and pump and place in box to discard. Position replacement motor and pump according to diagrams. Reconnect all clips, hoses and connections. Since replacement motor and pump is smaller, use longer support bracket from adapter kit. Return dishwasher to upright position and reconnect wiring using wirenuts, drain hose and waterline. Reposition mattboard strips under legs and slide back into place. Attach screws to counter top. Turn on power, water and do a test run to check for leakage. Replace bottom access panel. Pat yourself on the back since you've saved yourself hundreds of dollars for a repair or replacement of your dishwasher.
Removed the dishwasher, turned it over, removed 3 hoses, 2 clamps, 2 wires and one support. Installed new pump and reconnected. Done!
Other Parts Used:
Gordon from Ogdensburg, NY
Difficulty Level:
Easy
Total Repair Time:
15 - 30 mins
Tools:
Screw drivers, Wrench (Adjustable)
12 of 16 peoplefound this instruction helpful.
Was this instruction helpful to you?
Thank you for voting!
Motor/Pump assembly leaking
I made this replacement more dificult because I removed the old motor/pump earlier. Should have done it at the time I installed the new unit to be sure all hoses where installed correctly. I hooked the drain hose to the wrong port and when I started the dishwasher I found my error. Once I corrected the problem and started it again - the wash and drain cycles were perfect and there were no leaks.
Other Parts Used:
Thomas from San Antonio, TX
Difficulty Level:
Easy
Total Repair Time:
1- 2 hours
Tools:
Pliers, Screw drivers, Socket set
10 of 11 peoplefound this instruction helpful.
Was this instruction helpful to you?
Thank you for voting!
< Prev
1
2
3
Next >
Questions and Answers
Ask our experts a question about this part and we'll get back to you as soon as possible!
18 questions answered by our experts.
< Prev
1
2
Next >
Sort by:
Search filter:
Clear Filter
Your search term must have 3 or more characters.
Keep searches simple. Use keywords, e.g. "leaking", "pump", "broken" or "fit".
Sorry, we couldn't find any existing answers that matched.Try using some different or simpler keywords, or submit your new question by using the "Ask a Question" button above!
John
January 31, 2018
My dishwasher will not fill with water. Replaced inlet valve, float is fine, water pressure fine. Water line not clogged. Help
For model number GSD2030Z02WW
Hi John, Thank you for the question. I suggest replacing the Timer, PartSelect Number PS260070. The timer tells the valve when to open and allow the appliance to fill with water. Hope this helps!
Hi Jerry, Thank you for the question. Sounds like the Drain Solenoid is defective and needs to be replaced. PartSelect Number PS260117.Good luck with the repair!
3 people found this helpful.
Was this helpful?
Thank you for voting!
Felix
August 5, 2018
When my dishwasher starts it's first cycle it washes fine but after the first drain starts, it stops completely and turns off and doesn't drain. I have to reset it just th get it start again if it does start. Is motor/pump assembly the problem?
For model number GSD5560G00SS
Hello Felix, thank you for your question. If the unit is washing, starts draining, but then stops and turns off the issue is most likely the Motor and Pump Kit WD26X10013. I would remove the bottom spray arm and clean out under the impeller and screen to be sure there is nothing obstructing the drain pump and motor before ordering, but if its clean and there are no obstructions you will want to replace the aforementioned part. I hope this helps!
3 people found this helpful.
Was this helpful?
Thank you for voting!
Larry
January 9, 2019
Kenmore model 665.14815n611 parts list and repair instructions. Fills with water and drains but doesn't turn spray arms.
For model number 665.14815n611
Hello Larry, Thank you for the question. This sounds like an issue with the Circulation Pump, PartSelect Number PS11765854. This pump circulates the water tot he spray arms during the wash cycles. Here is a link to a video on how to replace a Whirlpool Circulation pump. Hope this helps!
https://www.youtube.com/watch?v=UYBYT1O730U
2 people found this helpful.
Was this helpful?
Thank you for voting!
Betty
February 6, 2018
I am looking at your motor and pump kit i need the black rubber cap and clamp for my dish washer it is leaking can i just buy that cap
For model number GSD500X-66WA
Hi Betty, Thank you for the question. Unfortunately the cap is only sold with the Motor and Pump Kit. Hope this helps!
2 people found this helpful.
Was this helpful?
Thank you for voting!
Youri
April 27, 2018
Hello! Can i replacement this kit to my dishwasher?
For model number GSD3210Z04AA
Hi Youri,
Thank you for your question. Yes, this part is listed under your model number and it is designed to work with your appliance. I hope this helps. Thank you and have a great day!
1 person found this helpful.
Was this helpful?
Thank you for voting!
Edisson
February 28, 2019
Pump model for this dishwasher !Please! Photo and price thank you !!
For model number Gsd2000gooww
Hi Edisson,
Thank you for your question. The part number listed under your model number for the motor and pump is PS260801. There are photographs listed with the part on our website that you may reference. I hope this helps. Thank you and have a great day!
1 person found this helpful.
Was this helpful?
Thank you for voting!
Tori
May 2, 2019
I just bought this motor and was sent wd26x10013. I installed it and started a test run, it worked for about 30 seconds and shut off. I couldn't get it to start back up so i reinstalled my old motor which worked but was getting old and it would not start up at all. I think it fried my machine.
For model number GSC3200G00BB
Hello Tori, Thank you for the question. I suggest testing the Interlock Switch, PartSelect Number PS1481922. It could have been shorted out when installing the motor. This part is a simple on/off mechanism that prohibits the appliance from operating when the door is open. If defective it will not allow the appliance to run. Hope this helps!
Hi! My range oven temp bottom stay on !When i turnoff the oven! How can be fixed help please ! Thank you!!
For model number JBS27WH2
Hi Edisson,
Thank you for your question. If your oven will not turn off, there are some parts that you will need to check to see which one is causing the issue. You will need to check the oven thermostat, the electronic control board and both the bake and broil elements. I hope this helps. Thank you and have a great day!
Was this helpful?
Thank you for voting!
David
February 7, 2019
Cam you send me a picture of the lower spray arm assembly as i am not quite sure where the small rubber washer goes when i rebuild the arm back in place
For model number Gsd3000w20
Hello David, Thank you for your inquiry. Photos can be found on our website for the lower spray arm, along with an exploded diagram showing where each piece is located. https://www.partselect.com/ModelSections.aspx?ModelID=338031&ModelNum=GSD3000W20&mfgModelNum=&ManufactureID=2&Selected=00005708i03&Position=1&mfg=GE&Type=Appliance&Mark=3 Good luck with your repair!
Was this helpful?
Thank you for voting!
< Prev
1
2
Next >
✖
Ask a Question
Ask our experts a question on this part and we'll respond as soon as we can.