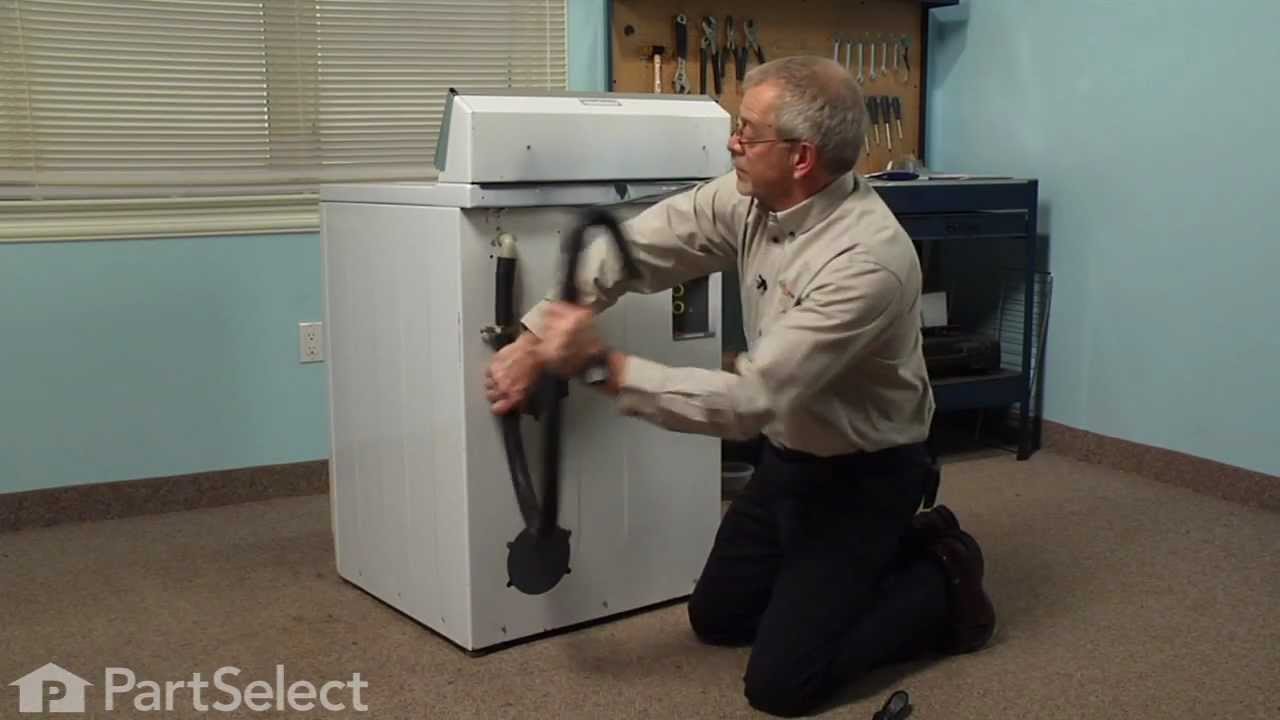
Real ratings from other people who bought this part.
Average Rating:
★★★★★
★★★★★
6 Reviews
4.2
Out of 5
5 Stars
3
4 Stars
2
3 Stars
0
2 Stars
1
1 Star
0
Search reviews left by others. DIY doesn't mean you have to do it alone. Use simple keywords like "fit", "broken", "easy", or "quality" to find reviews that match!
Search filter:
Clear Filter
Your search term must have 3 or more characters.
Sort by:
Prev
1
Next
Sorry, we couldn't find any existing reviews that matched. Try using some different or simpler keywords.
★★★★★
★★★★★
KEVIN C - May 4, 2021
Verified Purchase
Easy repair, great product
The parts worked fine, easy repair washer is working great. Thanks easyapplianceparts.ca
★★★★★
★★★★★
BHARAT P - September 23, 2021
Verified Purchase
Worked as expected.
Great service, and my washing machine is back in service with no leaks. Thanks.
★★★★★
★★★★★
Mark S - May 1, 2020
Verified Purchase
Easy repair!
Part was just as expected. Machines back up and running
★★★★★
★★★★★
Michael S - January 21, 2020
Verified Purchase
Satisfied
Good service and the part is in and functioning as designed. I only have one slightly negative comment in that I asked via telephone if the part contained the siphon apparatus within it because it was not clear in the image and description if it was a complete unit or just the body. This question I asked twice because the first person did not email me back with the answer as I was promised. The second person did not know so I decided to take the chance anyway and order the part and I only found out upon delivery that the part included the internal apparatus. I want to say that this glitch was not serious enough for me to never buy from your company again but staff need to do what they say they will do because guys like me rely on them to do that. Thanks I will definitely use your services again. mike storr
★★★★★
★★★★★
Jean-Marc A - April 26, 2023
Verified Purchase
Great parts
The clamp was too small.
★★★★★
★★★★★
Tim S - February 18, 2019
Verified Purchase
Clamp not as shown
Kit was supplied with a cheap hose clamp that did not fit over the oem hose
Prev
1
Next
Repair Tips
See how others fixed this model. Time, tools, difficulty, and steps that lead to victory!
Easy
30 - 60 mins
Average repair rating from 25 real customers like you
Sort by:
Prev
1
2
3
Next
Search repair tips from other customers using simple keywords like "replace", "fit", "remove", "inspect". DIY doesn't mean you have to do it alone!
Search filter:
Clear Filter
Your search term must have 3 or more characters.
Sorry, we couldn't find any existing installation instruction that matched.
Leaking water
205 of 233 peoplefound this instruction helpful.
Joseph from Plano, TX
Easy
30 - 60 mins
Nutdriver, Screw drivers
Well, I found the washer leaking water from the bottom a couple weeks ago. I finally got around to pulling off the front panel and ran a couple cycles to see where the water was coming from. Turns out the leak was at the plastic pump that does the draining after wash and rinse.
So I got the model number and googled online. I
... Read more found Partselect and they had every part I needed. Took me 10 minutes online to find the parts for my specific washer. I couldn't believe how easy it was. Parts came in two days...and this was right before Xmas.
Anyways, changing out the pump was simple. Took 5 minutes to get it off and put the new one in. I decided to change the hoses and elbow siphon break as well while I had the thing apart as those parts were old...but still working well.
Got the washer back together and the floor is dry as a bone. Perfect repair, really easy to do. Hardest part was figuring out how to get the front panel off.
Water leak noted on floor at front of washer and at sides
58 of 66 peoplefound this instruction helpful.
Jeff from Moorpark, CA
Difficult
More than 2 hours
Screw drivers, Socket set
Occasional noted leak became worse and I had a repair service out. Incorrect detection of outer tub seal made so cancelled them and read comments about raising the top. Did so just at start of a rinse cycle to see soapy water shoot from top of syphon break then continue to dribble out through tub empty process--this is what had cause th
... Read moree water to flow down the interior drain hose and out through the side and bottom near the pump.
Ordered all the parts shown here and they arrived just in time for planned work. Did not need or use the clamp and gasket purchased as the gasket was included in the break package and I really like the old-style clamps much better.
Replaced the break and the elbow and put it back together. Things went south on a rinse as water shot out the back hose at the new elbow. I had not realized the size of the new elbow was smaller than the original. Went back to the old elbow but it bothered me that it would still move when the 4 assembly bolt-screws were completely tight.
So far this seems to have worked. There does not seem to be any leaking at all. For those who read this, the job could be done in about and hour for less than I spent if you observe and diagnose properly. It appears that the washer at the end of the Syphon Break wore out and that is what caused the leak.
Thanks much to PartSelect for being in business and to all the posters on this site for helping everyone to get these things done right!
1. Unplug power to the washer. 2. Remove 2 screws from bottom front panel on either side. Panel then rotates out and unhooks at the top. Remove front panel 3. Remove bolts from underneath the top front on both sides using a socket. 4. Rotate the top upward to provide space to see and work. 5. From the back of the wash
... Read moreer, remove 4 bolts using a socket around the drain tube at the upper left. 6. From the front, the siphon valve can be removed from the inside upper right. 7. From the front, unscrew the clamp holding the drain hose on the water pump housing at the bottom right front and remove the hose. Be prepared for water to drain from the hose. Remove hose and siphon valve together and discard. 8. Install new hose on new siphon valve and screw new clamp tight. Make sure the rubber ring is inserted properly on the new valve (See old valve for reference) 9. Holding the siphon valve in place, use a socket and re-attach the 4 bolts around the drain tube at the back of the washer. 10. From the front, insert the opposite end of the new hose to the water pump at the lower right front and screw the circle clamp tight. Note: Re-use existing clamp. 11. Rotate the top back down into normal position. 12. Plug the power back in and run a short cycle and watch for leaks. 13. If no leaks, re-attach bolts for the top with a socket. 14. Re-attach front panel with 2 screws. Done.
I went to a major appliance part outlet in my area...they told me that they didn't make the parts in the USA anymore. I found your website, ordered the parts, installed them in less than 15 minutes and now the washer works great. I would recommend your website to anyone... thank you
Small puddle of water on floor after water drains out.
9 of 13 peoplefound this instruction helpful.
James from Lakewood, CA
Easy
30 - 60 mins
Screw drivers, Socket set
I first removed the 2 screws at the bottom of the front panel. The front panel then pulls up and off. I then removed 2 hex head screws with a small socket, which kept the top attached to the two side panels. I then lifted the top and kept it propped up. I removed the internal drain hose from the siphon break on the inside of the back pan
... Read moreel. I removed the 4 screws on the back panel that keeps the siphon break in place. I removed it and screwed in the new one. I re-attached the drain hose to the new part. I partially filled the tub and watched it drain with the lid still upright. No more leaks. The rubber seal in the siphon break had rotted.
Read less
Was this helpful?
Thank you for voting!
water leaking from machine during spin cycle
7 of 8 peoplefound this instruction helpful.
Franz from Woodcrest, CA
Easy
Less than 15 mins
Nutdriver, Screw drivers, Socket set
I initially could not figure out how to open the machine so I checked the internet for a repair manual. After getting it open I found the source of the problem. The siphon break was missing the diaphragm and was spitting water when the tub was draining. I did not know what a siphon break was or did. I am non mechanically inclined. So I s
... Read moreealed the top of the siphon break with a sandwich bag and a zip tie, put in a load and went to work. I now know what the siphon break does after it ran all day filling and draining for over 8 hrs. That is when I found this site, ordered the part and received it the next day as promised. It took about 10 minutes to put the part in and close the washer back up. It has been a week now and the garage is almost dry . HA , and my wife wanted a new washer ! This part and delivery was under $25. A new machine around $800 if I am lucky. The ability for me to be smug as long as she never finds out about the sandwich bag incident, PRICELESS !
Read less
Was this helpful?
Thank you for voting!
water leak during spin cycle
6 of 7 peoplefound this instruction helpful.
Efrain from Fontana, CA
Really Easy
Less than 15 mins
Screw drivers, Wrench (Adjustable)
First removed the two lower screws from the front panel. I then unscrewed two screws holding the top(lid) of washing machine. I then lifted the lid and let it rest on its rear hinges. The syphon is removed by unscrewing four screws from the rear of the washer. I then cut the original clamp holding the syphon to the hose. New syphon was in
... Read morestalled. Enclosed hose clamp was used to tighten around hose. Syphon was then then screwed back to the rear wall of the machine. Easy fix. Water leak solved.
Read less
Was this helpful?
Thank you for voting!
leaking hoses and low tension on belts
5 of 8 peoplefound this instruction helpful.
john from COTTAGE GROVE, MN
Easy
1- 2 hours
Nutdriver, Pliers, Socket set
opened front of washer, removed motor, replaced glides and springs, installed motor and replaced belts. Installed new hoses and vacuum breaker. Its been a week now and no leaks or other problems.
After 27 years of faithful service, our May tag washer was leaking during the spin/drainage cycle.
4 of 4 peoplefound this instruction helpful.
Victor from NEW ORLEANS, LA
Really Easy
15 - 30 mins
Nutdriver, Pliers, Screw drivers
The instructional video clearly told me how to remove access panels. I was able to observe the leak during operation, and determined it was coming from the siphon break and running down the internal drain hose. The video clearly showed me how to access the part and replace it. This saved me a $300 service call for sure. Thank-you for
... Read moreyour excellent guidance. We're going for 30 years of operation from this appliance!
Read less
Was this helpful?
Thank you for voting!
Rusty Hose Clamp Broke; Discovered I needed a Siphon Assembly
3 of 8 peoplefound this instruction helpful.
Elizabeth from Augusta, ME
Really Easy
30 - 60 mins
Screw drivers
One of the drain hose clamp broke (on Halloween night). After cleaning up the flood in the house (talk about a house of horrors). I removed the front panel of the washer and also discovered a mouse living in the washer on a stockpile of cat food. I also discovered that the MAYTAG washer that I bought used from a local appliance vendor
... Read moredid not have the correct SIPHON assembly for the drain hose thanks to PARTS SELECT. I ordered the SIPHON CONNECTOR, SIPHON BREAK ELBOW and I needed a new lid HANDLE and I discovered the CYLINDER LIGHT BULB was out.
I could have gotten the CYLINDER LIGHT BULB at a local store much cheaper. The lid HANDLE was plastic and was way over priced - it looked like metal but it was plastic.
However, the Siphon Break Elbow Kit and Connector were easy to install. You remove the front enclosure panel by removing 4 self-tapping screws at the bottom. You remove 2 sheet metal screws that hold the top enclosure panel on (in rear) and lift that cover up about five inches (prop it open really). (Which is where I also found a mouse nest which I also removed.)
I clamped a hose to the SIPHON CONNECTOR from the inside. PUT THE RUBBER GASKET INTO THE SIPHON CONNECTOR. SEAT THE SIPHON ELBOW INTO THE SIPHON CONNECTOR. FEED THE ELBOW into a precut hole on the back panel (from the inside). Then use 4 self-tapping screws (purchased separately at the local hardware store) through the precut holes into the SIPHON CONNECTOR from the outside/back. Attach the additional hose (that goes to the drain) with the hose clamp.
It actually took me longer than an hour for the whole project because I had to clean up after the mouse. Oh! And I caught the mouse the next day with a mouse trap by the frig.
Ask our experts a question about this part and we'll get back to you as soon as possible!
We may have answered a similar question already! Search questions and answers left by others using simple keywords like "fit", "broken", "easy", or "quality" to find questions that match.
Search filter:
Clear Filter
Your search term must have 3 or more characters.
Sort by:
Prev
1
Next
Sorry, we couldn't find any existing answers that matched.Try using some different or simpler keywords, or submit your new question by using the "Ask a Question" button above!
James
January 16, 2018
What is the function of the siphon break unit
Hello James, Thank you for your inquiry. It prevents the water from siphoning through the drain hose. If your washer drains into a floor drain or a drain that is lower than the height of the washer's tub, it essentially keeps the fill water from flowing into that drain. If there's high pressure water coming into the tub, the valve inside closes to keep the water from leaking, and it opens at lower pressure. Hope this helps!
9 peoplefound this instruction helpful.
Was this helpful?
Thank you for voting!
Jill - For model number LA612
May 17, 2019
Should i also get gasket 2-14765 to go with 2-14764 and 2-6638?
Hello Jill, thank you for your question. Yes, it is recommended to do so. All three of those parts are the correct replacements for your model.
1 personfound this instruction helpful.
Was this helpful?
Thank you for voting!
Jeremy - For model number Maytag A7300
October 31, 2022
Water is shooting out of siphon break connector, just replace this part or should I be looking for another problem?
Hi Jeremy, thank you for asking. We would recommend checking the following parts to fix your issue: Syphon Break Gasket, part number PS11738895, Siphon Break Connector Kit, part number PS2017342, and Siphon Break Elbow, part number PS11748480. We look forward to hearing from you if you need assistance with placing an order through our 7-days-a-week customer service. We hope this helps!
I have a leaking issue with my siphon break connector kit. Upon the drain/spin cycle of my washer, water drips from the top reservoir on said kit. I removed this part and cleaned inside and out and noticed the rubber seal at the top of this part. What is causing this issue?
Hello Brian, thank you for your inquiry. We have researched your model and found that you may need to replace the Syphon Break Gasket, part number PS11738895. Please reach out to customer service if you need help placing an order. Glad to be of help!
Item is in stock and is estimated to be delivered in 2-3 business days via Standard Shipping.
On Order
Item is not in stock and usually ships 3-5 business days from the time you place your order.
Special Order
Item is not in stock and usually ships 10-15 business days from the time you place your order.
NLA - No Longer Available
This item is no longer being made by the manufacturer, and cannot be added to your shopping cart.
[{"position":0,"name":"Home","title":"Home","url":"/"},{"position":1,"name":"Hose or Tube","title":"Hose or Tube","url":"/Washer-Hoses-and-Tubes.htm"},{"position":2,"name":"206638","title":"206638","url":""}]



 My Orders