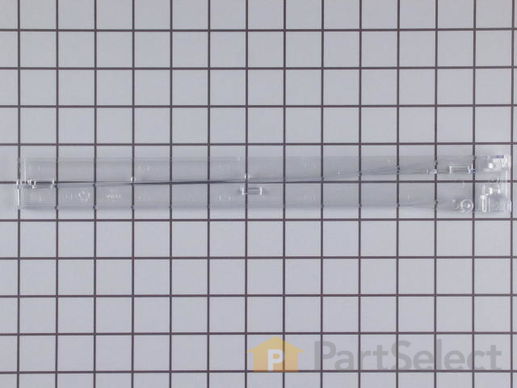
Part Location Diagram of WP67002191 Whirlpool Drawer Glide Rail - Right Side
See part 4 in the diagram
( Grid squares measure 1x1 inch )
Customer Service Representative

Get in touch, we're here to help!

Daily 8am - 9pm EST

customerservice@partselect.ca

Drawer Glide Rail - Right Side

 Fits your MTB2448DRQ!
★★★★★
★★★★★
7 Reviews
$39.12
  In Stock

Get this part fast! Average delivery time for in-stock parts via standard shipping: 1.8 days.

 Fits your MTB2448DRQ!
PartSelect Number PS11743485
Manufacturer Part Number WP67002191
Manufactured by Whirlpool
Product Description

Drawer Glide Rail - Right Side Specifications

This drawer glide rail is thirteen inches long. It is clear and made of plastic.
How Buying OEM Parts Can Save You Time and Money

How Buying OEM Parts Can Save You Time and Money

Troubleshooting
This part works with the following products:
Refrigerator.
This part works with the following products:
Maytag, Jenn-Air, Amana.
Part# WP67002191 replaces these:
61002305, 67002191
Back to Top
Customer Reviews
Average Rating:
★★★★★
★★★★★
7 Reviews
4.6
Filter By Rating:
  • 5 Stars
    6
  • 4 Stars
    0
  • 3 Stars
    0
  • 2 Stars
    1
  • 1 Star
    0
  • 1
Sort by:
Sorry, we couldn't find any existing reviews that matched. Try using some different or simpler keywords.
  • 1
Customer Repair Stories
 Average Repair Rating: 4.6 / 5.0, 15 reviews. What's this?
  • 1
  • 2
Sort by:
Sorry, we couldn't find any existing installation instruction that matched.
replace glide rails
First, removed glass shelf from fridge. Then removed old rails from underside of the glass shelf; this was a bit tricky because the rails have a plastic catch, so I had to wedge a screwdriver between the rail and the steel hardware under the shelf. Then I gently hammered out the rail. Reinstalling the new rails was very easy.
Other Parts Used:
Drawer Slide Rail - Left Hand Drawer Roller Wheel
  • Miguel from Berkeley, CA
  • Difficulty Level:
    Easy
  • Total Repair Time:
    15 - 30 mins
  • Tools:
    Screw drivers
4 of 6 people found this instruction helpful.
Was this instruction helpful to you?
Thank you for voting!
Rack rollers on each guide had broken off.
1-Removed drawer; removed drawer shelve which contained rails; slid old rail out of shelve mounts with light taps on ends.
2- Screwed on the new rollers to rail guides; reinstalled new guides into shelve mounts; re-installed shelve onto mountings in refrigerator; re-inserted drawer nto new rails-Done!
Received parts 48 hrs. after placing order!
Great job! Third positive experience with Parts Select.
Other Parts Used:
Drawer Slide Rail - Left Hand Roller Screw Rack Roller
  • Ken from Nantucket, MA
  • Difficulty Level:
    Really Easy
  • Total Repair Time:
    Less than 15 mins
  • Tools:
    Screw drivers
3 of 3 people found this instruction helpful.
Was this instruction helpful to you?
Thank you for voting!
Adjusti-temp meat/cheese drawer right glide rail fell off
When the new glide rail didn't look any different that the one I thought was broken, I thought I'd assessed the wrong broken part as everytime I tried to put it in the slots it would still fall off, just like the old one.. But I went back and reread the other repair stories to get a picture in my mind what they were talking about. I realized I needed to get the glass shelf off but it wouldn't budge. I found the original information booklet and realized the two blue clips in the shelf tracks were nothing more than packing clips (we've had the fridge 8 year.) when I got those off (these took the most time and a flat head screwdriver) the shelf came right off. Then I put the glide rail brackets in the appropriate slots, pushed the rail toward the front of the shelf and when it got to the place of resistance, I just applied steady, gentle pressure to get the brackets to lock in place in the slots. Repair done, placed shelf back in fridge, put drawer back on, and it was done. Oh, forgot, I first had to take the little wheel thingy off the old raid and screw it onto the new rail before attaching the new rail to the shelf. By the Way, this was really easy to do. I'm a 66 year old grandmother and this was my first refrigerator repair. Always read the previous repair stories--they really do tell you what you need to do.
Other Parts Used:
  • Pamela from San Antonio, TX
  • Difficulty Level:
    Easy
  • Total Repair Time:
    Less than 15 mins
  • Tools:
    Screw drivers
3 of 4 people found this instruction helpful.
Was this instruction helpful to you?
Thank you for voting!
Broken rails and pan
I first looked at the current assembly so that I could see how the new parts were to go (thanks Dad!) Then I removed the drawer and unscrewed the rails. Next, I removed the guide wheels from the old set of rails and installed them into the new rails. After that it was just a matter of screwing in the new rails and sliding the old drawer front plate onto the new drawer. Whala! Back in business.
Other Parts Used:
Drawer Slide Rail - Left Hand Meat Pan
  • Veronna from Sonoma, AL
  • Difficulty Level:
    Really Easy
  • Total Repair Time:
    Less than 15 mins
  • Tools:
    Pliers, Screw drivers
2 of 3 people found this instruction helpful.
Was this instruction helpful to you?
Thank you for voting!
The front part of the drawer guide rail had snapped off, as a result, the drawer didn't slide in and out properly.
I first removed the drawer and then removed the shelf to which the drawer guide is mounted. Removing the drawer guide from the shelf was the hardest part - it was quite tight. I used a piece of wood and a light tap from a hammer to get it free. I had to reuse the roller from the old drawer glide (one screw). I snapped the new glide onto the shelf and I was in business. The best part was that the part arrived the day after ordering it - though I didn't request overnight delivery and the repair took less than 10 minutes.
Other Parts Used:
  • Lawrence from Brick, NJ
  • Difficulty Level:
    Really Easy
  • Total Repair Time:
    Less than 15 mins
  • Tools:
    Screw drivers
1 person found this instruction helpful.
Was this instruction helpful to you?
Thank you for voting!
rail was broken
hit the old rail a couple of time with a screwdriver to loosen it. Put the new rail on. Put the slide tape in the grove on the rail. Tooks the old wheel of the old rail and put it on the new one. Done!
Other Parts Used:
  • Karen from Bridgewater, MA
  • Difficulty Level:
    Really Easy
  • Total Repair Time:
    Less than 15 mins
  • Tools:
    Screw drivers
1 of 2 people found this instruction helpful.
Was this instruction helpful to you?
Thank you for voting!
Broken Shelves
Removed and replaced by hand
Other Parts Used:
Drawer Slide Rail - Left Hand Refrigerator Door Front Pick-Off Shelf
  • James from Hayward, WI
  • Difficulty Level:
    Really Easy
  • Total Repair Time:
    Less than 15 mins
1 of 2 people found this instruction helpful.
Was this instruction helpful to you?
Thank you for voting!
Plastic piece on rail broke off
I had a heck of a time getting the broken rail off the drawer. I had to pry quite a bit with a screwdriver to get it to slide off. Other than that, it was like falling off a log.
Other Parts Used:
Drawer Slide Rail - Left Hand
  • Michael from Okemos, MI
  • Difficulty Level:
    Easy
  • Total Repair Time:
    15 - 30 mins
  • Tools:
    Screw drivers
1 of 2 people found this instruction helpful.
Was this instruction helpful to you?
Thank you for voting!
broken slides
removed shelf, removed sllides and replaced
Other Parts Used:
Drawer Slide Rail - Left Hand
  • james from butler, PA
  • Difficulty Level:
    Easy
  • Total Repair Time:
    15 - 30 mins
  • Tools:
    Screw drivers
1 of 2 people found this instruction helpful.
Was this instruction helpful to you?
Thank you for voting!
The crisper drawer would fall outof the frig
I matched up the holes on the shelf with the notches on the rail and snapped it into place. The only thing that was harder that weekend was watching golf and drinking beer. That took me four hours.
Other Parts Used:
  • Scott from Delaware, OH
  • Difficulty Level:
    Really Easy
  • Total Repair Time:
    Less than 15 mins
1 of 2 people found this instruction helpful.
Was this instruction helpful to you?
Thank you for voting!
  • 1
  • 2
Questions and Answers

Be the first to ask our experts a question about this part!

Related Parts
Model Cross Reference
This part works with the following models:
PartSelect Number: PS11743485
Manufacturer Part Number: WP67002191
Brand
Model Number
Description
Maytag
GT1928PACW
Refrigerator
Maytag
GT1928PAGW
Refrigerator
Maytag
GT1928PAHW
Refrigerator
Maytag
GT1928PDCW
Refrigerator
Maytag
GT1928PEFW
Refrigerator
Maytag
GT1928PVCW
Refrigerator
Maytag
GT2127PEGW
Refrigerator - Top Freezer
Amana
GT2128PDCW
Refrigerator
Amana
GT2128PEFW
Refrigerator
Maytag
GT2128PVCW
Refrigerator
Maytag
GT2428PVCW
Refrigerator
Jenn-Air
JTB1987ARA
Refrigerator - Top Freezer, Top Mount
Jenn-Air
JTB1987ARW
Refrigerator - Top Freezer, Top Mount
Jenn-Air
JTB1988AEA
Refrigerator - Top Freezer, Top Mount
Jenn-Air
JTB1988AEB
Refrigerator - Top Freezer, Top Mount
Jenn-Air
JTB1988AEW
Refrigerator - Top Freezer, Top Mount
Jenn-Air
JTB2187ARA
Refrigerator - Top Freezer
Jenn-Air
JTB2187ARW
Refrigerator - Top Freezer
Jenn-Air
JTB2188AEA
Refrigerator - Top Freezer
Jenn-Air
JTB2188AEB
Refrigerator - Top Freezer
Jenn-Air
JTB2188AEW
Refrigerator - Top Freezer
Maytag
KS58U20NE
Refrigerator - Top Freezer, Top Mount
Maytag
KSU5820NE
Refrigerator
Maytag
MB1927PEHB
Refrigerator - Bottom Mount
Maytag
MB1927PEHB-PMB1927PHB0
Refrigerator - Maytag Refrigerator Model MB1927PEHB-PMB1927PHB0 (MB1927PEHBPMB1927PHB0, MB1927PEHB PMB1927PHB0) Parts
Maytag
MB1927PEHW
Refrigerator - Bottom Mount
Maytag
MB1927PEHW-PMB1927PHW0
Refrigerator - Maytag Refrigerator Model MB1927PEHW-PMB1927PHW0 (MB1927PEHWPMB1927PHW0, MB1927PEHW PMB1927PHW0) Parts
Maytag
MB2227PEHB
Refrigerator - Bottom Mount
Maytag
MB2227PEHB-PMB2227PHB0
Refrigerator - Maytag Refrigerator Model MB2227PEHB-PMB2227PHB0 (MB2227PEHBPMB2227PHB0, MB2227PEHB PMB2227PHB0) Parts
Maytag
MB2227PEHW
Refrigerator - Bottom Mount
Customer Service Representative

Get in touch, we're here to help!

Daily 8am - 9pm EST

Contact Customer Service