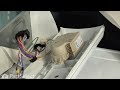
To release the timer knob pull small plastic tab on back of the timer.
How Buying OEM Parts Can Save You Time and Money
Part Videos
Replacing your Maytag Washer Timer
Troubleshooting
This part works with the following products:
Washer.
This part works with the following products:
Maytag, Magic Chef, Admiral, Hoover.
Part# WP21001522 replaces these:
AP6005759, 21001522
Customer Repair Stories
Average Repair Rating: 4.3 / 5.0, 8 reviews.
What's this?
< Prev
1
Next >
Sort by:
Search filter:
Clear Filter
Your search term must have 3 or more characters.
Keep searches simple. Use keywords, e.g. "leaking", "pump", "broken" or "fit".
Sorry, we couldn't find any existing installation instruction that matched.
No water entering,Timer making weird noises.
1st disconnect the power , turn the Water valve off thenRemove the 6 screws holding the Timer console and lay it forward on the Washer.Unplug the Timer power connector. Using the needle nose pliers grab the green shaft @ the back of the Timer and pull it back and this will release the Knob, then pull the Indicator Dial off the shaft. You can now remove the bad Timer and replace it with the new Timer (snap it in place). Push the indicator dial back on the shaft (look @ the configuration,it'll only go back one way, do not force) then line the knob up( there is a rectangular shaped hole inside the knob and it has to go into the rectangular shape on the shaft). Now hold the knob tightly against the timer and go to the back of the timer and push the green shaft forward till you hear it click into the knob (this step is important) if it doesn't lock it can vibrate loose and your washer will not work properly. Put the parts back in place, plug it in, turn the water on and it should be ready to go.I also wanted to add that Maytag Technical support is worthless and useless,I'm thankful I found PartsSelect on the Internet and the Users who shared their repair stories which enabled me to make this repair. I also want to say that Maytag mastered the Art of having Timers made that only last a little past there Warranty Period, 5 year warranty, died at 5 years and 3 months.
Other Parts Used:
John from Dover, PA
Difficulty Level:
Really Easy
Total Repair Time:
30 - 60 mins
Tools:
Screw drivers
25 of 26 peoplefound this instruction helpful.
Was this instruction helpful to you?
Thank you for voting!
The timer would quit after the wash cycle.
1.Removed the back plate from the control panel. 2.Pulled out on the plastic pin (behind the timer) with needle nose pliers in order to release the timer knob. 3.Removed wiring plug and uncliped timer. 4.Installed new timer.
Removed the top cover plate. Some difficulty in getting the cycle knob and skirt off. The whole assembly came out with the cover plate. Removed the screw that held the timer in place, disconnected the electrical connection, inserted the new timer, put the screw in and reconnected the electrical, screwed the top cover plate back on, put on the new skirt and knob, and that was it. Works just fine, and saved me calling a repairman to do it. Who knows how much that would have been!
No need for the Maytag repairman anymore. Video supplied was all that was needed. Could not have been easier.
Other Parts Used:
John from Etna, NH
Difficulty Level:
Very Easy
Total Repair Time:
Less than 15 mins
Tools:
Nutdriver, Screw drivers
2 of 2 peoplefound this instruction helpful.
Was this instruction helpful to you?
Thank you for voting!
Stuck On Wash Cycle
The hardest thing about the repair was moving the washer out in order to repair it. All I did was remove the top back pannel behind the timmer . Threr was a total of 6 screws to remove pannel. Then 1 screw to remove timer from mount and unplug old timer. Then I pluged in new one, then put all the screws back in reverse order thats all !!!!!!!!
Other Parts Used:
TONI from Safford, AZ
Difficulty Level:
Really Easy
Total Repair Time:
Less than 15 mins
Tools:
Nutdriver, Screw drivers
2 of 2 peoplefound this instruction helpful.
Was this instruction helpful to you?
Thank you for voting!
The washing machine timer and knob substained damage from a falling object on the wall. The replacement parts were required and ordered very simply thru the parts list and using the description and pictorial reference, made my repairs very easy and quickly, approximately 15 minutes of time completer
Removed 3 retaining screws of the face plate of the panel. Compressed the 2 pressure clips of the rear panel, which freed up the timer switch and allowing access to 2 harnessed wired connector for easy removal. The new switch reinstalled in reverse of the removal.
I removed the three screws on the top of the control panel and the three screws on the rear shield. This exposed the timer.
Through a hole in the back of the timer, using needle nose pliers, I pulled out the spline securing the timer knob, thereby releasing the timer knob. This is the key to the whole process, because the Maytag manual says that turning the timer knob counterclockwise will release it. That is wrong.
Then I disconected the electrical connector on the timer, and removed the retaining screw on the timer. Next, I pulled the timer out of its snap fit and replaced it. Reversing the steps in described, I replaced the timer and snapped the timer knob on the spline, completing the job.
Other Parts Used:
John from Leesburg, VA
Difficulty Level:
Easy
Total Repair Time:
15 - 30 mins
Tools:
Nutdriver, Pliers, Socket set
2 of 4 peoplefound this instruction helpful.
Was this instruction helpful to you?
Thank you for voting!
Broken Plastic on the timer
I removed the screws and the power connection to the timer. I had to remove the broken plastic piece stuck in the collar with pliers. I as able to get it put back on and working pretty quickly. It is too hard to describe it all here but I got it fixed and saved about 120.00 doing it myself.
Other Parts Used:
Morris from Suwanee, GA
Difficulty Level:
A Bit Difficult
Total Repair Time:
15 - 30 mins
Tools:
Screw drivers, Wrench set
1 personfound this instruction helpful.
Was this instruction helpful to you?
Thank you for voting!
< Prev
1
Next >
Questions and Answers
Ask our experts a question about this part and we'll get back to you as soon as possible!
8 questions answered by our experts.
< Prev
1
Next >
Sort by:
Search filter:
Clear Filter
Your search term must have 3 or more characters.
Keep searches simple. Use keywords, e.g. "leaking", "pump", "broken" or "fit".
Sorry, we couldn't find any existing answers that matched.Try using some different or simpler keywords, or submit your new question by using the "Ask a Question" button above!
Donnie
August 5, 2018
Wont stop filling with water?
For model number pavt234aww
Hi Donnie, Thank you for your question. There are a few parts that you should check to see if they are working correctly. The pressure switch, check to see if your pressure switch hose does not have any tears or breaks, and then also take a look at your water inlet valve as well. If all of those parts are fine, then it may be your timer that is the issue. I hope that helps. Good luck with your repair.
1 person found this helpful.
Was this helpful?
Thank you for voting!
Michael
June 6, 2019
Would the timer wp21001522 work on this machine
For model number PAV2300AWW Rev 20
Hello Michael, Thank you for contacting us. I have researched the model you have provided and have found the part you are looking for is PartSelect Number: PS11738818. Hope this helps!
1 person found this helpful.
Was this helpful?
Thank you for voting!
Walter
December 27, 2019
Washer fills fine but the timer will not advance. The only time the timer advances is in the final spin cycle on the delicate setting. Also the washer only agitates in the delicate cycle but will not advance.
For model number PAV2300AWW
Hello Walter, Thank you for the question. Normally if the Timer Switch is not advancing to the next cycle, the Timer will need to be replaced. We hope this helps!
1 person found this helpful.
Was this helpful?
Thank you for voting!
Desi
February 3, 2022
May washer does not spin, every other cycle works fine till it gets to spin part
For model number Hav2357aww
Hello Desi, thank you for writing. We recommend the Transmission Pulley and Bearing Kit PartSelect Number PS2003651. The kit is used to help the washer drain, and may need to be replaced if the washer is experiencing slow or no spin. We have an installation video for you to access. We hope to hear from you soon.
Old timer was loud and would not advance in delicate cycle. I replaced timer and it works in all cycles but in delicate cycle it will not spin,it advances but does not spin.
For model number PAV2300AWW Rev 12
Hi Jerry, sadly I was unable to find any information relating to this specific symptom. I would consult a local technician or call the manufacturer directly. Thank you for your question and good luck with your repair!
Was this helpful?
Thank you for voting!
Gary
January 16, 2019
Can not get the control panel cover open/off to replace the timer
For model number WTW57ESVW1
Hello Gary, Thank you for the question. You will need to use a putty knife to release the clips on each front corner of the end caps on the sides of the control panel. Then remove the screws on the back of the panel and slide the panel ahead about and inch and tip it back to gain access to the timer. Thank you for your inquiry, good luck with this repair!
Was this helpful?
Thank you for voting!
Kevin
August 12, 2017
What is wrong when it runs good and fills up, but stops when it gets to the drain and spin cycle?
For model number CAV2000AWW
Hello Kevin, thank you for contacting us. It's possible the timer could not be advancing passed that point. Also if it is not draining the drain pump either could be clogged or faulty which will need to be replaced. Hope this helps!
Was this helpful?
Thank you for voting!
Jim
January 27, 2018
Removing the knob has stopped me. Removing the plastic tab in the shaft does not work, there is no plastic tab and pressing the knob and turning ccw does not work. Is there a third technique?
For model number SAV3655AWW
Hi Jim,
Thank you for your question. Unfortunately no. We do have an installation video that may help you to remove this part: https://youtu.be/MbM3XM_iXdM . Perhaps a visual on how to do it may help? I hope that works. Good luck with your repair.
Was this helpful?
Thank you for voting!
< Prev
1
Next >
✖
Ask a Question
Ask our experts a question on this part and we'll respond as soon as we can.