




















KHMS2050SSS2 KitchenAid Microwave - Instructions
Keep searches simple. Use keywords, e.g. "leaking", "pump", "broken" or "fit".
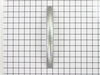
Replaced door handle with worn off silver finish.
Unscrewed 3 screws on side of door and two on the bottom. Slowly pry apart outside frame from black inside facing door. Separate pieces carefully. You won’t have to completely remove outside door cover if you have a short driver for the two Torx screws holding the handle on. Replace and carefully put back together. Tip: do not overscrew the screws, back in, it will easily crack the old plastic.
Parts Used:
-
Dan from TUMWATER, WA
-
Difficulty Level:Easy
-
Total Repair Time:15 - 30 mins
-
Tools:Screw drivers
2 of 2 people
found this instruction helpful.
Was this instruction helpful to you?
Thank you for voting!
Loud noise

-
Cynthia from DRIPPING SPGS, TX
-
Difficulty Level:Really Easy
-
Total Repair Time:15 - 30 mins
-
Tools:Screw drivers
1 person
found this instruction helpful.
Was this instruction helpful to you?
Thank you for voting!
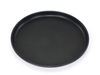
my pan that browns the meat started to bubble and peal
I really did not have a repair on the microwave just a replacement of the browning pan
Parts Used:
-
Lillian from SAN JOSE, CA
-
Difficulty Level:Really Easy
-
Total Repair Time:Less than 15 mins
1 person
found this instruction helpful.
Was this instruction helpful to you?
Thank you for voting!
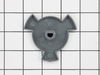
lost the driver
-
Luiz from Washington, DC
-
Difficulty Level:Very Easy
-
Total Repair Time:Less than 15 mins
1 of 2 people
found this instruction helpful.
Was this instruction helpful to you?
Thank you for voting!
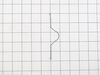
Lost spring that holds filter in hood that was lost when cleaning it.
simply removed the filter casing from the microwave, then removed both filters and inserted the spring after bending it slightly.
Parts Used:
-
Raymond from Mechanicsville, VA
-
Difficulty Level:Really Easy
-
Total Repair Time:Less than 15 mins
1 of 2 people
found this instruction helpful.
Was this instruction helpful to you?
Thank you for voting!
machine was dead.
After removing the over-the-range unit (no small feat!) I had to figure out how to open the case (good puzzle!). Capacitor had already discharged, so it was very easy to reach in, pop the old fuse and install the new one! As per your advice, I found out I was a "28%-er"! Upon re-installation, the microwave "sprang to life"!! Thanks, "Part Select"!! I was already shopping around for a new machine! (Now if you could only tell me an easier way to re-mount this heavy beast over the stove!!!)
Parts Used:

-
Mark from Smithtown, NY
-
Difficulty Level:A Bit Difficult
-
Total Repair Time:1- 2 hours
-
Tools:Pliers, Screw drivers
3 of 8 people
found this instruction helpful.
Was this instruction helpful to you?
Thank you for voting!
Microwave had no electrical
I was sent the wrong fuse by you. I had to procure a fuse in another manner. Very disappointing. The repair was simple. It just took longer because of the failure to send the correct fuse.
Parts Used:
-
Larry from HARKER HTS, TX
-
Difficulty Level:Really Easy
-
Total Repair Time:30 - 60 mins
-
Tools:Pliers
1 of 5 people
found this instruction helpful.
Was this instruction helpful to you?
Thank you for voting!
it was working fine and it stopped order a fuse and it wasn't the problem
took it to Buttermore appliance in Auburn Indiana and he changed the fan and added another fuse
Parts Used:
-
Herb from Auburn, IN
-
Difficulty Level:A Bit Difficult
-
Total Repair Time:1- 2 hours
0 of 4 people
found this instruction helpful.
Was this instruction helpful to you?
Thank you for voting!
Put the Fuse in, then plugged it in came on for a min then everything went out!!!!!
Took the front off and behind a plate was the fuse, so I replaced it for what good that did!!!
Parts Used:
-
Stephen from SPRINGFIELD, WV
-
Difficulty Level:Very Difficult
-
Total Repair Time:1- 2 hours
-
Tools:Pliers, Screw drivers
4 of 18 people
found this instruction helpful.
Was this instruction helpful to you?
Thank you for voting!
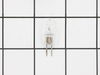
light bulbs nedd to repace it.
-
Jorge from Bay Point, CA
-
Difficulty Level:Really Easy
-
Total Repair Time:Less than 15 mins
-
Tools:Screw drivers
45 of 196 people
found this instruction helpful.
Was this instruction helpful to you?
Thank you for voting!
Light Burned Out
Followed the instruction booklet that came with the microwave. Very easy.
Parts Used:
-
Patti from Coarsegold, CA
-
Difficulty Level:Really Easy
-
Total Repair Time:Less than 15 mins
-
Tools:Screw drivers
Was this instruction helpful to you?
Thank you for voting!
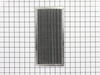
Dirty filters
Removed the dirty ones and put in the new ones. This was really not a repair. No tools needed.
Parts Used:
-
Anna from Antioch, CA
-
Difficulty Level:Really Easy
-
Total Repair Time:Less than 15 mins
Was this instruction helpful to you?
Thank you for voting!
turntable broke, spring was missing, filters needed changing
it was a breeze, the parts arrived in great condition and all was self explanatory, No directions or tools needed - filters replaced, turntable placed back in microwave and spring replaced.
Parts Used:

-
Kristi from Richmond, TX
-
Difficulty Level:Really Easy
-
Total Repair Time:Less than 15 mins
Was this instruction helpful to you?
Thank you for voting!
Turntable Driver was down to two legs . . . one had melted into a blob!
I removed the injured turntable driver . . . had lost one of its three legs due to some sort of uber-thermal meltdown! As a result, the microwave turntable was turning a bit, stopping, turning a bit more, stopping . . . I was concerned I wouldn't be able to find such a tiny little part, but voila . . . PartSelect had what I needed. Other than the cost (it's just a tiny piece of plastic!) and s/h . . . I'm happy to have a fully functional microwave back! I simply popped the new turntable driver into place and replaced the glass turntable and plastic ring.
Parts Used:
-
Marcia from Eugene, OR
-
Difficulty Level:Really Easy
-
Total Repair Time:Less than 15 mins
Was this instruction helpful to you?
Thank you for voting!
Light burned
Unscrewed the lens cover anbd inserted the new bulb. Put the cover back on and there was light!
Parts Used:
-
Jennifer from Red Oak, IA
-
Difficulty Level:Easy
-
Total Repair Time:Less than 15 mins
-
Tools:Screw drivers
Was this instruction helpful to you?
Thank you for voting!