




















CS980ST4SS General Electric Range - Instructions
Keep searches simple. Use keywords, e.g. "leaking", "pump", "broken" or "fit".
broiler element burned completely out
Moved stove out away from wall .Unplugged stove, turned gas off. Unit is a dual fuel convection. Burners are gas, oven is electric. Removed 4 screws from back shield and exposed the 2 electrical leads connected to broiler element. Disconnected the electrical .Inside oven I removed the front bracket holding element in place, then removed the 2 1/4 screws in the back holding element in place. placed new element in and finger tightened the 2 screws, next I installed the front bracket and finger tightened those. I then snugged the rear screws in followed by the front. I went to the back and reconnected the 2 electrical leads. Replaced back shield and plugged unit in and turned gas back on.Caution; Make sure your gas line is flexible before moving your stove out to far. Repair was very easy
Parts Used:

-
Raymond from Highland, MI
-
Difficulty Level:Really Easy
-
Total Repair Time:15 - 30 mins
-
Tools:Pliers, Socket set
Was this instruction helpful to you?
Thank you for voting!
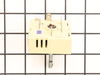
Cooktop cleaner was sprayed on top of dial causing short circuit
A cleaning spray was allowed to caused a short circuit of the infinite control switch. Here is the sequence of a very easy way to repair it: Turn off the power to the unit. Take the bottom metal cover off. You should be able to find the one that was burnt out (my was the bigger surface burner switch). Take photos of how each colored wire are connected ( I used my cell phone). Review the photos!! You will see that the switch has two clamps holding the metal cover to the plastic casing on the sides. Using a narrow screw driver, pop loose the plastic casing from the metal clamps. This way you don't have to take the unit totally apart. The metal casing should be fine. Clean it well, making sure it is dry. Take the new switch and also take the plastic casing from the metal top cover. Replace the metal pin and the plastic casing only. Make sure you line it up the same way with the little blue box in the same orientation. You may not have enough room for your hand and your view. By feel, you should be able to place it there and pop it in. Check the taken photos and connect the wires following the same diagram. Replace back the metal cover. Turn the power on. Enjoy dinner!!! Michael.
Parts Used:
-
Michael from Jacksonville, FL
-
Difficulty Level:Really Easy
-
Total Repair Time:15 - 30 mins
-
Tools:Screw drivers
Was this instruction helpful to you?
Thank you for voting!
the bottom element of the oven was broken
attached the element,pushed it back in the pocket,put the plate back on, screwed the nut and bolt back on and was done in less than 4 minutes!!
Parts Used:

-
DAVID from PARIS, MI
-
Difficulty Level:Really Easy
-
Total Repair Time:Less than 15 mins
Was this instruction helpful to you?
Thank you for voting!
Bake Element burnt out
-
Greg from Chicopee, MA
-
Difficulty Level:Really Easy
-
Total Repair Time:Less than 15 mins
-
Tools:Socket set
Was this instruction helpful to you?
Thank you for voting!
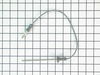
Oven Probe broke
-
Kathleen from Munt Laurel, NJ
-
Difficulty Level:Really Easy
-
Total Repair Time:Less than 15 mins
Was this instruction helpful to you?
Thank you for voting!
Old bake element burned out
Turned off circuit breaker, removed screws holding old element in with nut drivers, pulled out old element about 3-4" to reach terminals connected to back of element, removed spade lug terminals with needle nose pliers. Reconnected terminals to new element and screwed new element in place with nut drivers. Turned on circuit breaker and oven. New element works perfectly. Took about 8-10 minutes. Very easy to do.
Parts Used:
-
Thomas from Hamilton, VA
-
Difficulty Level:Really Easy
-
Total Repair Time:Less than 15 mins
-
Tools:Nutdriver, Pliers
Was this instruction helpful to you?
Thank you for voting!
Broken bake element
-
Marcus from Lagrange, GA
-
Difficulty Level:Really Easy
-
Total Repair Time:Less than 15 mins
-
Tools:Pliers
Was this instruction helpful to you?
Thank you for voting!
missing meat thermistor
-
John R from Asheville, NC
-
Difficulty Level:Really Easy
-
Total Repair Time:Less than 15 mins
Was this instruction helpful to you?
Thank you for voting!
Bake Element Broke
-
Lesley from LaPlace, LA
-
Difficulty Level:Really Easy
-
Total Repair Time:Less than 15 mins
-
Tools:Nutdriver, Pliers
Was this instruction helpful to you?
Thank you for voting!
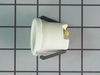
Oven light wire broken, damaged socket
Remove light bail, glass cover held by two nut screws. Pull socket, removed clips in back, replaced wire connectors, placed new socket in, then glass cover and bail. Wire connected in back, cover plate replaced.
Parts Used:
-
Patricia from Brandenburg, KY
-
Difficulty Level:Really Easy
-
Total Repair Time:Less than 15 mins
-
Tools:Nutdriver, Pliers
Was this instruction helpful to you?
Thank you for voting!