




















CS980ST4SS General Electric Range - Instructions
Keep searches simple. Use keywords, e.g. "leaking", "pump", "broken" or "fit".
no heat in oven
removed element found a crack and replaced with new one I got from PartSelect.com. with fast fast shipping,thanks you saved me for spendin more money on a new one. it happened on christmas day of course......
Parts Used:

-
ronda from kingston, OK
-
Difficulty Level:Easy
-
Total Repair Time:Less than 15 mins
-
Tools:Nutdriver
0 of 1 people
found this instruction helpful.
Was this instruction helpful to you?
Thank you for voting!
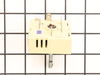
Two burners were not working
I got someone to look at the stove. They told me what I needed. I looked all over the Internet and couldn't find the part. One guy told me just to buy a new stove top because mine was an antique. It still looked good and two burners were still working. I didn't give up. I found the part on partselect bsite and was thrilled. It shipped fast and was exactly the right part. Now my stove works like new.
Parts Used:
-
Terri from Leesburg, FL
-
Difficulty Level:Really Easy
-
Total Repair Time:15 - 30 mins
-
Tools:Screw drivers
3 of 10 people
found this instruction helpful.
Was this instruction helpful to you?
Thank you for voting!
The bottom burner melted
First we removed the screws inside the oven. Next, the oven backing was removed by unscrewing one side and one bottom bolt which exposed the clips for the burner. The clips were removed from the old burner. The old burner was pulled through the fiberglass protection and out of the oven. The new burner was inserted into the oven and the prongs were pushed through the fiberglass protection. The screws inside the oven were reattached. The clips were attached on the outside of the oven. The backing was slid into the right holding piece and the bolts on the left and bottom were attached.
Parts Used:
-
Linda from Virginia Beach, VA
-
Difficulty Level:Easy
-
Total Repair Time:15 - 30 mins
-
Tools:Pliers
0 of 1 people
found this instruction helpful.
Was this instruction helpful to you?
Thank you for voting!
The element started to spark and actually broke into two pieces.
I have a GE Profile oven and the heating element on the bottom broke in two. I found the part on your website very easily. It was easy to see that I had the correct part. I ordered the new element and it came in about three days. I easily took off the old element, but I was really surprised because the new one didn't fit. The heating element itself was the correct size, but the holes didn't quite match up. As a matter of fact I had to take some tin snips and expand the hole at the back of the oven. That was the only hard part, but it was really difficult to lean in that far without putting too much weight on the door. Anyway, I opened the hole about an inch more, plugged it in, and now it works perfectly!
Parts Used:
-
Joe from Austin, TX
-
Difficulty Level:Very Difficult
-
Total Repair Time:15 - 30 mins
-
Tools:Nutdriver, Pliers
0 of 1 people
found this instruction helpful.
Was this instruction helpful to you?
Thank you for voting!
Wires to attach to bake element retracted into stove body
I had to remove the back panel on the stove to free up taped wires to get more length.
Parts Used:
-
Michael from Hamden, CT
-
Difficulty Level:Difficult
-
Total Repair Time:30 - 60 mins
-
Tools:Nutdriver, Pliers
Was this instruction helpful to you?
Thank you for voting!
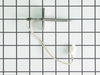
Oven Sensor Replacement
The part was just like the old one and would have been an easy fix except our range suffered from a lighting hit. The clips had melted together. Called a dealer and asked about a new wiring harness. He said in those cases just cut the clip off and hard wire with wire clips,or firecrackers. We used wire nuts and taped all together and the oven works just great. Nothing is ever as easy as it should be.
Parts Used:
-
Barbara from Edwardsville, IL
-
Difficulty Level:A Bit Difficult
-
Total Repair Time:30 - 60 mins
-
Tools:Nutdriver
Was this instruction helpful to you?
Thank you for voting!
bake element needed to be replaced
My oven is wired into the wall so I had to cut the power off at the fuse box. The hardest part was pulling the stove/oven away from the wall to see if it was a simple plug in or wired in. I lifted bottom drawer out so I could get leverage and lifted the entire unit so I could put the front feet on the soft pads. It slid away from the wall easily. I found a socket that fit the screws on the plate holding the broken element and unscrewed it, saving the screws. A gently tug on the element pulled the attached ends through the hole. The tip of the ends were attached to the wall wiring by a small sliding metal clip. I carefully pulled the ends apart. One was hard to get apart to I had to push it with the tip of a knife. Once the old was off the new was super easy to put back on. Side the tips to the clips, screw the plate in place and push the oven back in place. Flip your fuses and turn on the oven. Yeah!
Parts Used:
-
Bernadette from Coatesville, PA
-
Difficulty Level:Easy
-
Total Repair Time:15 - 30 mins
-
Tools:Socket set
Was this instruction helpful to you?
Thank you for voting!
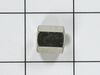
Convection fan came loose from shaft
Convection fan came loose from the shaft with a lout rattle and grinding as the fan spun down. Had to remove four metal screws to remove the fan cover. Initially tried to just put the nut back on to hold the fan. However, I could not get the nut to start, so I assumed that threads were stripped on the nut or the shaft. Ordered the replacement nut, hoping that it was the nut that was the problem. However, I had the same problem with the new nut. I could see no damage on the shaft. It finally occurred to me that the nut and shaft had left-hand threads (counter-clockwise to tighten). At that point, it was extremely easy to put the nut back on and tighten it. I did not try using the old nut, since I had already received the new one, but I'm certain that if I had come to that realization earlier, I could have saved time and money. So, if you have the same problem, try putting the nut on "backwards."
Parts Used:
-
Thomas from Albuquerque, NM
-
Difficulty Level:Easy
-
Total Repair Time:15 - 30 mins
-
Tools:Socket set
Was this instruction helpful to you?
Thank you for voting!
Bake element not working
Removed element with 1/4 " nut driver, unhooked element,started to install new element and discovered the wires were too short and had to remove cover on the back to replace wires on the new element. The wires on my range were not as long as the ones showed on the video.It was still an easy repair and the delivery time was less than 2 days. excellent service. Thanks
Parts Used:
-
Rodney from Chambersburg, PA
-
Difficulty Level:Easy
-
Total Repair Time:15 - 30 mins
-
Tools:Nutdriver, Screw drivers
Was this instruction helpful to you?
Thank you for voting!
Oven would not reach bake temp.
Used the TS guide, because I had no idea what the problem was. That was easy step by step. Thanks. Gave me a list of two parts that could fix the problem. Picked the higher percentage part (97%). Followed the simple install instructions and it was successful. One problem I did encounter was the two wires that it connected to were short. Removed the back center plate to gain access to the wires. I was able to extend them enough to make the connections to the bake element. If not for that the repair would have only taken maybe 10 minute's.
Parts Used:
-
Thomas from Rogersville, TN
-
Difficulty Level:Easy
-
Total Repair Time:15 - 30 mins
-
Tools:Nutdriver, Pliers
Was this instruction helpful to you?
Thank you for voting!
Bake element buned and broken
The repair was somewhat easy. The replacement elements are pushon type. The only thing is that the G.E. Hotpoint wire on the right side of the bake element is short. Be extra careful to not have it go back into the back oven wall or you will have to take the back cover plate (Pull out the range, remove the back cover using a nut driver or a magnetic tip srewdriver with the bit removed works[Wires are right there]. This is as easy a job as can be.
Parts Used:

-
Charles from Pittsburgh, PA
-
Difficulty Level:Easy
-
Total Repair Time:15 - 30 mins
-
Tools:Nutdriver, Pliers, Screw drivers
Was this instruction helpful to you?
Thank you for voting!
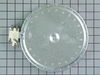
A large burner (haliant Burner 8" ) went out on my Hotpoint Electric Range
I ordered the part on a Monday and Tuesday afternoon I received it! I went a route I often take first. I read the instructions of others before starting my job and opened the top of the range. There are two screws under the range top in front near the oven door, one on either side, that must be removed. After this I opened the top of the range and positioned a piece of 2X2 about 20 inches long at an angle to hold the top up while I worked on the burner. I then used my phone to take a close up picture of the old burner while in place in my range so I could refer to it when putting the new one in place. I then took a pair of needle nose pliers and pulled off the wiring, then removed lock washers under the burner and removed the old burner, being careful not to lose the washers and springs. I took the new burner and layed it along side the old one to see exactly how it would be placed under the glass cover. I replace the springs and lock washers then referred to my photo and replace all the wires to the burner as they had been. Then lowered the top in place and put the screws back in place. That was it. I'm a 67 year old female, if I can do this, anyone can!
Parts Used:
-
Ruth from Potosi, MO
-
Difficulty Level:Easy
-
Total Repair Time:15 - 30 mins
-
Tools:Screw drivers, Wrench set
Was this instruction helpful to you?
Thank you for voting!
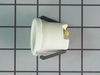
broken light socket
The only tool needed was a nutdriver to remove the lamp socket. I needed my head mounted light to see what I was doing, and everything went smoothly from there. Simple job.
Parts Used:
-
James from Monterey, TN
-
Difficulty Level:Easy
-
Total Repair Time:15 - 30 mins
-
Tools:Nutdriver
Was this instruction helpful to you?
Thank you for voting!
burner worked on high only
Followed directions from Rodney of Erath La. Directions were perfect and helped me to decide to under take this job. Job took a little longer spending some time to clean the glass top on both sides and around the counter top where it mounts. The actual repair time was quick and easy thanks to Rodney. Price of the part was reasonable and delivery got here quick. Will deal with parts select again! Carl from Florida
Parts Used:
-
Carl from Delray Beach, FL
-
Difficulty Level:Really Easy
-
Total Repair Time:30 - 60 mins
-
Tools:Screw drivers, Socket set
Was this instruction helpful to you?
Thank you for voting!
bakinf element not working
-
Jerry from Dallas, GA
-
Difficulty Level:A Bit Difficult
-
Total Repair Time:1- 2 hours
Was this instruction helpful to you?
Thank you for voting!