




















59677533702 Kenmore Refrigerator - Instructions
Keep searches simple. Use keywords, e.g. "leaking", "pump", "broken" or "fit".
crisper drawer center rail broke
Really easy once I figured out which way the rail went in.
I used the repair as an excuse to clean the refrigerator!!
I used the repair as an excuse to clean the refrigerator!!
Parts Used:


-
Diane from Glendale, AZ
-
Difficulty Level:Easy
-
Total Repair Time:30 - 60 mins
5 of 11 people
found this instruction helpful.
Was this instruction helpful to you?
Thank you for voting!
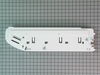
Plastic hinge pin broken on original endcap
Really easy - Remove drawers, remove glass shelf and associated support rails, remove drawer slide from old endcap, remove old endcap, reverse proceedure installing new endcap - now the hard part, have a cool softdrink while you carry the old endcap and packing material from the new one out to the trash.
By the way - the part got here really fast - thanks for the great service.
By the way - the part got here really fast - thanks for the great service.
Parts Used:
-
ROBERT from Lufkin, TX
-
Difficulty Level:Really Easy
-
Total Repair Time:30 - 60 mins
-
Tools:Nutdriver, Screw drivers
2 of 2 people
found this instruction helpful.
Was this instruction helpful to you?
Thank you for voting!
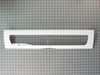
Door on the pullout lower "Pantry" had cracked
Part was pretty ubiquitous so plastic door pins part fits a lot of refrigs, no tools necessary, new part is flexible enough to bend slightly to fit over pins at side. Mine was a bottom freezer type.
Parts Used:
-
Donald from RICHMOND, IN
-
Difficulty Level:Really Easy
-
Total Repair Time:30 - 60 mins
2 of 2 people
found this instruction helpful.
Was this instruction helpful to you?
Thank you for voting!
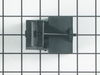
Bad Compressor Start Device and Capacitor
Followed Youtube video from Free Repair Help. Only problem was getting down low enough to see the pins on the Compressor to plug the replacement Compressor Start Device and Capacitor-could not replace the old clip to hold the unit to the Compressor like the old unit had. At 77 I just have a problem bending over.
Parts Used:
-
JOHN from LOVELAND, OH
-
Difficulty Level:A Bit Difficult
-
Total Repair Time:30 - 60 mins
-
Tools:Screw drivers, Socket set
2 of 2 people
found this instruction helpful.
Was this instruction helpful to you?
Thank you for voting!
broken end cap
took out the drawers and glass shelf and unscrewed the sides took parts for drawer glide off put them on the new part reinstallled saved $110 service cll and $20 on the part!
Parts Used:
-
chris from las vegas, NV
-
Difficulty Level:Easy
-
Total Repair Time:15 - 30 mins
-
Tools:Nutdriver, Screw drivers
3 of 5 people
found this instruction helpful.
Was this instruction helpful to you?
Thank you for voting!
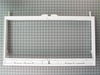
Too much weight on shelf over time caused it to crack down middle
Removing the old pieces & figuring out how to separate the front trim so it could be reinstalled on the new frame took the longest! (released the securing tabs with a screw driver). Reinstalling the new parts were straight forward, "no problem". (epg)
Parts Used:
-
EMILE from RACELAND, LA
-
Difficulty Level:Easy
-
Total Repair Time:15 - 30 mins
-
Tools:Screw drivers
2 of 2 people
found this instruction helpful.
Was this instruction helpful to you?
Thank you for voting!
Parts broken or missing
followed instructions and used common sense and the salesman was very helpful and knowledgeable and he contributed a lot of help in finding the right parts that fit
Parts Used:
-
Carlton N from VALDOSTA, GA
-
Difficulty Level:Really Easy
-
Total Repair Time:15 - 30 mins
-
Tools:Nutdriver
2 of 2 people
found this instruction helpful.
Was this instruction helpful to you?
Thank you for voting!
Cracked lid, broken hinge - right side
Two phillips head screws out to remove drawer slide. Three screws to remove right side drawer support. New support placed, new lid snapped into place. The right side has an adjustment lever. Re-routing that took the longest. The arm had to be removed and twisted to get the adjustment knob off and on.
Parts Used:
-
David from Plattsburgh, NY
-
Difficulty Level:Really Easy
-
Total Repair Time:15 - 30 mins
-
Tools:Nutdriver, Screw drivers
2 of 2 people
found this instruction helpful.
Was this instruction helpful to you?
Thank you for voting!
Broken plastic hinge holding bottom drawer lid.
Took the food out. A couple of screw removals. Put drawer lid on and then put the screws in. Nothing to it.
Parts Used:
-
Bob from Blair, NE
-
Difficulty Level:Really Easy
-
Total Repair Time:Less than 15 mins
-
Tools:Nutdriver
2 of 2 people
found this instruction helpful.
Was this instruction helpful to you?
Thank you for voting!
Our deli drawer had a cracked cover window.
Extremely simple to replace the entire cover. Just had to press on the sides to remove the cover from the hinge pins, then reinstall.
Parts Used:
-
LARRY from HUTTO, TX
-
Difficulty Level:Really Easy
-
Total Repair Time:Less than 15 mins
3 of 5 people
found this instruction helpful.
Was this instruction helpful to you?
Thank you for voting!
Crisper frame, rail and drawer lid were busted.
These particular pieces just snap into position. Really could not have been any easier. Just glad I found PartSelect to get needed pieces.
Parts Used:
-
Dave from Atlantic Highlands, NJ
-
Difficulty Level:Really Easy
-
Total Repair Time:Less than 15 mins
3 of 5 people
found this instruction helpful.
Was this instruction helpful to you?
Thank you for voting!
Hinge on 'goumet lid' in front broke off
Wasn't a big deal. Removed the the shelves and glass immediately above the endcap as well as the large 'goumet' draw. Used a nutdriver to remove two screws. Popped off the old endcap and did everything in reverse. Replaced the long clear goumet draw cover that was still intact. Thanks for making it easy!!!!
Parts Used:
-
Erik from Cumming, GA
-
Difficulty Level:Easy
-
Total Repair Time:Less than 15 mins
-
Tools:Nutdriver
2 of 2 people
found this instruction helpful.
Was this instruction helpful to you?
Thank you for voting!
The Tab on which the lid swings broke on the left side.
An ideal opportunity to clean the tracks for the glass top and sides. I just removed the two (2) screws with nut driver and gently eased the end cap off by slightly pulling it forward and up, inserting the lid onto the new endcap and slipping the cap back into place securing with the two screws. as easy as pie. I did not change the right end cap as there was no need for it, But if U have to change it U must also first disconnect the back plate.
Parts Used:
-
kenneth from CLEARWATER, FL
-
Difficulty Level:Very Easy
-
Total Repair Time:Less than 15 mins
-
Tools:Nutdriver
2 of 2 people
found this instruction helpful.
Was this instruction helpful to you?
Thank you for voting!
Gasket torn
Pulled old gasket off door put new one in channel on door pushed gasket in channel less than 10 minutes
Parts Used:
-
Ronald from ALIQUIPPA, PA
-
Difficulty Level:Very Easy
-
Total Repair Time:Less than 15 mins
2 of 2 people
found this instruction helpful.
Was this instruction helpful to you?
Thank you for voting!
The crisper frame itself was broken in the back little tab
I just watched the YouTube video that you guys provided and did it exactly step by step and it was perfect
Parts Used:
-
Connie from HESPERIA, CA
-
Difficulty Level:Very Easy
-
Total Repair Time:Less than 15 mins
-
Tools:Screw drivers
2 of 2 people
found this instruction helpful.
Was this instruction helpful to you?
Thank you for voting!