




















3889VRV Magic Chef Range - Instructions
Keep searches simple. Use keywords, e.g. "leaking", "pump", "broken" or "fit".
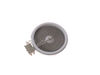
element or temperature sensor failed: not working
Removed unit from counter, removed 14 screws holding glass top to frame, removed ceramic element, swapped over mounting brackets to new element, checked wireing as per instruction sheet (direct replacement) connected wires, re-installed glass top to frame and placed back into counter. ops check good.
Parts Used:
-
David from Mary Esther, FL
-
Difficulty Level:Easy
-
Total Repair Time:30 - 60 mins
-
Tools:Nutdriver, Screw drivers
1 of 3 people
found this instruction helpful.
Was this instruction helpful to you?
Thank you for voting!
I'd damaged the old door seal
Once I saw the spring clips on the new door seal, it was easy to understadn how to remove the old seal and install the new one. Looks nice !
Parts Used:

-
kerry from oldsmar, FL
-
Difficulty Level:Really Easy
-
Total Repair Time:Less than 15 mins
1 of 3 people
found this instruction helpful.
Was this instruction helpful to you?
Thank you for voting!
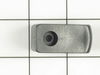
The broiler drawer support broke while removing the drawer for cleaning. Order part through Part-Select, arrived within 4 days, replaced broken part same day.
Broken part was already removed, so I used the screw from the broken support and installed the new support. Very simple, easy, and painless.
Parts Used:
-
Stanley from Brunswick, OH
-
Difficulty Level:Really Easy
-
Total Repair Time:Less than 15 mins
-
Tools:Screw drivers
1 of 3 people
found this instruction helpful.
Was this instruction helpful to you?
Thank you for voting!
broiler drawer supports broken
removed drawer from track replaced supports on track and one on the drawer.
Parts Used:
-
Clarence from Yorktown, VA
-
Difficulty Level:Really Easy
-
Total Repair Time:Less than 15 mins
-
Tools:Screw drivers
1 of 3 people
found this instruction helpful.
Was this instruction helpful to you?
Thank you for voting!
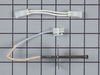
Error code F-1&F-3
Remove two screws back panel and remove sensor two screws inside top oven.
Parts Used:
-
Carl from Franklin, NJ
-
Difficulty Level:Really Easy
-
Total Repair Time:15 - 30 mins
-
Tools:Screw drivers
1 of 3 people
found this instruction helpful.
Was this instruction helpful to you?
Thank you for voting!
light bulb went out in my oven
My husband took the plastic cover off and took out old bulb and screwed in the new one. Then put the cover back on.
Parts Used:

-
Janet from Ada, MI
-
Difficulty Level:Really Easy
-
Total Repair Time:Less than 15 mins
2 of 7 people
found this instruction helpful.
Was this instruction helpful to you?
Thank you for voting!
Light burned out in upper oven
-
Shirley from Las Vegas, NV
-
Difficulty Level:Really Easy
-
Total Repair Time:Less than 15 mins
0 of 1 people
found this instruction helpful.
Was this instruction helpful to you?
Thank you for voting!
replaced oven lightbulb
-
peggy ann from forest city, NC
-
Difficulty Level:Really Easy
-
Total Repair Time:Less than 15 mins
0 of 1 people
found this instruction helpful.
Was this instruction helpful to you?
Thank you for voting!
F2 and F5 if I remember correct.
Removed the two screws pulled the element out and unhooked the wires then used one of the included adapters to reinstall the new sensor then screwed the two screws back in to secure the sensor. Everything works fine now.
Parts Used:
-
Joe from Troy, AL
-
Difficulty Level:Easy
-
Total Repair Time:Less than 15 mins
-
Tools:Pliers, Screw drivers
2 of 7 people
found this instruction helpful.
Was this instruction helpful to you?
Thank you for voting!
oven light burnt out
1. Unscrewed glass cover on bulb
2. Removed old bulb
3. Screwed in new bulb
4. Replaced glass cover
5. Mixed drink & baked cupcakes
2. Removed old bulb
3. Screwed in new bulb
4. Replaced glass cover
5. Mixed drink & baked cupcakes
Parts Used:
-
William from Schwenksville, PA
-
Difficulty Level:Easy
-
Total Repair Time:Less than 15 mins
3 of 10 people
found this instruction helpful.
Was this instruction helpful to you?
Thank you for voting!
Had Spilled Cold Water On Hot Oven Glass
First of all called my local appliance stores and was told that no one had parts because the range was too old. My husband was adamant that we needed a new stove. After much searching found a part on your site. The repair was soo easy a mere woman can do it. Required a screw driver and patiently taking the door apart. Could have been done faster if I had not cleaned everything back to new condition. Easy repair. . . Awesome service from your company!
Parts Used:
-
Yvonne from Wausau, WI
-
Difficulty Level:Really Easy
-
Total Repair Time:30 - 60 mins
-
Tools:Screw drivers
1 of 4 people
found this instruction helpful.
Was this instruction helpful to you?
Thank you for voting!
Bulb Replacement
I pulled down the wire around the glass cover. . . Released on end of the wire from its holder being careful to not let the glass cover drop. Unscrewed the bulb and replaced with replacement. Easy, easy.
Parts Used:
-
Judith from Phoenix, AZ
-
Difficulty Level:Really Easy
-
Total Repair Time:Less than 15 mins
0 of 2 people
found this instruction helpful.
Was this instruction helpful to you?
Thank you for voting!
Light lens broke when self clean cycle was used
I searched Whirlpool, Sears and random appliance stores and Part Select was the only company to have the lens available. All other manufacturers said the lens was no longer manufactured as a stand alone piece and I would have to buy the entire light assembly. Thank you Parts Select!!!!!
Parts Used:

-
James from Buford, GA
-
Difficulty Level:Really Easy
-
Total Repair Time:Less than 15 mins
Was this instruction helpful to you?
Thank you for voting!
replaced short oven senor
watched video provided when ordered part; follow the steps, easy as pie
Parts Used:
-
Vee from Alexandria, VA
-
Difficulty Level:Really Easy
-
Total Repair Time:Less than 15 mins
-
Tools:Screw drivers
Was this instruction helpful to you?
Thank you for voting!
Oven would not heat, F3 code and beeping.
I followed the instructions on this website. Luckily a friend showed me where the sensor was located and from there, it was a breeze. Removed six screws on the back oven panel, removed two screws inside of the oven, took the old sensor out and put the new sensor in. Voila - works great. I can't tell you how much I appreciate Parts Select and the feedback and help from the customers. I've been out of work for almost two years and when I called my repair guy, he said it could be the computer and that would be expensive. That's when I searched on line and found Parts Select. I would have never even attempted this on my own if it weren't for you and it was so simple. Next time anything goes wrong with an appliance, I'll be contacting you first! Thank you.
Parts Used:
-
Kathy from Palos Heights, IL
-
Difficulty Level:Really Easy
-
Total Repair Time:Less than 15 mins
-
Tools:Screw drivers
Was this instruction helpful to you?
Thank you for voting!