




















3889VRV Magic Chef Range - Instructions
Keep searches simple. Use keywords, e.g. "leaking", "pump", "broken" or "fit".
Replaced upper over light and assembly
I had to pull out the oven and balance the oven on two patio tables. Remove the back of the oven. Pull out the light assembly which was burnt. I was unable to remove the casing around the light, so I destroyed it with a pliers. Reinstalling the new light and assembly was easy. What made this job difficult, I could not remove the light assembly from the front of the oven and had to go in from the back.
Parts Used:

-
Thomas from SAN DIEGO, CA
-
Difficulty Level:Very Difficult
-
Total Repair Time:More than 2 hours
-
Tools:Pliers, Screw drivers
1 person
found this instruction helpful.
Was this instruction helpful to you?
Thank you for voting!
original fixture required bulb - this fixture (all-in-one) was great
Pulled range out from cabinet-wall to get to back side, everthing was clearly exposed tlhen. Just a matter of installing new fixture, putting back on, reconnected power source - put range back in proper place.
Parts Used:
-
wesley from ODENVILLE, AL
-
Difficulty Level:Really Easy
-
Total Repair Time:30 - 60 mins
-
Tools:Pliers, Screw drivers
1 person
found this instruction helpful.
Was this instruction helpful to you?
Thank you for voting!
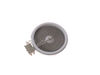
Element burn out. Would not heat
Turn Circuit breaker off.Open the Oven door removed the 2 screws to the top surface. Disconnect the wire harness mark and remove the wires from the Old Element, removed the screws holding the element to top surface, Remove element replace with new element. Install wires, install screws, reconnect wire harness reposition surface. Reinstall screws and turn Circuit breaker power back on. Done and Done
Parts Used:
-
Dennis from AIKEN, SC
-
Difficulty Level:Very Easy
-
Total Repair Time:15 - 30 mins
-
Tools:Nutdriver
1 person
found this instruction helpful.
Was this instruction helpful to you?
Thank you for voting!
Replaced Burned-out Cooktop Element
Exact fit, but read the instructions! Male connectors on element are labeled 1A 1B 2A 2C, very faintly etched in the ceramic. Even though the old and new elements look the same (and I took photos to aid installation), the connector locations are different -- 1A on the old element is where 2B on the new one is, etc. Used included extension wire for one that would not reach with the new configuration and everything works perfectly.
Parts Used:
-
Seth from Old Orchard Beach, ME
-
Difficulty Level:Easy
-
Total Repair Time:15 - 30 mins
-
Tools:Nutdriver
1 person
found this instruction helpful.
Was this instruction helpful to you?
Thank you for voting!
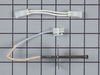
Oven shutting off, getting an F1 error on ECM
Remove rear sheet metal cover. Disconnect the temp sensor wiring connector (on the left side as viewed from front).
Open oven, take out the 2 screws attaching sensor and remove. Reverse for installation.
Included wiring adapters are not needed for this model oven.
Open oven, take out the 2 screws attaching sensor and remove. Reverse for installation.
Included wiring adapters are not needed for this model oven.
Parts Used:
-
Ben from Belen, NM
-
Difficulty Level:Really Easy
-
Total Repair Time:15 - 30 mins
-
Tools:Screw drivers
2 of 4 people
found this instruction helpful.
Was this instruction helpful to you?
Thank you for voting!
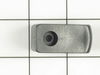
One of the broiler drawer guides broke
All I had to do was pull the drawer out and screw on the new part! Awesome experience...and it was so easy to find the part on the website, everything is very clear and with pictures to ensure where the part belongs...who could ask for more?
Parts Used:
-
Jeri from NEW RICHMOND, OH
-
Difficulty Level:Very Easy
-
Total Repair Time:Less than 15 mins
-
Tools:Screw drivers
1 person
found this instruction helpful.
Was this instruction helpful to you?
Thank you for voting!
The oven did not heat, but the top burners worked fine.
1. Slowly pull the stove from wall. 2. Unplug 120 volts plug from outlet. 3.Turned off the gas outlet. 4. Open the stove door, remove the racks, then unscrew (2) screws that hold the short oven sensor in place. 5. Slowly pull sensor out of it's housing. Remove the clip that holds the sensor. Install new sensor using the clip. Push sensor back through the hole opening. Screw the (2) screws into the mount to secure the sensor. 6. Plug the 120 volt plug into the wall outlet. Turn on the gas outlet. Test stove by turning on oven. It works like a new stove. Wife is happy, and Thanks Giving Dinner is on! Reverse your steps to secure your stove. A total of 25 minutes after cleaning the dust under stove. Thanks for everything. By the way, Thanks Giving Dinner was delicious.
Parts Used:
-
Marvin from DECATUR, GA
-
Difficulty Level:Really Easy
-
Total Repair Time:15 - 30 mins
-
Tools:Screw drivers
1 person
found this instruction helpful.
Was this instruction helpful to you?
Thank you for voting!
broiler drawer hung crooked on one side.
I can't believe how easy this was to fix! I amazingly found the part on-line at PartSelect website. I love that you pick part by size, color, etc. I didn't have a part or model number, so this made it super easy! I ordered the part and got it in the mail within 2 days....YEAH! I got my screwdriver out and attached the peice, slid the drawer back in and shazam! it was fixed! Thank you PartSelect and kudos to the person that set up the way you order your parts......awesome! Thanks!
Parts Used:
-
Denise from Festus, MO
-
Difficulty Level:Easy
-
Total Repair Time:Less than 15 mins
-
Tools:Screw drivers
1 of 2 people
found this instruction helpful.
Was this instruction helpful to you?
Thank you for voting!
Terminal block arc'ed because a wire had become loose.
Ordered and received the terminal block. Installed it along with a new 220V power cord and the appropriate insulator . Ensured the terminals were tight with a nut driver. Reinstalled cover. Then, using the control panel, I did a function check on all the heating elements, clock, oven light, to satisfy all operational requirements. All checked good! And, I was relieved that the control panel had not been shorted out as the terminal block was due to a loose connection. Easy fix.
Parts Used:

-
Larry from Scranton, KS
-
Difficulty Level:Really Easy
-
Total Repair Time:Less than 15 mins
-
Tools:Nutdriver, Screw drivers
1 of 2 people
found this instruction helpful.
Was this instruction helpful to you?
Thank you for voting!
old tube burned out
removed the shield and removed the old tube. Replaced with the new tube and replaced the shield. The only place I could locate this tube was through the internet. This Co. had as good a price including shipping that I found.
Parts Used:

-
JERRY from SPANISH FORK, UT
-
Difficulty Level:Really Easy
-
Total Repair Time:Less than 15 mins
2 of 5 people
found this instruction helpful.
Was this instruction helpful to you?
Thank you for voting!
cleaner
just needed clearner for the top of my glass top, the operator was very helpful I received my clearniner in 7 days thank you
Parts Used:

-
Mary from Duarte, CA
-
Difficulty Level:Really Easy
-
Total Repair Time:Less than 15 mins
2 of 5 people
found this instruction helpful.
Was this instruction helpful to you?
Thank you for voting!
One of the broiler drawer support broke
Piece of cake. Removed the Phillips screw with screwdriver, placed new one on the slide and used old screw to screw it in place. Drawer does not lean to one side anymore.
Parts Used:
-
Jay from Charleston, SC
-
Difficulty Level:Really Easy
-
Total Repair Time:Less than 15 mins
-
Tools:Screw drivers
1 of 2 people
found this instruction helpful.
Was this instruction helpful to you?
Thank you for voting!
oven door seal
easily pulled old seal out and push new seal in place simple and quick.
Parts Used:

-
David from Jacksonville, FL
-
Difficulty Level:Really Easy
-
Total Repair Time:Less than 15 mins
1 of 2 people
found this instruction helpful.
Was this instruction helpful to you?
Thank you for voting!
my stovetop light did not work
We actually had to get the repairman back that had repaired our microwave. Our range has the attached microwave above the range. My stovetop light worked prior to the visit. When he left, I prepared supper without the light, which did not go on. Ultimately, we had to replace the fluorscent tube, which thankfully, you had. No appliance store in a 35 mile radius did. We finally got the glass protector off, and the new tube did not go on. Back to the repairman, to tell him the new bulb did not work and that probably something happened when he visited before. He came back, found that indeed a wire had been broken when he was working on the microwave. I had indicated to him I did not expect to pay another repair bill after I had alrealy spent 117. before plus the cost of the new bulb, 22. something including shipping. He obliged and id not charge me anythink to repair the broken wire.
Now I have the old bulb for back up!!!
Thank you for having my replacement tube!!
Now I have the old bulb for back up!!!
Thank you for having my replacement tube!!
Parts Used:
-
Geraldine M. from Fork Union, VA
-
Difficulty Level:Really Easy
-
Total Repair Time:15 - 30 mins
1 of 2 people
found this instruction helpful.
Was this instruction helpful to you?
Thank you for voting!
burned oven bulb
The hardest part was taking out original light bulb because screws on shield where hard to unscrew after all this years . The old bulb vent out leaving neck in socket. It took narrow electrical pliers to get neck out .The generic appliance bulb did not fit and had aluminum neck ,not recommended for brass sockets in ovens.Putting new light bulb in was not the problem.
Parts Used:

-
Ivanka from Atlantra, GA
-
Difficulty Level:Really Easy
-
Total Repair Time:30 - 60 mins
-
Tools:Pliers, Screw drivers
3 of 9 people
found this instruction helpful.
Was this instruction helpful to you?
Thank you for voting!