




















156-1W (1X) Maytag Range - Instructions
Keep searches simple. Use keywords, e.g. "leaking", "pump", "broken" or "fit".
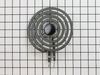
Burners needed replacing
Pulled out the old burners and put in the new ones.
Parts Used:
-
Alene from INDIANAPOLIS, IN
-
Difficulty Level:Very Easy
-
Total Repair Time:Less than 15 mins
1 of 2 people
found this instruction helpful.
Was this instruction helpful to you?
Thank you for voting!
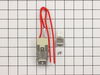
Burner plugs were loose
used the supplied parts...very easy. The parts were exact replacements.
Parts Used:
-
James from CONCORD, NC
-
Difficulty Level:Really Easy
-
Total Repair Time:30 - 60 mins
-
Tools:Nutdriver, Pliers, Screw drivers, Socket set
1 of 2 people
found this instruction helpful.
Was this instruction helpful to you?
Thank you for voting!
burned out stove eye, 6"
remove burned out eye, replaced with new eye.new eye does not fit exactally correct onto splash pan as point on end of steel " rod " not pointed enough to slip into mate on splash pan
Parts Used:
-
Robert from Birmingham, AL
-
Difficulty Level:Easy
-
Total Repair Time:15 - 30 mins
1 of 2 people
found this instruction helpful.
Was this instruction helpful to you?
Thank you for voting!
Receptacle had become bad poor connection.
First I disconnect the breaker. I removed the defected receptacle and cut the wires. I connected the new receptacle with parts with the new part. Turned the breaker back on and everthing worked fine.
Parts Used:
-
JAMES from Harrodsburg, KY
-
Difficulty Level:Really Easy
-
Total Repair Time:Less than 15 mins
-
Tools:Pliers, Screw drivers
1 of 3 people
found this instruction helpful.
Was this instruction helpful to you?
Thank you for voting!
The burner was shortening out and would work sometime. The first time I replace the burner but the new one shorted out quickly.
I unplugged the stove. Took out the burner and removed receptacle by pulling it out of the bracket and clipping the wires. One thing you want to make sure is that when you clip the wires from the receptacle you're replacing you leave enough wire so that you can connect them to the wires on the new receptacle when it is in place on the stove. I had just enough but would have liked more. The bracket I received didn't match the one on the stove so I used the one on the stove since the receptacle itself was the same as the one I was replacing.
Parts Used:
-
shawn from Vancouver, WA
-
Difficulty Level:Really Easy
-
Total Repair Time:Less than 15 mins
-
Tools:Pliers
1 of 3 people
found this instruction helpful.
Was this instruction helpful to you?
Thank you for voting!
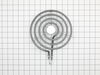
surface element burnout
The repair was just a matter of sliding the old one out and plugging the new one in. The ease of use of this website was wonderful. Super fast shipment. Im very pleased.
Parts Used:
-
david from wellsboro, PA
-
Difficulty Level:Really Easy
-
Total Repair Time:Less than 15 mins
0 of 1 people
found this instruction helpful.
Was this instruction helpful to you?
Thank you for voting!
Electrical receptacle for burner was defective.
After buying a 'universal' part at Lowe's and it not fitting correctly and shorting out the burner, I went online and found this source for an exact replacement part. Beside having to disassemble the drop in stove burner two or three times it went well when I had the correct part. I lost one screw somewhere and that delayed me a short time to find a replacement. Thus the 1 to 2 hours. It would have been about a 30 minute job if I had been smarter.
Parts Used:
-
gerald from Hillsboro, TN
-
Difficulty Level:Easy
-
Total Repair Time:1- 2 hours
-
Tools:Pliers, Screw drivers, Socket set
0 of 1 people
found this instruction helpful.
Was this instruction helpful to you?
Thank you for voting!
one of wire melted and broken off from receptacle
Cut broken wire and existed wire off and put splice on both new and old wires to connect them.
It's easy job.
It's easy job.
Parts Used:
-
Young from Cordova, TN
-
Difficulty Level:Easy
-
Total Repair Time:15 - 30 mins
-
Tools:Pliers, Screw drivers
0 of 1 people
found this instruction helpful.
Was this instruction helpful to you?
Thank you for voting!
Sockets for the burner elementss were burned out
I removed the burner elements for three burners by lifting the surface top and unplugging them. I snapped out the plug sockets that were burned out and cut the two wires, one element at a time. Using the included wire nuts I stripped the ends of the cut wire and connected each wire to one of the wires on the new socket. Once the wires were connected I snapped the sockets in place and reinstalled the elements, lowered the surface top and the range was ready to use.
Parts Used:
-
Martin from Manchester, MD
-
Difficulty Level:Really Easy
-
Total Repair Time:15 - 30 mins
0 of 1 people
found this instruction helpful.
Was this instruction helpful to you?
Thank you for voting!
Old surface element burned out.
I ordered and received the replacement element, then unplugged the old one and plugged in the new one.
Job done.
Job done.
Parts Used:
-
Royce from Rio Rancho, NM
-
Difficulty Level:Really Easy
-
Total Repair Time:Less than 15 mins
0 of 2 people
found this instruction helpful.
Was this instruction helpful to you?
Thank you for voting!
one pole of the socket corroded to nothing
Starting by me making a substitute prong to keep the stove working while the part this coming by mail. was a piece of cake.
Parts Used:
-
martien from williamstown, MA
-
Difficulty Level:Easy
-
Total Repair Time:Less than 15 mins
Was this instruction helpful to you?
Thank you for voting!
surface burner stopped working. Was not heating up.
The repair only took me 10 minutes to do. I purchased the surface replacement kit from partselect.com. The part arrived in two days. The instructions were very simple. I read the instructions on line during my purchase. When I received the new part, I simply did the repair. Including shipping, the cost was less than $20.00. A service call would have been at least 5x the cost. Thank you for being there Partselect. (Tim from south bend indiana)
Parts Used:
-
timothy from south bend, IN
-
Difficulty Level:Really Easy
-
Total Repair Time:Less than 15 mins
-
Tools:Nutdriver
Was this instruction helpful to you?
Thank you for voting!
Porcelan Electric Burner Plug broke
The video on your website showed me how to take out 1 screw, cut the existing wires and strip the ends. The kit came with 2 porcelan wire nuts to re-connect the wires and it was done. Less than 10 minutes. It saved me $100.00 to get it repaired.I bought 2 in case I need another one in the future.They only cost $11.00 each. Awesome website.
Parts Used:
-
John J from Coatesville, PA
-
Difficulty Level:Really Easy
-
Total Repair Time:Less than 15 mins
-
Tools:Screw drivers
Was this instruction helpful to you?
Thank you for voting!
When The Burner Started To Heat (Front) And Then Put The Rice Bag On The Burner. Then The Plastic Bag Began To Burn And The Bag Of Rice Began To Pour Over The Burner. Someone Tried To Clean Up On The Burner But The Burner With Plastic And Hard To Clean The Plastic Off From The Burner.
Just pull the old out from the stove and put new one on the stove and then tested the burner that is working fine. Thank you very much for order the part. Have a great day.
Parts Used:
-
Robert J from Indianapolis, IN
-
Difficulty Level:Really Easy
-
Total Repair Time:Less than 15 mins
Was this instruction helpful to you?
Thank you for voting!
part of original burner not working
slide new burner in slot and turned on stove. Worked perfectly.
Parts Used:
-
SUSAN K from SEDALIA, MO
-
Difficulty Level:Really Easy
-
Total Repair Time:Less than 15 mins
Was this instruction helpful to you?
Thank you for voting!