




















10651762511 Kenmore Refrigerator - Instructions
Keep searches simple. Use keywords, e.g. "leaking", "pump", "broken" or "fit".
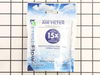
air filter needed replacement
pulled the top shelf and poped open the door and replaced the filter
Parts Used:
-
David from Dublin, NH
-
Difficulty Level:Very Easy
-
Total Repair Time:Less than 15 mins
5 of 6 people
found this instruction helpful.
Was this instruction helpful to you?
Thank you for voting!
Raise side of fridge and slide 2x4 under side with broken wheel.
Remove back side cardboard access cover. About 6 dcrews need to be removed. Remove 9/16” bolt and lower compressor tray frame down to slide out wheel axel. Place wheel in slot and replace axel. Lift compressor tray and replace 9/16” bolt. Replace cardboard cover. Remove 2x4.
Parts Used:

-
Hans from OGDEN, UT
-
Difficulty Level:Really Easy
-
Total Repair Time:Less than 15 mins
-
Tools:Socket set
5 of 6 people
found this instruction helpful.
Was this instruction helpful to you?
Thank you for voting!
Ice maker quick working and made a clicking sound while trying to drop ice
Removed freezer cover from ice maker, unplugged the harness. Installed the new ice maker assembly,plugged in two wire harness and secured the part and cover.
Results was smooth process, no noice from ice dispenser. Pleased with results. Saved on repairs. Thanks Tom
Results was smooth process, no noice from ice dispenser. Pleased with results. Saved on repairs. Thanks Tom
Parts Used:
-
Thomas from HARPER, TX
-
Difficulty Level:Easy
-
Total Repair Time:15 - 30 mins
-
Tools:Socket set
5 of 6 people
found this instruction helpful.
Was this instruction helpful to you?
Thank you for voting!
Refrigerator light would not stay on
Removed the 2 screws holding the light bulb shield, then the 4 uolding the metal panel. Unplugged the olw door switch and replaced.
reassembled the pieces.
reassembled the pieces.
Parts Used:

-
Dave from Manchester Center, VT
-
Difficulty Level:Easy
-
Total Repair Time:15 - 30 mins
-
Tools:Nutdriver, Socket set
4 of 4 people
found this instruction helpful.
Was this instruction helpful to you?
Thank you for voting!
Light in my refrigerator didn't work.
At first I went to a local part supplier and they didn't have it in stock but could order it for me for $55.00 plus $10.00 to ship it. I told them I would have to think about it. I went home and got on the computer and found your web site and was I shocked when I saw the same part listed for $6.98 and $7.00 to ship it. You guys saved me $50.00. The part arrived in two day and took 5 min. to install. I now have light in my refrigerator. Thank you.
Parts Used:
-
Joseph from Byron Center, MI
-
Difficulty Level:Really Easy
-
Total Repair Time:Less than 15 mins
-
Tools:Screw drivers
5 of 7 people
found this instruction helpful.
Was this instruction helpful to you?
Thank you for voting!
Old one leaks on one side
Simply cut the water tube on both sides of connector and push in the new one.
Parts Used:

-
Orlando from Bayonne, NJ
-
Difficulty Level:Very Easy
-
Total Repair Time:Less than 15 mins
4 of 5 people
found this instruction helpful.
Was this instruction helpful to you?
Thank you for voting!
Ice maker not making ice and dripping water
This is an easy fix. The hardest part was just determining which part to replace. But the Q&A's for the ice maker from this site steered me right. And their video on how to install was easy to follow. The only difference I found was my Whirlpool had only 2 electrical connectors instead of the 3 in the video. I finished the job in about 15 minutes so everything in my freezer stayed solidly frozen.
Parts Used:
-
Allen from HOUSTON, TX
-
Difficulty Level:Really Easy
-
Total Repair Time:Less than 15 mins
-
Tools:Screw drivers
4 of 5 people
found this instruction helpful.
Was this instruction helpful to you?
Thank you for voting!
the icemaker make the noise, but wouldn't produce ice. When we took the ice tray off, we saw that the metal piece that turned the ice crusher was broken.
I used the computer to enter the make and model of the refrigerator with the icemaker unit. We looked at the diagram to identify the name of the part and then ordered it. It was sent out the next day! We received it and installed it and it works perfect!
Parts Used:

-
Ruth from Eureka, IL
-
Difficulty Level:Easy
-
Total Repair Time:Less than 15 mins
-
Tools:Screw drivers
7 of 14 people
found this instruction helpful.
Was this instruction helpful to you?
Thank you for voting!
Broken light switch
Watched video. Unplugged refrigerator and popped out switch. In plugged connector and pushed switch in place. Plugged in refrigerator and the light worked
Parts Used:

-
Terry from WARMINSTER, PA
-
Difficulty Level:Really Easy
-
Total Repair Time:15 - 30 mins
-
Tools:Screw drivers
4 of 5 people
found this instruction helpful.
Was this instruction helpful to you?
Thank you for voting!
Not making ice
First turn off the ice maker. Then there's four screws in the very back you remove pull out the cover. There's hex head 516 bolts maybe quarter inch that hold in the ice maker unplug the ice maker reverse process
Parts Used:
-
Jay from WOODWAY, TX
-
Difficulty Level:Really Easy
-
Total Repair Time:15 - 30 mins
-
Tools:Screw drivers, Socket set
4 of 6 people
found this instruction helpful.
Was this instruction helpful to you?
Thank you for voting!
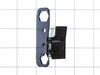
Bottom plastic door cam on side-by-side frig worn, and door stop bracket broken.
1. Removed 2 screws on top hing.
2. Easily lifted door and place on table.
3. Removed set screw for door cam.
4. Removed stop bracket.
5. Reversed steps 4 thru 1.
When tightening top 2 screws, make sure door gap is consistent and top of frig door aligns with the top of the freezer door.
NOTE: The lady at PartSelect who helped me with my order was great. Took the time to verify my parts. Prior to this I had bought the part from a nearby appliance parts store. They sold me the wrong part, even though I showed them a picture of my model number plate b4 ordering. In the future, I will always go to PartSelect for my appliance part purchases.
2. Easily lifted door and place on table.
3. Removed set screw for door cam.
4. Removed stop bracket.
5. Reversed steps 4 thru 1.
When tightening top 2 screws, make sure door gap is consistent and top of frig door aligns with the top of the freezer door.
NOTE: The lady at PartSelect who helped me with my order was great. Took the time to verify my parts. Prior to this I had bought the part from a nearby appliance parts store. They sold me the wrong part, even though I showed them a picture of my model number plate b4 ordering. In the future, I will always go to PartSelect for my appliance part purchases.
Parts Used:

-
Stephen from COLONIA, NJ
-
Difficulty Level:Very Easy
-
Total Repair Time:Less than 15 mins
-
Tools:Nutdriver, Pliers, Socket set
3 of 3 people
found this instruction helpful.
Was this instruction helpful to you?
Thank you for voting!
Broke the Rocker Switch in Fridge side
Popped out with butter knife and unplugged 3 prong connector and reversed with anew switch.
But, unfortunately it got broken again exactly same way as before.
So, I ordered same switch again for 2nd time.
Maytag should recall that Rocker Switch and build with better materials.
But, unfortunately it got broken again exactly same way as before.
So, I ordered same switch again for 2nd time.
Maytag should recall that Rocker Switch and build with better materials.
Parts Used:
-
Sung-Su from BISMARCK, ND
-
Difficulty Level:Very Easy
-
Total Repair Time:Less than 15 mins
4 of 6 people
found this instruction helpful.
Was this instruction helpful to you?
Thank you for voting!
lights wouldn't come on/work in refrigerator
Referencing the info/schematics you have on your website, I unscrewed/unattached top-front panel (carefully), from behind the panel you have to detach the wires (2) from the switch, pushed "in" the switch to remove, put in new switch and attach wires to test BEFORE remounting panel. Tada!! Thank you PartSelect! You saved me at least $80...would have been at least $100 to have a repair person come to the house!
Parts Used:
-
Jane from Albuquerque, NM
-
Difficulty Level:Easy
-
Total Repair Time:15 - 30 mins
-
Tools:Pliers, Screw drivers, Socket set
4 of 6 people
found this instruction helpful.
Was this instruction helpful to you?
Thank you for voting!
My ice maker would only freeze for a short while, after unplugging it for a few hours it would begin to make ice again only to stop after a few trays
The repair went great, however, I had someone to put the part in for me.
Parts Used:
-
Elizabeth from EDENTON, NC
-
Difficulty Level:A Bit Difficult
-
Total Repair Time:30 - 60 mins
3 of 3 people
found this instruction helpful.
Was this instruction helpful to you?
Thank you for voting!
Ice cube tray had a loose part hanging down
-
Roger from BOULDER, CO
-
Difficulty Level:Easy
-
Total Repair Time:30 - 60 mins
-
Tools:Nutdriver, Screw drivers
3 of 3 people
found this instruction helpful.
Was this instruction helpful to you?
Thank you for voting!