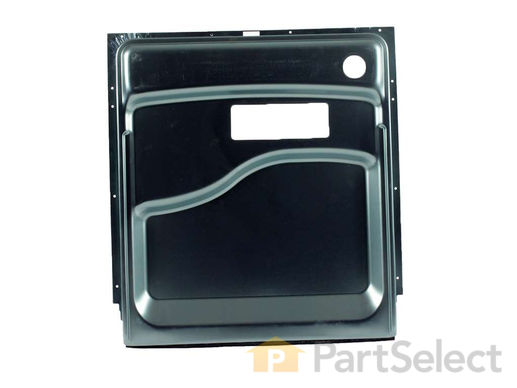
Part Location Diagram of WD31X10114 GE INNER DOOR Assembly
See part 40 in the diagram
( Grid squares measure 1x1 inch )
Customer Service Representative

Get in touch, we're here to help!

Daily 8am - 9pm EST

customerservice@partselect.ca

INNER DOOR Assembly

 Fits your GLDT696T00SS!
★★★★★
★★★★★
1 Review
$152.20
  Special Order
 Fits your GLDT696T00SS!
PartSelect Number PS3486954
Manufacturer Part Number WD31X10114
Manufactured by GE
Troubleshooting
This part fixes the following symptoms:
Leaking
This part works with the following products:
Dishwasher.
This part works with the following products:
General Electric.
Back to Top
Customer Reviews
Average Rating:
★★★★★
★★★★★
1 Review
4.0
Filter By Rating:
  • 5 Stars
    0
  • 4 Stars
    1
  • 3 Stars
    0
  • 2 Stars
    0
  • 1 Star
    0
  • 1
Sort by:
Sorry, we couldn't find any existing reviews that matched. Try using some different or simpler keywords.
  • 1
Customer Repair Stories
 Average Repair Rating: 2.7 / 5.0, 2 reviews. What's this?
  • 1
Sort by:
Sorry, we couldn't find any existing installation instruction that matched.
Replaced inner door
I had to buy the inner door assembly since the seal at the bottom was not available separately. $104 for a $10 part.

Before you take anything apart, shut off the power. There is 110V in the door, and it’s pretty unforgiving.

The inner door assembly is manufactured with razor sharp edges all around. It is fastened with approximately 11,000 Phillips screws, all of which fall under the dishwasher upon removal. The outer door will fall to the floor to indicate you have removed all the screws. Or, you could support the outer door, if you are smarter than I am.

Putting the new inner door on isn’t too bad. Mine was bent a little in shipping, but I bent it straight again, pretty much. I had my 19 year old son help hold it in place, so I could learn how “lame” this activity was. Once a couple of screws are installed, he can go back to sleeping 15 hours a day. Make sure the lower seal is aligned as you tighten the bottom screws.

Once you’re done, turn on the power and run the dishwasher. You’ll learn that the leak is due to a clogged discharge hose, and you just burned an hour an $104.
Other Parts Used:
  • JOHN from VIERA, FL
  • Difficulty Level:
    Easy
  • Total Repair Time:
    30 - 60 mins
  • Tools:
    Screw drivers
5 of 5 people found this instruction helpful.
Was this instruction helpful to you?
Thank you for voting!
Seal on inner door assembly damaged and causing dishwasher to leak at bottom door.
This seal is not a “slide off and slide on” type like other dishwasher inner door assemblies because it’s stainless steel.
CAUTION - THIS COMPONENT IS SHARP AND WILL SEVERELY CUT YOU - I DOUBLED UP ON LATEX GLOVES

1. Remove bottom rack from washer
2. Using Phillips screwdriver remove all screws from inner door area - place towels under exterior of door because it will drop off when all screws are removed. ALSO - there are 4 screws that hold the hinges to the door frame - be careful because the hinges are spring loaded!!
3. Cut the 2 wires feeding the detergent release compartment ( you will have to strip and reconnect them using wire nuts - orange or blues)
4. Slide outer shell up to remove from inner door assembly
5. Remove vent assembly(adjustable pliers) and detergent compartment (4 phillips screws/2 brackets) BE CAREFUL NOT TO DAMAGE GASKETS (you will reuse when reinstalling them on the new inner door assembly).

REASSEMBLY
1. Remove protective film from entire door assembly
2. Install vent & detergent compartment DO NOT FORGET GASKETS
3. CAREFULLY - pull down door hinges far enough to place new inner door assembly in its designated place when in operation THEN allow hinges to slowly touch the inner door assembly
4. Wire up detergent compartment wires you cut earlier
5. Using some means of adhesive (duct tape, double back tape) place to styrofoam filler back in place
6. Slide the outer door assembly on while slowly opening door - pay attention to the outer door assembly door frame so that it goes over the inner door assembly - this is the difficult part and having a second set of hands will help with overcoming obstacles
7. Place all your screws back in place and put the bottom rack back
8. Run the dishwasher empty first through a full cycle so the water level can heat the gasket and check for leaks after running awhile
Other Parts Used:
  • Joe from OKLAHOMA CITY, OK
  • Difficulty Level:
    A Bit Difficult
  • Total Repair Time:
    1- 2 hours
  • Tools:
    Pliers, Screw drivers
4 of 5 people found this instruction helpful.
Was this instruction helpful to you?
Thank you for voting!
  • 1
Questions and Answers

Be the first to ask our experts a question about this part!

Related Parts
Model Cross Reference
This part works with the following models:
PartSelect Number: PS3486954
Manufacturer Part Number: WD31X10114
Brand
Model Number
Description
General Electric
GDT596SSH0SS
Dishwasher
General Electric
GLDT690D00BB
Dishwasher
General Electric
GLDT690D00WW
Dishwasher
General Electric
GLDT690D02BB
Dishwasher - DISHWASHER
General Electric
GLDT690D02WW
Dishwasher - DISHWASHER
General Electric
GLDT690J00BB
Dishwasher - DISHWASHER
General Electric
GLDT690J00WW
Dishwasher - DISHWASHER
General Electric
GLDT690T00BB
Dishwasher
General Electric
GLDT690T00WW
Dishwasher
General Electric
GLDT696D00SS
Dishwasher
General Electric
GLDT696D02SS
Dishwasher - DISHWASHER
General Electric
GLDT696J00SS
Dishwasher - DISHWASHER
General Electric
GLDT696T00SS
Dishwasher
Customer Service Representative

Get in touch, we're here to help!

Daily 8am - 9pm EST

Contact Customer Service