Order within the next 4 hrs and your part ships today!
Fits your LA5500XTG0!
About This Part
What it does. Why it matters. Everything you need to know for an easy fix.
Washer Clutch Assembly Specifications
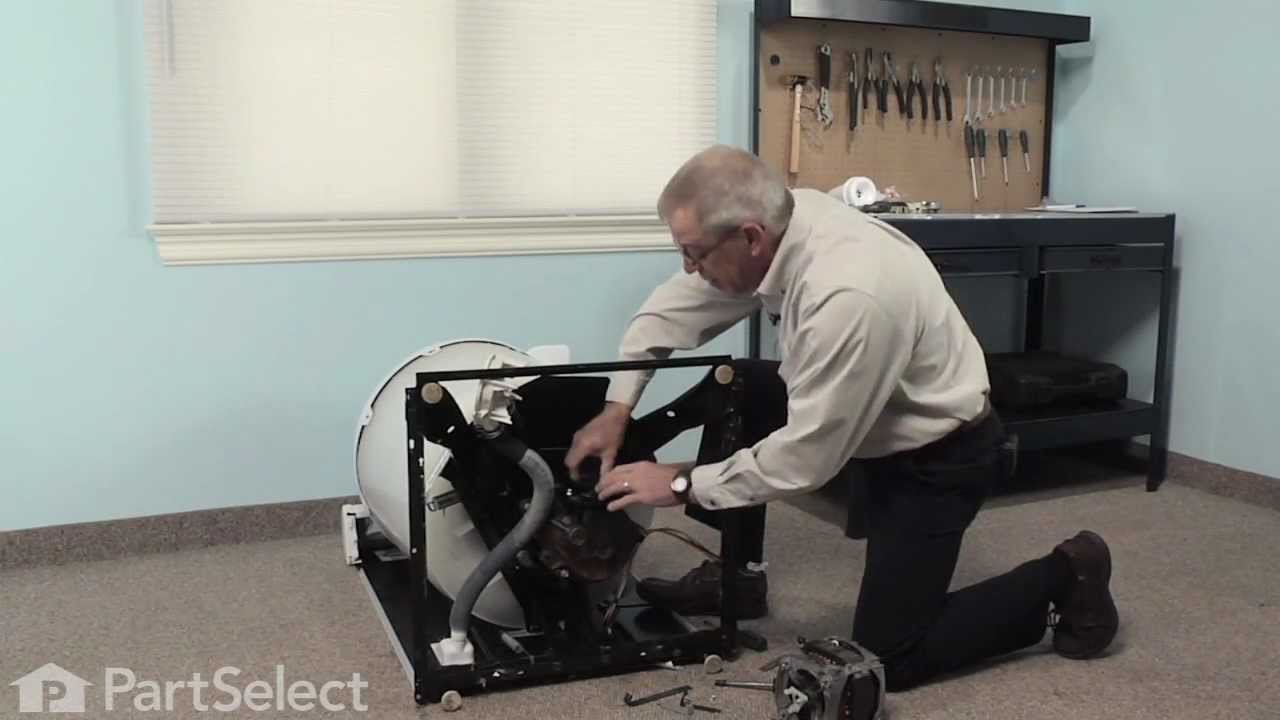
A worn clutch can cause a slower spin speed which will leave your clothes wet after a cycle. This clutch assembly comes with brake cam driver, blue spring for large capacity washers and black spring for compact washers. As per factory, the blue spring (1.24") replaces the black spring (1.46").
Part #285785
Manufactured by
Whirlpool
for Whirlpool, Kenmore, KitchenAid, Roper
Real ratings from other people who bought this part.
Average Rating:
★★★★★
★★★★★
57 Reviews
4.9
Out of 5
5 Stars
51
4 Stars
6
3 Stars
0
2 Stars
0
1 Star
0
Search reviews left by others. DIY doesn't mean you have to do it alone. Use simple keywords like "fit", "broken", "easy", or "quality" to find reviews that match!
Search filter:
Clear Filter
Your search term must have 3 or more characters.
Sort by:
Prev
1
2
3
Next
Sorry, we couldn't find any existing reviews that matched. Try using some different or simpler keywords.
★★★★★
★★★★★
Gabriel L - July 24, 2026
Verified Purchase
piece et livraison
Les pièces sont arrivées en bonnes conditions et très rapide
★★★★★
★★★★★
Gregory H - April 28, 2021
Verified Purchase
Exactly the part I needed.
Easy Job, the part was perfect. My washer will now spin properly.
★★★★★
★★★★★
Michael S - November 7, 2020
Verified Purchase
Very good
Exactly what I needed. Repair complete with the aid of the video. Completely satisfied.
★★★★★
★★★★★
Chris K - June 6, 2019
Verified Purchase
Heavy Duty Kenmore washer repaired works like new.
Originally ordered the direct drive coupling. The washer would spin but intermittently. We could only run small loads. I didn't want to have to take the Washer apart twice so I ordered the clutch just in case. The video was quite helpful but not exactly the same Washer. It took about 2 hours, replaced both the Clutch and the coupling but it was the clutch that was the issue. It works like new and I expect it to be a lasting repair. Fast shipping! Very happy to have saved so much money by repairing it myself.
★★★★★
★★★★★
Joan M - July 4, 2019
Verified Purchase
The part was installed with no issue. Machine is now working as it should.
The part came very quickly and I' m very satisfied with PartSelect.
★★★★★
★★★★★
Remo G - March 12, 2025
Verified Purchase
Great part
The part was in great condition and worked great for the stacker machine I fixed it was a Whirlpool machine thank you I would recommend it to anybody
★★★★★
★★★★★
Allen S - March 21, 2025
Verified Purchase
Right part, came quickly, happy! Thanks
Will be using this company for my requirements, good quality and quick arrival
★★★★★
★★★★★
Patrick B - March 15, 2020
Verified Purchase
When order part they send video how to change it.
The part was perfect fit. It works great. The washer is like new again. Thanks.
★★★★★
★★★★★
Kenneth F - January 10, 2019
Verified Purchase
Exact replacement parts.
Fast delivery, fair price, helpful troubleshooting and installation video online.
★★★★★
★★★★★
Chuck B - July 18, 2020
Verified Purchase
The part fit perfectly, fixed the problem I had
The washer had the problem of not straining all the water out of the clothes after spin cycle. My old clutch was worn out but I would not have guessed that without the diagnostic aid. New part is well built, and fit perfectly. Super easy repair, took me about 35 minutes.
Prev
1
2
3
Next
Repair Tips
See how others fixed this model. Time, tools, difficulty, and steps that lead to victory!
Easy
1- 2 hours
Average repair rating from 70 real customers like you
Sort by:
Prev
1
2
3
Next
Search repair tips from other customers using simple keywords like "replace", "fit", "remove", "inspect". DIY doesn't mean you have to do it alone!
Search filter:
Clear Filter
Your search term must have 3 or more characters.
Sorry, we couldn't find any existing installation instruction that matched.
spin cycle did not engage
500 of 540 peoplefound this instruction helpful.
Andrew from SLC, UT
Easy
30 - 60 mins
Nutdriver, Pliers, Socket set
researched potential causes, found cluch dust under the washer and determined that it wouldn't engage because clutch was too worn. ordered the assembly, removed agitator from inside the tub as it is connected to the gear shaft, turned washer on it's back for access to motor, unattached the direct drive water pump from the motor drive, unb
... Read moreolted the 3 gearcase mounting bolts and took the entire gearcase, shaft, motor, etc... together, out from under the washtub. the clutch slides off the gearshaft with a little fidgeting and the new assembly is easily installed where the previous was. put everything back together... then... spin spin! worked perfectly
Read less
Was this helpful?
Thank you for voting!
Clothes washer would not spin with more than a couple socks in it. It would barely spin when empty.
257 of 266 peoplefound this instruction helpful.
Shawn from Longmont, CO
Easy
30 - 60 mins
Pliers, Screw drivers, Socket set
Diagnosing the problem was the toughest part. I originally called a repair man - described to him the problem and he said it was most likely the transmission (gearbox)... of course that is one of the most expensive parts! I asked him if it was maybe the clutch... he said there was no clutch.. only a brake... I knew he was wrong after rese
... Read morearching. The fact that the washer would agitate fine and spin very light loads but not spin anything heavy told me it was NOT the gearbox.. or the brake.. it was the clutch.. it had to be... so I called the repair man and canceled the appointment I had made then ordered the clutch assembly. Showed up very quickly. Now to the repair. I realized that I did not have to take apart the cabinet section of the washer.. I only needed access to the bottom. My washer - a 5 year old Whirlpool Gold Ultimate Care II had just a piece of foam blocking off the bottom of the washer... Easy access... I disconnected the hot and cold water and the drain tube. I removed the hot and cold water tubes from the back of the washer also so they would not get crushed when I laid the machine on its back. I unplugged the washer also. The drain tube I left connected to the washer.. I was afaid of it getting crushed while on its back, so I bunched up a large towel put it on the floor and tilted the washer slowly back onto it... the towel was enough of a spacer to keep the drain hose from getting crushed. I used a couple pieces of Duct Tape to hold the lid shut while on its back. I then removed the foam insert on the bottom. Then I unplugged the wiring harness. and a single wire that had a spade connector in the same area. I then removed the clips from the plastic water pump and slid it off the motor (I used Duct Tape again to suspend the water pump up and out of my way while I proceeded) I did NOT have to remove the motor from the gearbox. I used a socket wrench and unbolted the 3 gearbox bolts. I was able to take the whole unit, gearbox and motor out in one piece.. it slid right out (you will have to unscrew the the bolt in the top of the agitator/dispenser shaft - then the gearbox unit with the shaft will slide right out, I did this before I put the washer on it's back) Once it was slid out, I removed the clutch then reinstalled the same way I took it off. The only hard part was the circular wire retainer install for the clutch. It CAN all be done .. I ended up using 2 screwdrivers to put the new retaining ring into the new clutch assembly.. One screwdriver would hold down part of the retaining ring and the other I used to continue pushing the ring into place.. don't give up! You will get it in.. even with normal tools (This was the hardest part of the whole install) It took me 5 minutes with some force and fiddling. I also swapped in the new plastic piece that came with the clutch assembly... you will see where it goes... the old plastic piece looked fine, but I changed it out anyways - it hooks the clutch to the brake system it looks like. After the new clutch assembly was installed I just put it all back together the way I took it apart. One thing I will add was I was not sure if the clutch had to be lined up when I slid the shaft back into the washer.. It does not have to be.. It will align itself automatically. You know when you hear that click/pop when the washer is about to spin?.. well that is that plastic piece engaging with the clutch... there was a piece or two that fell off the shaft when I had removed it.. While sliding the shaft back into the washer I had to just put the pieces back on the shaft before I put the bolt back into the top of the agitator/shaft...
Summary: Get the washer on its back - unplugged! remove wire(s) Harness from motor remove water pump unbolt 3 bolts holding the gearbox slide gearbox and motor out as one piece ( a bit heavy) remove and replace clutch assembly (pay attention to how things are removed)
Done! put it all back together... hope that helps. It worked perfect for me.. and m
Read less
Was this helpful?
Thank you for voting!
Would not spin unless helped
116 of 138 peoplefound this instruction helpful.
Ernest from Oakdale, CT
Easy
30 - 60 mins
Pliers, Screw drivers, Socket set
Turned off water supply, disconnected hoses so I could lay on its back.( drain hose also ) have something to catch all the water in. There will be some residual water so have something to wipe it up. Removed agitater, then I removed the spanner nut with hammer and punch. layed it on its back, removed the three mounting bolts that hold the
... Read more gearcase to the tub support. Removed wire harness and ground wire , pulled gearcase and shaft out . Removed spin tube thrust washer, removed support ring from groove in shaft , removed retaining ring , slid clutch off shaft ,installed new clutch. Take care to watch how parts are removed so that they are installed in proper orientation. Since I had it this far apart I decided I should replace the coupling. I removed the two motor retainers , seperated coupling , pulled both halves off shafts , installed new halves , they go on a lttle tight , newer couplings have metal inserts , aligned coupling halves , inserted together , put motor retainers back on , tightened small screws,done.
would not completely spin all the water out of clothes
98 of 109 peoplefound this instruction helpful.
Ron from bellbrook, OH
Easy
1- 2 hours
Nutdriver, Pliers, Screw drivers, Socket set
I replaced the clutch and coupler. The clutch was well worn. My wife had washed three or four loads of heavy rugs and we think that was the cause of the premature wear. We now take the rugs to a commercial laundry. The coupler was OK but the new coupler has metal instead of plastic inserts so I decided to replace it while I had it to
... Read morern apart. The machine is now running like it was new.
0.Disconnect supply hoses and electrical. Refer to the parts breakdown pictures on the PartSelect website. I refer to only the numbers so you may have to match the part to a particular diagram. 1. Remove the agitator by pulling up on the fabric softener dispenser #1. Clean out the excess liquid and "residual gunk". Grab one off the tabs of the plastic cap #23 and pull gently. The plastic cap (~ 3" in dia) is held in place by a rubber O-ring #24. The cap comes out easily exposing the bolt that holds the agitator to the drive shaft. Remove the bolt. and the agitator comes right out. 2. Turn the machine over on its front. You do not need to remove the back panel. 3. Get plenty of rags to soak up the water before you remove the hoses from the water pump #22 on the end of the motor. A quart or more remains in the pump and hoses. Remove the two hoses. 4. Disconnect the wiring harness from the motor#29. There is a small plastic "catch" on the bottom of the connector that must be lifted to remove the connector. It's kind of hard to see but it's there and it's part of the connector. 5. Remove the three bolts #10 that hold the gearcase #9 to the bottom of the tub assembly. 6. Remove the gearcase, the drive shaft, the motor, and the water pump as one unit. You will need to lift them a little to get clearance because the tub has settled down. Just lift the tub and all and pull the assembly out. Get them out to a spot where you have room to work on them. The water pump may still have bit of water. 7. Replacing the clutch. Remove the clutch parts from the bag and lay them out where you can see everything. Refer to the instructions in the bag to select the correct spring and to see how the keeper spring is installed. Remove the washer, keeper ring, and clutch assembly, and plastic clip#15 remembering the order and the orientation. Install the new clutch in reverse order. 8. You will have one plastic part #15 left over. It goes on the bottom of the tub after you remove a key ring. 9. Replacing the coupler. note the orientation of the water pump#22 and remove it by removing the two retainers #21. set it aside. 10. Remove the screws#23 and retainer clips#17. Separate the motor#20 from the gearcase#9 to expose the coupler. Replace the coupler, reattach the motor to the gearcase, and the water pump to the motor. 11. The reassembly is pretty much a reverse of the assembly.
Drum and agitator did not turn and machine squealed.
85 of 272 peoplefound this instruction helpful.
Francis from Ann Arbor, MI
Easy
More than 2 hours
Nutdriver, Pliers, Screw drivers, Socket set, Wrench (Adjustable), Wrench set
As best described in the clutch DIYs, removed the enclosure, unclipped the water pump, motor and elec. harness to check the coupling. The bushing separated from the plastic fingers which caused the squealing. Checked the gearbox and it turned for a limited amount before jamming. Ordered new gearcase and clutch (since it was over 10 yrs
... Read more. old.), and a coupling. (Gearcase comes with half a coupling, so check if req'd for motor shaft.) For ease of removing and re-installing the motor it is best the machine lays on its back. This way the grommets and coupling can be easily aligned on the face-plate without having to manually support the weight of the motor. In the tub, unsnap two agitator caps. The inner one has no tabs to break so pry and pull on the "ears". Use 7/16" socket wrench with extension to unscrew the bolt holding agitator to gear shaft end. Assuming the motor and face-plate are still off, unscrew the three screws holding the gearcase in place and slide it out. Before installing the new clutch onto the new gear shaft, slide the plastic thrust spacer? (in kit but not shown in any instructions) down the shaft, observing which is the correct side. Check for correct clutch spring, as per instructions. Slide clutch, open side up, down the shaft. Instal wire retainer (this can be tricky) and circlip. if the brake assembly slid down while sliding out the gear shaft, squeeze its spring with a pipe wrench and push it back up (with rubber mallet). The clutch kit comes with a plastic pawl? which mounts under the brake and mates with the clutch. If the locating pins for the old part are broken off, drill them out of their holes so the new part fits snug. Insert the gear shaft up the brake sleeve into the agitator so their splines mate. Screw gear case to its mounts, agitator to shaft end (not too tight here) and snap on caps. Screw on face-plate, replace coupling on motor shaft (if req'd.), set motor on face-plate, aligning the coupling and checking the grommets fit in their holes. Instal motor holding clips (with screws), mount water pump with its holding clips, and wire harnesses. Stand up machine and replace enclosure, back panel and hoses. Replacing the gearcase was easy. Because of space limitations, removing and replacing the enclosure, etc. was a b**** that took most of my time. And watch the lid doesn't fall on your fingers!
Washer not spinning completely and at time not at all
69 of 75 peoplefound this instruction helpful.
Jason from Henderson, KY
A Bit Difficult
30 - 60 mins
Pliers, Screw drivers, Socket set
I have to admit that before attempting to replace the clutch, I had no clue how to do it. With the help of the diagram of the parts, I was able to access from the internet at PartSelect.com. I felt comfortable enough to attempt the repair because the diagram was easy to read and accurate.
Everything had to be accessed from
... Read morethe bottom of the machine. I tipped the machine backwards enough get under it. To replace the clutch, I had to remove the motor drive. To do so, I disconnected the electrial to the drive motor by simply unconnecting the quick connect harness. I then removed two screws from the two retainer brackets located one on top and one on the bottom. Once this was done the motor drive simply dropped down. I then removed the three bolts holding the gear case to the tub. I had to remove one bolt from inside the tub underneath the fabric softner dispenser. Once this was done the gear case slid out. The clutch sit on top of the gear case. I then simply removed the old clutch and installed the new clutch by reversing the process. The only real difficulty that I had was with the retainer ring. Once done, I reinstalled the gear case and motor drive. I would suggest replacing the direct-drive coupling at this time. I had earlier replaced the coupling hoping to solve the problem. The coupling was redesigned and is more likely to last longer than the orginal coupling.
Read less
Was this helpful?
Thank you for voting!
Washer would drain, agitate but not spin and was very noisy and would vibrate heavily
60 of 65 peoplefound this instruction helpful.
Michael from Schuylkill Haen, PA
Really Easy
30 - 60 mins
Nutdriver, Screw drivers, Socket set
I first watched the youTube vidio on yhe PartSelect web site. After getting a visual of the repair, I decided to tackle the job with a better understanding and knew the repair was easy to purform. First I took the two screws out of the contrl panel on top of the washer, rolled the panel back to expose the clips that hold the metal cabinet
... Read more to the back panel of the washer. After removing the cabinet I was ready to lay the washer on it's back and had a clear view of the pump, motor and clutch... I was able to easly identify these parts because I took time to watch the video. Using a flat head screwdriver I removed the clips that hold the pump to the motor... Without disconnecting the hoses connected to the pump I pushed the pump to the side and out of the way. This further exposed the motor. Using the flat head screwdriver, I removed the clips holding the motor to the transmission (they just snap off like they did on the pump). The motor was now ready to be removed from the transmission ( it just lifts off) before removing it I disconnected the power suply wire from the motor... Now the motor can be completely removed. I identified the drive couupler 1/2 was on the motor shaft the other 1/2 was on the transmission shaft.. On both halfs the splines were broken. I removed the old broken drive coupler. Since I already had the machine so far apart i figured i would replace the clutch also. Using a deep socket ratchet wit an extention I removed the agator... I then unbolted the transmission (only three bolts) I gentely pulled the transmission and shaft out of the bottom of the washer. This exposed the clutc assembly, I removed the clutc ( which wasn't bad or wore by the way) and replaced it.... I figured I had it and I was this far into the repair why not. After relpasingvthe clutch, I slid the shaft and transmission back into place tightened the bolts and that was done. I then slid/replaced the drive coupler... Placing one half on the motor shaft the other on the transmission shaft, placed the rubber bushing on the oneside of the plastic drive coupler. And mounted the motor back on the transmission utilizing the clips I took off earlier. Once the motor was in place I installed the waterpump fastened by the clips. Flipped yhe washer up, replaced the cabinet... Tightened down the the control panel and was ready to do some wash..: the washer runs perfect now and I saved myself about $700.00. It was allot easier than I thought it would be... Watching the youTube video is the secret to success. The washer is running like the day I bought it new... All for only 53.00. Hats off to everyone at PartsSelect for going above and beyond. Regards, ~ Michael
2 1/2 year old Whirlpool top load washer fails to spin clothes dry.
50 of 1237 peoplefound this instruction helpful.
Neal from Howell, NJ
A Bit Difficult
More than 2 hours
Nutdriver, Screw drivers, Socket set
First confirmed it wasn't the lid switch by jumping. Then confirmed by taking off washer cover that the transmission was leaking and spraying oil as evidenced by yellow oil film on the inside of the washer cover. The leaking oil caused the clutch assembly to slip and wear. Replaced both the clutch assembly and the transmission upper two
... Read moreseals.
To repair, after taking the washer cover off removed the agitator holding screw. Then remove two clips holding water pump. Unconnect the motor wires and remove two clips holding motor in place. Tilte washer back leaning up on a chair and remove 3 bolts holding transmission assy in place. Slid out the transmission/ shaft from machine. I rebuilt the transmission by separating the case on bench and replacing two seals. To do this you first need to remove clutch assembly from the trans agitator shaft. The clutch is held on by a washer and two spring clips. You need to take note of the orientation of the parts for proper reassembly. The difficult part was separating the cover of the transmission from the base . After removal of the cover screws using a putty knife and hammer I gently tapped all around to separate the halves. The I replaced the two upper seals, one one the cover and one in the output shaft. The second difficult part that requires some skill is removing the seal from the transmission cover. I used a hair dryer to heat up the aluminum cover to ease removal of the seal. After replacement of the seals I resealed the cover onto the base using automotive silicone gasket maker. Note; I kept the transmission level during this repair so that I did not need to drain oil. After keeping the transmission level and allowing 24 hours for the silicon to cure I assembled the new clutch assembly and clips in reverse order on transmission shaft. Then reassembled the transmission, motor and pump in reverse order. Ran machine with full load of towels. Spin problem fixed and transmission is still leak free a week later.
Disconnect electrical, took out agttator, tipped machine againest the wall. On hooked the two hoses on pump, removed three bolts pulled complete assembley out removed worn parts and installed new parts and reassembled. Works like new,
First I watched the vid, from this website that showed how to replace a pump on the Whirlpool model I have. It was very helpful. Then, on the same web page as the vid for washer pump replacement several DIYers describe how they did the repair and rate how difficult it was. This also was very helpful. The info from these two sources confi
... Read morermed to me that it was the pump that was leaking. Tilting the washer back far enough so I could see the pump also visually confirmed it was the pump. If the pump had come off easily I would not have had to take the cabinet off. All I would have had to do was lay the washer on its' back to get the pump off. But noooo, the pump was rusted so tightly to the motors' shaft that I had to be more aggressive, to remove the pump, than the measures mentioned in the vid. After finally getting the pump off I saw that the end of the motors' shaft had corroded and was misshapened enough so that I had to "persuade" the new pump onto the shaft. I also ordered these parts (1. Direct Drive Coupling 2. Agitator Repair Kit and 3. Clutch Assembly) after I read in the DIYers descriptions that many of them, who changed their pump, also changed these parts. Since my washer was 15 yrs old it made sense to replace these parts which usually wear out before the pump. Unfortunately, after I got everything reassembled the new pump leaked more than the old one. Guess I over-"persuaded" the new pump onto the shaft. That, and I don't think the new pump is as well built as the original so it couldn't take much persuasion. Now I either: 1. buy a new pump and motor or 2. buy a new washer which is what I'll most likely do. If I had a do-over I would only get the pump. If it worked properly with no leaks, then I would buy the other 3 parts, if it didn't work, I would only be out $40 instead of the $95 I'm out for the 4 items. Being frugal or, as my family says, "cheap," I do have to be careful. There is a point where repairing something old is more a point of pride than good sense. I don't know where that point is and I definitely wouldn't have brought this up if the new pump had fixed the washer. Also, after struggling for quite some time to put the cabinet back on, I Googled "how do I get a Whirlpool washer cabinet back on?" After watching one of the vids Google answered back-I was able to put the cabinet back on in less than 10 minutes. I hope this has been helpful. Happy DIYing!
Ask our experts a question about this part and we'll get back to you as soon as possible!
We may have answered a similar question already! Search questions and answers left by others using simple keywords like "fit", "broken", "easy", or "quality" to find questions that match.
Search filter:
Clear Filter
Your search term must have 3 or more characters.
Sort by:
Prev
1
2
3
Next
Sorry, we couldn't find any existing answers that matched.Try using some different or simpler keywords, or submit your new question by using the "Ask a Question" button above!
Sofie
July 20, 2017
So my washer sounds totally normal but the spinning is off and when I take the clothes out they are super drenched. I’m not sure what is wrong since it sounds normal and it is still washing stuff but I’m worried it will get worse. What should we check first??? TIA
Hello Sofie, first you should check the motor coupling to make sure it has not broken. If that seems to be in good condition you may have a faulty clutch assembly that needs replacing. Best of luck with this repair!
66 peoplefound this instruction helpful.
Was this helpful?
Thank you for voting!
Ryan
July 20, 2017
The clutch in my washer is malfunctioning but I’m not positive. How do I check it? How will I know that is the problem?
Hi Ryan, if your tub is not spinning or slipping your clutch may need to be replaced. You can check this by removing the transmission from the unit and inspecting it for visibly damaged parts. I hope this helps!
18 peoplefound this instruction helpful.
Was this helpful?
Thank you for voting!
Joel Ceballos - For model number LXR7133JQ1
January 29, 2018
Our machine stopped spinning and it makes a loud buzzing sound. We tried the washing cycle and the center part does not move and in the drying section of the cycle nothing moves and all we hear is the loud sound wondering what could be causing these issues.
Hello Joel. Thank you for your question. There are a few parts you will want to check. First check the lid switch to make sure its activating. If its not, the unit will not agitate or spin. Also check the
Direct Drive Motor Coupling and the Clutch Assembly. I hope this helps!
12 peoplefound this instruction helpful.
Was this helpful?
Thank you for voting!
Jacq
July 20, 2017
So I just replaced my clutch assembly and now I have another problem. Earlier today when I was using my washer I heard a loud noise kind of like something ripping and when I was inspecting it I could smell a burning smell. The washer didn’t turn off until I turned it off. What is wrong now. This is so frustrating did my husband install the clutch assembly wrong or is it something new
Hello Jacq, by the sounds of things the motor coupler which is found here 285753A is at fault. The coupler is found between the transmission and the motor and will slip to prevent any damage. This could cause a burning smell when it slips. Please let us know if you have any further questions.
11 peoplefound this instruction helpful.
Was this helpful?
Thank you for voting!
Paul Miller - For model number rtw4300sqo
March 6, 2019
Had asked a question yesterday, now my wife says that today the spin cycle as well as the agitation cycle are making rather loud noises--coming from down low in the unit. Sounds to me like something is slipping then catching?? i'm leaning toward the clutch or the transmission, but can't decipher which to attempt to replace, there was a small spot of blackish powder underneath the unit when i inspected it the other day too.
Hello Paul, thank you for your question. The most likely cause of this noise, and the slipping is the clutch Part Number: PS334641. There is an installation video and lots of other information on the parts page. You may want to inspect the coupling as well, PartSelect Number: PS1485646. I hope this helps!
8 peoplefound this instruction helpful.
Was this helpful?
Thank you for voting!
David - For model number Whirlpool LSR5232LQO
January 18, 2019
Agitates and drains but does not spin. Not spinning sounds like the clutch but wouldn't that also make it not agitate? Thanks in advance.
Hi David,
Thank you for your question. If the washer is not spinning, there are some parts that you will need to check to see which ones are causing the issue. You will need to check the direct drive motor coupling, the clutch assembly, the lid switch, the pump and the clutch lining kit. I hope this helps. Thank you and have a great day!
6 peoplefound this instruction helpful.
Was this helpful?
Thank you for voting!
Michael
February 18, 2019
Noticed my washer will not spin. If you open the lid rock the drum around it will sometimes spin. Now i’m at the point of it will not spin at all. The coupler seems to be fine. It is kind of lose on the motor side but i cannot even get it off on the transmission side. I’m thinking this kit will solve my problem?
Hello Michael, thank you for contacting us, In order for us to locate the correct parts and repair information we will require the model number of the unit. Once you have located the model number please feel free to resubmit the question and we will be happy to help you. Look forward to hearing from you!
5 peoplefound this instruction helpful.
Was this helpful?
Thank you for voting!
Carolyn - For model number 110-24872300
November 26, 2019
At end of spin cycle, drum clangs loudly. When manually turned, clang occurs at 180 degree turn. Will clutch assembly fix this?
Hello Carolyn, thank you for your question. Yes, The clutch changes the unit from agitation to drain/spin mode and if you hear a bang noise at the end of the cycle this could be the issue. If that part is replaced and the issues persists, we would recommend checking the PartSelect Number: PS11723156 gear case and brake assembly. I hope this helps.
5 peoplefound this instruction helpful.
Was this helpful?
Thank you for voting!
Steven - For model number LSQ9010PG2
December 5, 2018
My washer makes a loud "cluncking" sound when draining...i replaced the clutch kit, thinking this was the problem, but still makes the loud clunking noise when draining? any other parts i can try?
Hi Steven,
Thank you for your question. If you are hearing a loud clunking sound when the water is draining, then there may be something stuck in the pump causing this and you will need to check it. I hope this helps. Thank you and have a great day!
5 peoplefound this instruction helpful.
Was this helpful?
Thank you for voting!
Michael - For model number MTW5900TW0
February 18, 2019
Noticed my washer will not spin. If you open the lid rock the drum around it will sometimes spin. Now i’m at the point of it will not spin at all. I never noticed any burning smell or noises that are abnormal. The coupler seems to be fine. It is kind of lose on the motor side but i cannot even get it off on the transmission side. I’m thinking this kit will solve my problem?
Hello Michael, thank you for your question. We would recommend checking the clutch assembly on the unit. The clutch changes the unit from agitation to drain/spin mode. If that isn't the issue the next part we would recommend is the gearcase. I hope this helps!
4 peoplefound this instruction helpful.
Was this helpful?
Thank you for voting!
Prev
1
2
3
Next
✖
Ask a Question
Ask our experts a question on this part and we'll respond as soon as we can.
Item is in stock and is estimated to be delivered in 2-3 business days via Standard Shipping.
On Order
Item is not in stock and usually ships 3-5 business days from the time you place your order.
Special Order
Item is not in stock and usually ships 10-15 business days from the time you place your order.
NLA - No Longer Available
This item is no longer being made by the manufacturer, and cannot be added to your shopping cart.
[{"position":0,"name":"Home","title":"Home","url":"/"},{"position":1,"name":"Transmission or Clutch","title":"Transmission or Clutch","url":"/Washer-Transmissions-and-Clutches.htm"},{"position":2,"name":"285785","title":"285785","url":""}]



 My Orders