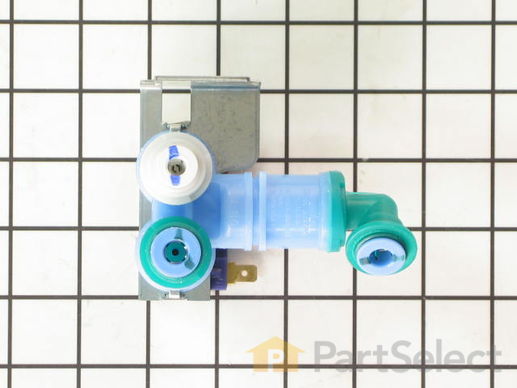
Product Description
Secondary Water Valve Specifications
This part releases water from the supply line when it's activated.
How Buying OEM Parts Can Save You Time and Money
Troubleshooting
This part fixes the following symptoms:
Leaking | Ice maker not making ice | Not dispensing water
This part works with the following products:
Refrigerator.
This part works with the following products:
Amana, Kenmore, Maytag, KitchenAid.
Part# 12002193 replaces these:
AP4009555, 1057511, 12002101, 12002193, 12544102, 67001726, 67003311, 67003659, 8171097, 8171159, WP67003659, Y12002101
Customer Reviews
Filter By Rating:
- < Prev
- 1
- Next >
Sort by:
Search filter:
Clear Filter
Your search term must have 3 or more characters.
Keep searches simple. Use keywords, e.g. "leaking", "pump", "broken" or "fit".
Sorry, we couldn't find any existing reviews that matched. Try using some different or simpler keywords.
Chris E - October 9, 2021
Verified Purchase
Easy repair worked great
The part fit and worked perfectly. Be wary of the connectors you take off and put on. I reversed them the first time and had water coming out of my ice maker when I pushed the switch for water in the fridge. Reversed them and it worked perfectly. So much happier than having to buy a new fridge.
- < Prev
- 1
- Next >
Customer Repair Stories
Average Repair Rating: 3.4 / 5.0, 11 reviews.
What's this?
- < Prev
- 1
- 2
- Next >
Sort by:
Search filter:
Clear Filter
Your search term must have 3 or more characters.
Keep searches simple. Use keywords, e.g. "leaking", "pump", "broken" or "fit".
Sorry, we couldn't find any existing installation instruction that matched.
Original parts had cracked due to cold weather
Original parts froze when the fridge was stored in the garage, so when we brought it in and hooked up the water supply we discovered the cracks.
I used a wrench to remove the back lower cover of the fridge. attached to that cover were both the parts I needed to replace. I removed one nut each per part so they were free of the back cover. Once free I unhooked the two electrical plugs per part and reattached the new part so as not to confuse the positions of the wiring. Then I did the same thing with the two hoses attached to each part, swapping old part for new. Once connected, I reattached the new parts to the back cover and replaced the back cover to the fridge. Connected the water line and tried the ice maker and water source on the door. I didn't realize it, but the filter, located in the refrigerator side of the unit had also frozen and cracked, so I had water now pouring from the fridge! Replaced that filter, cleaned up the water and everything is working great!
800 number customer service person Kim originally helped me locate the correct parts via schematic diagram, as no part numbers were visible on my broken parts. She was incredibly helpful and got the correct parts on her first guess ( she told me it was a guess but she was right on the money).
Other Parts Used:
-
Brian from University City, MO
-
Difficulty Level:Easy
-
Total Repair Time:15 - 30 mins
-
Tools:Wrench set
34 of 45 people
found this instruction helpful.
Was this instruction helpful to you?
Thank you for voting!
no water pressure, and very little volume of water
First I removed the existing copper ice maker line and then installed a plastic line. I then tried the appliance, with no change. I then removed and replace the primary water valve and then tested that as well. There was no change in the outcome. So I removed and replaced the secondary water valve and tested that as well and I noticed a significant change in water pressure, and in volume.
Other Parts Used:
-
Robert C. from Milford, PA
-
Difficulty Level:Easy
-
Total Repair Time:30 - 60 mins
-
Tools:Nutdriver, Wrench (Adjustable)
10 of 18 people
found this instruction helpful.
Was this instruction helpful to you?
Thank you for voting!
My ice maker was driping water on the ice cubes
It was really pretty simple. You get to the back of the frig, open a panel and the valve is right there. The instructions where clear on what to do, even though the new valve was different water line connections. It was spelled out what to do. Works great and all the parts supply places would have to ordered it anyway, so I saved $ and got the valve in 30 hours to boot. Thanks
Other Parts Used:
-
Garry from Anderson, IN
-
Difficulty Level:Easy
-
Total Repair Time:15 - 30 mins
-
Tools:Nutdriver, Pliers
9 of 11 people
found this instruction helpful.
Was this instruction helpful to you?
Thank you for voting!
no water in ice maker
Removed rear panel of refrigerator and disconnecterct water valve after shutting the water off and unplugging the electricity. Replacement valve waterconnections were different than the original which required modifications and problematic water leaks. I would have preferred an exact replacement part which was a better design to prevent water leaks and would have installed with no modifications
Other Parts Used:
-
David from Conroe, TX
-
Difficulty Level:A Bit Difficult
-
Total Repair Time:30 - 60 mins
-
Tools:Nutdriver, Pliers, Screw drivers
4 of 5 people
found this instruction helpful.
Was this instruction helpful to you?
Thank you for voting!
Broken valve due to outdoor storage and freezing
After locating broken valve ordered part online.
Replacment was very straight forward and directions were easy to follow. At first I was concerned about slip in fittings insted of threaded compression fittings, but they went in easy and sealed properly.
Fridge was pulled out, valve replaced, water flow tested and fridge pushed back in within 30 minutes.
Other Parts Used:
-
John from Friday Harbor, WA
-
Difficulty Level:Really Easy
-
Total Repair Time:15 - 30 mins
-
Tools:Nutdriver
4 of 7 people
found this instruction helpful.
Was this instruction helpful to you?
Thank you for voting!
water leaking from secondary water valve that feeds the filtered water
Removed electric supply, removed old filter and cut back ends of tubing one inch with sharp razor knife. Simply push in the tubing to the new valve until seats and your done. Reintall valv to plate and good to go. Instructions that came with part were great and saved 15 bucks with parts select...
Other Parts Used:
-
john from glen mills, PA
-
Difficulty Level:Easy
-
Total Repair Time:30 - 60 mins
-
Tools:Socket set
3 of 5 people
found this instruction helpful.
Was this instruction helpful to you?
Thank you for voting!
old valve was cracked
remove the back plate, removed the screw holding the valve, removed electrical wires and water tubing. installed new valve. very simple. also i received the valve in one day. thank you
Other Parts Used:
-
Duston from Lawton, OK
-
Difficulty Level:Really Easy
-
Total Repair Time:Less than 15 mins
-
Tools:Nutdriver
3 of 3 people
found this instruction helpful.
Was this instruction helpful to you?
Thank you for voting!
Leaking valve
The hardest part was to pull the refrigerator out. You Shut off the water line power and then take out the panel. Disconnect the water line and isolate and remove the part. and I have replaced these parts multiple times and it is very easy and a lot less expensive then a new fridge.
Other Parts Used:
-
Brett from NEWTON, MA
-
Difficulty Level:Very Easy
-
Total Repair Time:30 - 60 mins
-
Tools:Socket set, Wrench (Adjustable)
2 of 2 people
found this instruction helpful.
Was this instruction helpful to you?
Thank you for voting!
Cracked Water Valves
-
John from Charlottesville, VA
-
Difficulty Level:Really Easy
-
Total Repair Time:15 - 30 mins
-
Tools:Nutdriver, Wrench (Adjustable)
2 of 7 people
found this instruction helpful.
Was this instruction helpful to you?
Thank you for voting!
icemaker making hollow ice cubes.
Changed icemaker, no help. Water pressure perfect from fauset to frig. Waterfilter was replaced new. No help. Trouble shot to secondary inlet water valve which was not sending enough water to icemaker. New part had a minor modification, yet easy. No need for ice trays :))
Other Parts Used:
-
BRENDA from BLOOMFIELD, NJ
-
Difficulty Level:Easy
-
Total Repair Time:15 - 30 mins
-
Tools:Screw drivers, Wrench (Adjustable)
0 of 8 people
found this instruction helpful.
Was this instruction helpful to you?
Thank you for voting!
- < Prev
- 1
- 2
- Next >
Questions and Answers
We're sorry, but our Q&A experts are temporarily unavailable.
Please check back later if you still haven't found the answer you need.
Related Parts
Model Cross Reference
This part works with the following models:
PartSelect Number: PS2003637
Manufacturer Part Number: 12002193
Brand
Model Number
Description