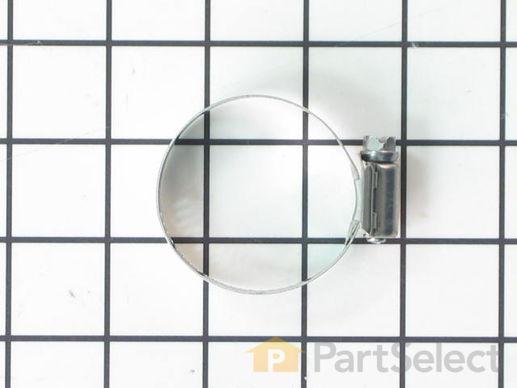
Hose Clamp
$12.47
Special Order
PartSelect Number
PS11743289
Manufacturer Part Number
WP616099
Manufactured by
Whirlpool
Product Description
Hose Clamp Specifications
Note: This part has been updated by the manufacturer. It may appear different but will still function the same as the original.
How Buying OEM Parts Can Save You Time and Money
Troubleshooting
This part fixes the following symptoms:
Leaking
This part works with the following products:
Washer, Dishwasher, Washer Dryer Combo, Central Vacuum.
This part works with the following products:
Kenmore, Whirlpool, Maytag, KitchenAid.
Part# WP616099 replaces these:
01500032, 01500145, 01500184, 113200087, 113200202, 113200404, 14219082, 16316, 2-0900, 2-4681, 2-900, 200900, 204681, 22001376, 22002052, 22003627, 23001261, 23001262, 272859, 272860
...
Show more
, 272861, 272865, 285188, 287820, 287985, 3363366, 353098, 370448, 371504, 4171855, 426661, 500920, 6-919978, 6-919979, 6-919980, 60001134, 616.4001, 616099, 618316, 65076100, 7-57023, 7-57441, 757023, 757441, 9-1134, 9-4030, 901134, 904030, 9724931, 99001774, 99002468, 99003631, 99003632, 99003633, P113200087, W10094820, Y01500032, Y01500145, Y01500184, Y6164001
Show less
Customer Repair Stories
Average Repair Rating: 3.0 / 5.0, 4 reviews.
What's this?
- < Prev
- 1
- Next >
Sort by:
Search filter:
Clear Filter
Your search term must have 3 or more characters.
Keep searches simple. Use keywords, e.g. "leaking", "pump", "broken" or "fit".
Sorry, we couldn't find any existing installation instruction that matched.
A wirre from an underwire bra punctured a hole in tub to pump hose. Water leaked out all over the floor.
I searched the internet for parts because we had just had a repairman out to fix the knocking noise in the washer drum. He found an underwire from a bra there and removed it. That cost about $100.
My husband took apart the bottom panel and showed me what the part looked like and I was able to find it on your website. I was able to order the parts and have my husband repair the washer so I was only without a washer for a week and a half. Thank you.
Other Parts Used:
-
Tina from Denver, PA
-
Difficulty Level:Easy
-
Total Repair Time:15 - 30 mins
-
Tools:Nutdriver, Pliers, Socket set
42 of 81 people
found this instruction helpful.
Was this instruction helpful to you?
Thank you for voting!
Leak in the hose that feeds the upper wash arm
First I disconnected the dishwasher electric, water supply and discharge hoses. I then pulled the dishwasher out. After opening the door, I removed the retainer clip holding the upper wash arm, then the nut holding the top shower hose in place. Close the door and lean the dishwasher on its side to get at the underside where the other end of the hose is. Loosen the hose clamp and remove the top shower hose. Reassemble everything in reverse order. In hindsight, I didn't need to buy the new hose clamp or the tub top washer (I reused the originals). Good luck!
Other Parts Used:
-
Norman from Chappaqua, NY
-
Difficulty Level:A Bit Difficult
-
Total Repair Time:15 - 30 mins
-
Tools:Nutdriver, Screw drivers, Wrench (Adjustable)
12 of 13 people
found this instruction helpful.
Was this instruction helpful to you?
Thank you for voting!
Leaking water from the discharge hose and pump gasket
1) Remove the lower dish rack.
2) Use towel to soak up any water in the dishwasher.
3) Remove the bottom plate on the dishwasher front.
4) Remove clamp from around the discharge hose. Some water will drain out so have towel handy.
5) Dishwasher will need to be pulled out from its built-in area in order to feed the old discharge hose out and the new one in. MAKE SURE THAT THERE IS ENOUGH PLAY IN THE ELECTRICAL WIRES AND THE INPUT WATER LINE TO THE DISHWASHER TO ALLOW IT TO BE PULLED OUT.
6) Loosen, all the way, the white plastic locking arm that clamps the pump housing. It clamps on a white corrugated plastic piece.
7) Remove the spindle arm inside the washer by unscrewing the "tower" piece.
8) Remove the screws from the pump housing on the inside of the washer.
9) Lift the pump housing carefully and remove the rubber gasket from around the housing. There is enough play to remove the gasket and put the new one on.
10) Clean the area around the housing so that the new gasket seats properly.
11) The new gasket will have to be installed before re-installing the discharge hose.
12) Re-install screws in pump housing.
13) Re-install the spindle arm.
14) Tighten the white plastic locking arm underneath the washer that locks down the pump housing.
15) The new discharge hose can now be reconnected between the sink drain and the dishwasher.
16) Dishwasher can now be put back into its place.
17) Before closing up the bottom plate of the dishwasher, it should be run and checked for leaks before finally closing up. My advice - let it stand overnight before checking for leaks. after running.
Other Parts Used:
-
Roger from Palm Bay, FL
-
Difficulty Level:A Bit Difficult
-
Total Repair Time:1- 2 hours
-
Tools:Nutdriver, Screw drivers
10 of 15 people
found this instruction helpful.
Was this instruction helpful to you?
Thank you for voting!
Unit had shaft seal leak.
After shutting off power and water to the unit, I disconnected the water supply line using a Crescent wrench and a pair of channellock pliers to support the solenoid.
I then disconnected the power at the junction box and the drain and circulate lines and clamps.
Then unlatched the retaining ring under the unit and lifted the pump assembly out.
Using the detail drawing from the web site I disassembled the pump assembly and laid out the parts in order of removal.
I then reassembled the pump assembly in reverse order replacing the worn parts with the new parts purchased from PartSelect.
I then reassembled the unit in reverse order checking for leaks as I went along.
The part worked great and my friend's dishwasher works beautifully.
Other Parts Used:
-
Jay from Victoria, TX
-
Difficulty Level:Really Easy
-
Total Repair Time:1- 2 hours
-
Tools:Nutdriver, Pliers, Screw drivers, Socket set
6 of 9 people
found this instruction helpful.
Was this instruction helpful to you?
Thank you for voting!
- < Prev
- 1
- Next >
Questions and Answers
We're sorry, but our Q&A experts are temporarily unavailable.
Please check back later if you still haven't found the answer you need.
Related Parts
Model Cross Reference
This part works with the following models:
PartSelect Number: PS11743289
Manufacturer Part Number: WP616099
Brand
Model Number
Description
Kenmore
10682872600
Washer
- Kenmore Washing Machine Model 106.82872600 (10682872600, 106 82872600) Parts
Kenmore
1101050299
Washer
- Kenmore Washing Machine Model 110.1050299 (1101050299, 110 1050299) Parts