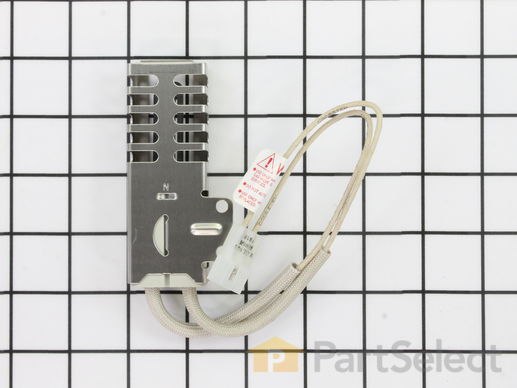
Oven Igniter
$161.49
In Stock
Get this part fast! Average delivery time for in-stock parts via standard shipping: 1.8 days.
PartSelect Number
PS11740875
Manufacturer Part Number
WP3186491
Manufactured by
Whirlpool
Product Description
Oven Igniter Specifications
This part is used to light the oven for the bake or broil.
How Buying OEM Parts Can Save You Time and Money
Troubleshooting
This part fixes the following symptoms:
Gas igniter glows | but will not light | Little to no heat when baking | Will Not Start
This part works with the following products:
Range.
This part works with the following products:
Whirlpool, Roper, Estate, Kenmore.
Part# WP3186491 replaces these:
AP6007756, 3186491
Customer Repair Stories
Average Repair Rating: 4.1 / 5.0, 7 reviews.
What's this?
- < Prev
- 1
- Next >
Sort by:
Search filter:
Clear Filter
Your search term must have 3 or more characters.
Keep searches simple. Use keywords, e.g. "leaking", "pump", "broken" or "fit".
Sorry, we couldn't find any existing installation instruction that matched.
The (relatively new) gas oven would not light...oddly enough after a power outage. The recommended typical troubleshooting experience was that if the oven will not light: replace the igniter, even if it appears to be working fine.
I had already removed the 2 plates in the bottom of the oven to take an initial look. After not finding anything obvious, and searching on line for advice, I ordered the igniter. After the igniter arrived it was a matter of removing 2 screws, pulling out the lower drawer to gain access to the igniter disconnect, and done.
thanks for getting the correct part to me so quickly. Also the diagram and part number search was right on the money!
Other Parts Used:
-
Robert from Sun City, CA
-
Difficulty Level:Really Easy
-
Total Repair Time:Less than 15 mins
-
Tools:Wrench set
26 of 28 people
found this instruction helpful.
Was this instruction helpful to you?
Thank you for voting!
Gas Oven, started to Preheat then quit. Then would not even light
It is very simple to do. We called a repair man we normally use, but he does not do gas appliances. So started to research. I removed the bottom drawer, looked at the connection on the wires hanging down. Opened the oven removed the racks. On the bottom plate, loosened two screws and slid the bottom toward the front and removed it. Then removed two philips screws and removed the heat deflection plate, it slides forward and pulled up from the back. Then there it was- the igniter. I looked at it then looked at the connection behind the drawer. Went to PartSelect.com, found the part using the model number and used the parts diagram found the igniter and the picture matched what I had. I ordered the part, placed all parts back in place until part arrived. After part arrived, shut off breaker to oven removed all parts again disconnected the wire connection behind the drawer. Then on the side of the igniter, I used a nut driver, removed two bolts and took out the igniter. Matched it to the new one, including the power connection. Placed new one in and reversed the order. Turned on breaker, Pre Heated oven, been in service since. Ordered part before 3 on Wed, received early on Friday. Stopped home during lunch Friday and put it in place. 15 minutes and DONE Oven worked and fresh baked cookies when I got home! Thanks PartSelect.com!
Other Parts Used:
-
John from West Grove, PA
-
Difficulty Level:Really Easy
-
Total Repair Time:Less than 15 mins
-
Tools:Nutdriver, Screw drivers
11 of 12 people
found this instruction helpful.
Was this instruction helpful to you?
Thank you for voting!
Had to replace ignitor
First I removed the two screws that hold the element in place. I then pulled the element out about 3 inches and disconnected the two wires.
Replacing it was just as simple,only in reverse.
The only tip I have that I should mention,is to UNPLUG the appliance first,as 110volts tingle your fingers!
Replacing it was just as simple,only in reverse.
The only tip I have that I should mention,is to UNPLUG the appliance first,as 110volts tingle your fingers!
Other Parts Used:
-
Ron from Marthasville, MO
-
Difficulty Level:Easy
-
Total Repair Time:15 - 30 mins
-
Tools:Screw drivers
10 of 11 people
found this instruction helpful.
Was this instruction helpful to you?
Thank you for voting!
Igntr would glow but Oven wouldent heat
I removed the two screws that held the igntr in place. Then I pulled the igntr out and unplugged the wires. Replaced the igntr with the two screws and plugged the wires back together. I then turned the oven on to 400 degrees and it heated like a new one.
Other Parts Used:
-
Elmer from New Baden, IL
-
Difficulty Level:Really Easy
-
Total Repair Time:15 - 30 mins
-
Tools:Nutdriver
7 of 8 people
found this instruction helpful.
Was this instruction helpful to you?
Thank you for voting!
Gas Oven was not lighting
After I found the web site I looked at the possible solutions for my problem. My igniter was glowing so I was not sure that would fix the problem but several places indicated the igniter would fix the problem and after I replaced it the oven work great.
Other Parts Used:
-
Edwin from Virginia Beach, VA
-
Difficulty Level:Easy
-
Total Repair Time:30 - 60 mins
-
Tools:Screw drivers, Wrench set
6 of 8 people
found this instruction helpful.
Was this instruction helpful to you?
Thank you for voting!
Oven wouldn't heat
I didn't do it, but I suggest putting down newspaper to keep from having to clean up all the charred remains that will inevitably fall from the parts you have to remove. First, unplug the thing so you don't shock yourself. I removed all the racks for easy access to the drip pan, which had to be removed by unscrewing two screws. Then there was a cover over the flame area that also required two screws being removed. The coil had two screws connecting it, but first I had to pull out the drawer at the bottom, crawl under the unit and unplug the coil. I removed the two screws from the old coil and replaced it with the new one, but first I had to get back under and plug in the new coil. I was unprepared for the virtual small animals that were under the stove, so I took some time to clean out that mess. I tested the thing to make sure it would work, and it did. I put all the pieces back in reverse order and had some really good baked chicken for dinner. I also recommend using gloves, as all the soot is hell on your nice manicure.
Other Parts Used:
-
Lori from Wimberley, TX
-
Difficulty Level:Easy
-
Total Repair Time:30 - 60 mins
-
Tools:Screw drivers, Socket set
4 of 5 people
found this instruction helpful.
Was this instruction helpful to you?
Thank you for voting!
oven burner would not light
the research and diagnosis took much longer than the repair on this model. if i had the new igniter on hand, it would have been only about 15 mins.
Other Parts Used:
-
Mark from Summerville, SC
-
Difficulty Level:Really Easy
-
Total Repair Time:15 - 30 mins
-
Tools:Screw drivers, Socket set
4 of 7 people
found this instruction helpful.
Was this instruction helpful to you?
Thank you for voting!
- < Prev
- 1
- Next >
Questions and Answers
We're sorry, but our Q&A experts are temporarily unavailable.
Please check back later if you still haven't found the answer you need.
Related Parts
Model Cross Reference
This part works with the following models:
PartSelect Number: PS11740875
Manufacturer Part Number: WP3186491
Brand
Model Number
Description