This manufacturer-approved Refrigerator Pantry End Cap Kit, also known as the Refrigerator Drawer Support, is a kit containing all parts of the Pantry End Cap. It snaps into place on the appliance’s pantry drawer to help contain the items inside and to keep your refrigerator door from sliding all the way out. It is rated as "medium" difficulty to install, is constructed of plastic and comes in white. If broken or missing, the pantry drawer will not stay in place and the part should be replaced. Refer to your user manual and model number to ensure this is the correct part for you. This kit includes both the right and left side end caps, as well as the pins that will hold them in place. To replace an end cap, remove the three screws holding it in place. Then, remove the pin and end cap, replacing the old end cap with the new end cap. In the past, the left and right end caps were sold separately, but the part has been updated and now includes both sides. The part is sold as a kit, and unfortunately, as such none of the parts are available individually.
How Buying OEM Parts Can Save You Time and Money
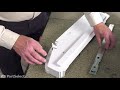
Part Videos
Replacing your Kenmore Refrigerator Pantry End Cap Kit, LH and RH
Troubleshooting
This part fixes the following symptoms:
Door won’t open or close | Fridge too cold | Noisy
This part works with the following products:
Refrigerator.
This part works with the following products:
Kenmore, Whirlpool, Maytag, Amana.
Part# W10874836 replaces these:
AP6004794, 12656010, 12656013, 12656014, 12656019, 12656022, 12656023, 12656104, 12656106, 2206738W, 2206740W, 2206764W, 2301453W, 2301455W, 2311704W, 67002757, 67002758, 67003281, 67005694, 67005858
...
Show more
, 67005861, 67005863, 8208332, 8208333, W10845508, W10845509, W10870281, W10874836VP, WP12656019, WP12656022, WP12656023, WP12656106
Show less
Customer Reviews
Average Rating:
★★★★★
★★★★★
82 Reviews
4.8
Filter By Rating:
5 Stars
73
4 Stars
6
3 Stars
2
2 Stars
1
1 Star
0
< Prev
1
2
3
Next >
Sort by:
Search filter:
Clear Filter
Your search term must have 3 or more characters.
Keep searches simple. Use keywords, e.g. "leaking", "pump", "broken" or "fit".
Sorry, we couldn't find any existing reviews that matched. Try using some different or simpler keywords.
★★★★★
★★★★★
Walter P - 29 days ago
Verified Purchase
Easy repair
The arrived fast and I had it swapped out within half an hour. Took more time to clean out the frig than it did to change the part. Fit was perfect.
★★★★★
★★★★★
Joel L - March 24, 2024
Verified Purchase
The right part shipped quickly!
I have purchased various appliance parts from Parts Select over the years. 100.% happy with the service & quality. The how to videos are very helpful.
★★★★★
★★★★★
Kevin K - February 28, 2024
Verified Purchase
OEM part is the perfect replacement
NEW OEM replacement parts from the manufacturer came in a factory sealed box. After watching the video of the removal/installation, me doing the same was quite easy. Great video! I also had to have the logic board for the fridge replaced by a Red Seal tech. When he saw the OEM box, he asked about it. He said you guys are the best in Canada to get parts from. I agree!
★★★★★
★★★★★
Yasmin V - January 14, 2024
Verified Purchase
Great service
Quick delivery and the correct part with easy to follow directions
★★★★★
★★★★★
Jim A - January 13, 2024
Verified Purchase
Easy repair with great video help
The part arrived very quickly. The video on the site walked through the installation. And new part actually had extra reinforcement of the piece that had broken on the original part.
★★★★★
★★★★★
Andrew B - November 29, 2023
Verified Purchase
Better than the original part.
Knob that breaks off has been reinforced in the replacement part. Video was also very helpful with the installation.
★★★★★
★★★★★
Rick A - November 26, 2023
Verified Purchase
Perfect Fit!
This was exactly what was needed! Great price and fast delivery!
★★★★★
★★★★★
Patricia S - November 25, 2023
Verified Purchase
Just what I ordered
Part came quickly and my fridge works again. Thankyou
★★★★★
★★★★★
Perry G - October 12, 2023
Verified Purchase
Great fit and easy to replace
Received this part quickly
★★★★★
★★★★★
Bill B - September 14, 2023
Verified Purchase
Perfect fkt
Perfect fix. Easy to install l/h side.
< Prev
1
2
3
Next >
Customer Repair Stories
Average Repair Rating: 4.2 / 5.0, 204 reviews.
What's this?
< Prev
1
2
3
Next >
Sort by:
Search filter:
Clear Filter
Your search term must have 3 or more characters.
Keep searches simple. Use keywords, e.g. "leaking", "pump", "broken" or "fit".
Sorry, we couldn't find any existing installation instruction that matched.
The poorly designed deli drawer lid tab broke off
Removed the fruit & veggie drawers & the deli (pantry) drawer. Took out the 3 screws, removed the attached parts, put them on the replacement part, reattached it and put the drawers back in.
Here's the part I want to share: PartSelect had a expanded diagram showing the correct part and sufficiently detailed to figure out the repair before the part arrived. That's why I ordered from them. Secondly, I ordered the part Thursday morning--and the thing was sitting on my porch when I came back in from my evening out Saturday--2 days later!!!
Other Parts Used:
Tim from Littleton, CO
Difficulty Level:
Easy
Total Repair Time:
15 - 30 mins
Tools:
Nutdriver
307 of 339 peoplefound this instruction helpful.
Was this instruction helpful to you?
Thank you for voting!
Dropped a jug and broke the lower drawer hinge pin
Remove food off of lower shelf, remove the two produce drawers, remove large lower drawer, remove glass shelf, remove three screws holding end cap in place. Once end cap was removed the drawer track could be removed and placed on new end cap. Installation of new end cap took less than 5 minutes. Most of the time spent was removing/replacing food and cleaning the shelf/bins. PartSelect was awesome BTW!
Other Parts Used:
Gordon from Cold Spring, KY
Difficulty Level:
Really Easy
Total Repair Time:
Less than 15 mins
Tools:
Nutdriver
167 of 178 peoplefound this instruction helpful.
Was this instruction helpful to you?
Thank you for voting!
broken hinge pin for deli draw cover
1. remove deli draw 2. remove glass top & end caps 3. remove screws on side of end cap 4. remove end cap 5. remove crisper control connection bars & rear ductwork 6. reinstall crisper control connection bars & rear ductwork 7. install new end cap & rear ductwork 8. install glass top & end caps 9. install deli draw & cover
Other Parts Used:
Thomas from Kingston, NH
Difficulty Level:
A Bit Difficult
Total Repair Time:
30 - 60 mins
Tools:
Nutdriver
109 of 120 peoplefound this instruction helpful.
Was this instruction helpful to you?
Thank you for voting!
Started with a grinding noise in the bottom of the dishwasher, and then the thing just stopped cleaning the dishes. It wasn't pumping any water,
I removed the plasic inner parts, used the torx drivers to remove the internal platic plate that covered the sump. Found the food chopper cover and removed it. It had gotten a piece of plastiic wrapped around it. As it spun it had ground the teeth off the end of the drive on the impellor and the food chopper. I replace both as a set and it works fine.
The side hinge broke off due to the door sticking. so it wasn't covered under warrant.
first I removed the pantry drawer and the 2 crisper drawers. Then I removed the glass shelf and it's supports. Using a nut driver I removed the 2 screws holding the end cap to the side of the refrigerator. Carfully snaped the end cap loose of the clip in front and pulled it straight forward, being carful not to break the rear tabs holding the climate adjuster. I then removed the old climate adjuster from my broken part (it's held on by clips) and installed it on the new end cap. I put the new end cap in snapping it onto the existing clip and added the 2 screws. Put the shelf supports and glass back on top of the drawer, slid back in the crisper drawers, installed the divider into the drawer (it just slides in) then put the drawer back in and I was done. It was an easy job and I'm sure I saved at least one hundred dollors for 20 minutes work.
Plastic pegs holding bin cover broke off on both sides
Not a bad job at all. Took out the vegetable bins above, the glass cover and the sliding drawer. Then took out the screws holding the end caps on to the refrigerator wall. You can remove the metal slide at this time or after you take the old piece out. Then you re-install the metal slide on the new piece and screw it back in. THe right hand side is trickier because you also have to remove the mechanism in the back that controls the humidity inside the bin as well as the control lever in the front, so that you can install them on the new end cap. All the parts either snap on or you have to twist them slightly. We repaced both end caps as well as cleaned things really well in about 45 minutes, with 2 adults and a 10 yr old working together.
Other Parts Used:
Roberta from St. Louis, MO
Difficulty Level:
Easy
Total Repair Time:
30 - 60 mins
Tools:
Screw drivers
46 of 50 peoplefound this instruction helpful.
Was this instruction helpful to you?
Thank you for voting!
The pin on the right side of the end cap broke off.
1. I had to remove the cold cut drawer. 2. Remove the two screws for the sliding track and then the sliding track. 4. Remove the two crisper drawers as well as the glass and the two supports for the glass. 3. Remove the two screws for the end cap. This is accomplished by gently lifting up at the front of the part. You will find another three parts that are attached to the end cap. One is the slider that controls the tempetature, it is attached to a long plastic rod that is connected to the back side of the end cap by pressure clip points. The other end of the plastic rod is connected to a piece that is mounted to the back wall of the refridgerator. this is removed by gently pulling the entire unit forward until it comes loose from the back wall. Once the entire assembly is removed, The plastic rod must be released from teh back of the end cap. This will allow both ends to be disconnected from the slider at the front and the piece that was attached to the back wall by rotating each end to allow the removal of the components fronm the end cap. Once everything is removed, you are ready to complete the repair by reversing the removal process.
Other Parts Used:
Clarence from Gold River, CA
Difficulty Level:
Easy
Total Repair Time:
15 - 30 mins
Tools:
Nutdriver
43 of 46 peoplefound this instruction helpful.
Was this instruction helpful to you?
Thank you for voting!
Broken Bracket
Remove (3) screws; Removed existing bracket and installed new bracket.
Ask our experts a question about this part and we'll get back to you as soon as possible!
62 questions answered by our experts.
< Prev
1
2
3
Next >
Sort by:
Search filter:
Clear Filter
Your search term must have 3 or more characters.
Keep searches simple. Use keywords, e.g. "leaking", "pump", "broken" or "fit".
Sorry, we couldn't find any existing answers that matched.Try using some different or simpler keywords, or submit your new question by using the "Ask a Question" button above!
John
September 22, 2017
The little tab that holds "pantry drawer lid" in place on the ride side "pantry end cap" broke off. Two questions:1>do you replace the whole pantry end cap for just that little tab? 2>the right and left side are different but you only sell one. The right side has the temperature adjustment. Do i need to order a right side and if yes, i don't see it on the schematic.
For model number KBFS25EWMS5
Hi John,
Thank you for your inquiry. The tab on the end cap is not sold separately and is sold with the end cap. The end caps are sold in a kit with both the left and right side and the part number for the kit is PS11738134. I hope this helps. Thank you and have a great day!
244 people found this helpful.
Was this helpful?
Thank you for voting!
Paula
August 23, 2017
I have the lid for the wide n fresh deli drawer however the clip on the left side to hook the lid broke. What par to i need in order to put the lid on the deli drawer back on . Right now the drawer works just no lid/cover.
For model number MFI2568AES
Hi Paula,
Thank you for your inquiry. If the clip on the end cap has broken off you will need this end cap to fix it. I hope this helps. Thank you and have a great day!
29 people found this helpful.
Was this helpful?
Thank you for voting!
Maggie
September 11, 2017
I believe the part I need is #3 but for the other side(left side) do you sell that part?
For model number MFD2560HEQ
Hi Maggie.
Thank you for the question. This part has been updated by the manufacture and now includes both left and right side. They no longer sell the sides sepratly and you will receive both left and right side int he kit.
Hope this helps!
21 people found this helpful.
Was this helpful?
Thank you for voting!
Doug
July 20, 2017
The pantry cover in my fridge will not open or close and I think its because of the endcap pin. Should I order that separately or does it come with the endcaps? Do I need to replace both end caps or just the pin?
Hi Doug, if your pin has fallen out you need to order this assembly to replace the pantry endcap. Please let me know if you have any further questions!
10 people found this helpful.
Was this helpful?
Thank you for voting!
Meriam
July 20, 2017
I need to remove the endcaps and replace them and I purchased both endcaps but I’m worried about breaking the pin since that seems to be the most fragile part. Can you give me some tips on installing without breaking these pieces
Hi Meriam, there will be three screws holding the endcaps in place, removing those should be simple. Once that is done you can remove the attached parts put them on your new one, and replace your endcap. I hope this helps!
10 people found this helpful.
Was this helpful?
Thank you for voting!
Shelle
October 31, 2017
The left side of the deli drawer lid knob broke off..(the .lid hinge knob) not sure what part that is?
For model number GI6FDRXXY03
Hi Shelle, Thank you for the question. The pin that the lid swivels open and closed on is part of the end cap.The end caps come in a kit.This part has been updated by the manufacture and now includes both left and right side, PartSelect Number PS11738134. Hope this helps!
10 people found this helpful.
Was this helpful?
Thank you for voting!
Karen
May 6, 2018
The tab has broken on the part (left side of fridge when facing it) right below the plastic see-through cover piece that comes up when you open the bottom drawer. I think i found the correct replacement piece, but just making sure. Please advise. Thank you.
For model number JFI2089AEP8
Hello Karen, thank you for your question. Yes, the end cap kit is what you would want to order. This kit includes both the right and left side end caps, and the pins which hold them in place. Good luck with your repair!
9 people found this helpful.
Was this helpful?
Thank you for voting!
Bernie
July 20, 2017
Does this purchase include both endcaps?
Hi Bernie, yes, purchasing this pantry end cap kit W10874836 will have both end caps included. Best of luck with this repair!
9 people found this helpful.
Was this helpful?
Thank you for voting!
Danny Wright
November 6, 2018
The little tab that holds "pantry drawer lid" in place on the ride side "pantry end cap" broke off. Two questions:1>do you replace the whole pantry end cap for just that little tab? 2>the right and left side are different but you only sell one. The right side has the temperature adjustment. Do i need to order a right side and if yes, i don't see it on the schematic.
For model number GI6SDRXXY02
Hello Danny, thank you for your question. The whole end cap is replaced not just the tab. The tab comes on the end cap. The right and left are different, but the part number PS11738134 comes as a kit now (both left and right sides). Per the manufacturer : NOTE: This part has been updated by the manufacturer and now includes both left and right side. I hope this helps!
8 people found this helpful.
Was this helpful?
Thank you for voting!
Eileen
March 28, 2018
The little pin on left hinge of chef's pantry drawer broke off. What part do i need to replace it? Thanks
For model number AF12538AEQ
Hi Eileen,
Thank you for your question. If it is the little pin that acts as the hinge for your pantry drawer door, then this is the part that you would need to replace. Your end cap kit. I hope that helps. Good luck with your repair.
8 people found this helpful.
Was this helpful?
Thank you for voting!
< Prev
1
2
3
Next >
✖
Ask a Question
Ask our experts a question on this part and we'll respond as soon as we can.