Real ratings from other people who bought this part.
Average Rating:
★★★★★
★★★★★
2 Reviews
5.0
Out of 5
5 Stars
2
4 Stars
0
3 Stars
0
2 Stars
0
1 Star
0
Search reviews left by others. DIY doesn't mean you have to do it alone. Use simple keywords like "fit", "broken", "easy", or "quality" to find reviews that match!
Search filter:
Clear Filter
Your search term must have 3 or more characters.
Sort by:
Prev
1
Next
Sorry, we couldn't find any existing reviews that matched. Try using some different or simpler keywords.
★★★★★
★★★★★
George N - May 16, 2020
Verified Purchase
Works great
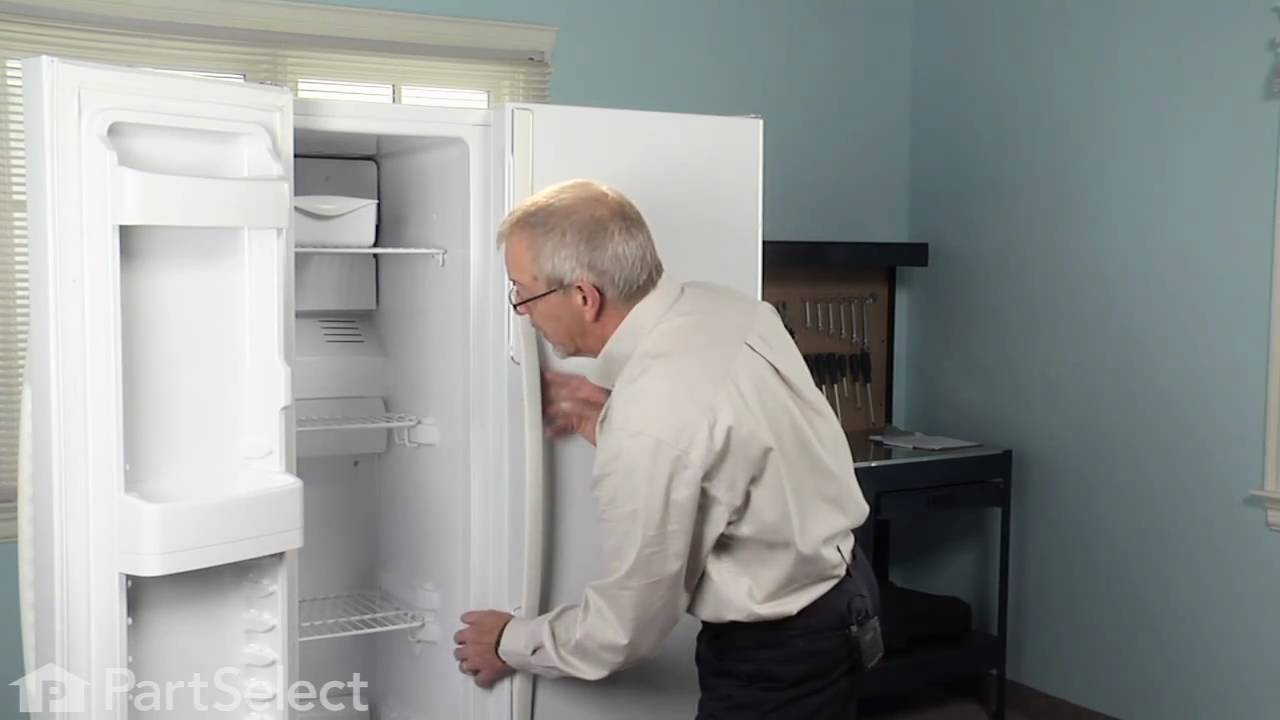
Fast shipper (We needed this) Thanks for the video
★★★★★
★★★★★
Reid K - May 18, 2021
Verified Purchase
Easy repair
Part worked great ,everything is working well
Prev
1
Next
Repair Tips
See how others fixed this model. Time, tools, difficulty, and steps that lead to victory!
Easy
30 - 60 mins
Average repair rating from 103 real customers like you
Sort by:
Prev
1
2
3
Next
Search repair tips from other customers using simple keywords like "replace", "fit", "remove", "inspect". DIY doesn't mean you have to do it alone!
Search filter:
Clear Filter
Your search term must have 3 or more characters.
Sorry, we couldn't find any existing installation instruction that matched.
Ice box and freezer would not get cold,the back wall of the freezer was covered with ice
570 of 611 peoplefound this instruction helpful.
Greg from Aledo, TX
Really Easy
1- 2 hours
Nutdriver, Pliers, Screw drivers
1. I had to defrost the ice off of the back wall of the freezer with a blowdryer. 2. Removed the four 1/4'' screws and removed the back panel. 3. Defrosted all of the ice off the coils and heater. 4. I replaced the defrost thermostat and heater by following the directions that came with them. The directions are very clear a
... Read morend easy to follow. I had a single element heater, and the replacement was a double element, the directions even explained how to rearrange the wires to make it work. The whole job only really consisted of cutting two wires that are color coded on the thermostat and resplicing the new ones in. I used scotch locks and electrical tape for the splices. The element had connectors on it so I just removed two screws, unplugged two wires and plugged them on the new one. The greatest thing about this repair was that I troubleshot the problem using the PartSelect website, ordered the parts and they arrived at my house in less than 24 hours. Thank You.
Freezer wouldn't maintain temperature ... got warm.
297 of 353 peoplefound this instruction helpful.
Mike from Scottsdale, AZ
Easy
15 - 30 mins
Nutdriver, Screw drivers
The freezer in my side-by-side kept warming up -- often 20 degrees or more, which of course caused the fresh food side to warm up also. I do a lot of jump-in-with-both-feet home repairs, but never on a large appliance. Not having an ohmmeter, which cost about $100 for a reliable one, I took the symptoms to the internet. Countless self-hel
... Read morep sites and U-Tube videos later, I was positive it was one of two possible problems, either the defrost thermostat was broken and the defroster wasn't coming out of its cycle or the temperature sensor wasn't reading the correct temp and thus kicking in the fan motor when needed. Fortunately I found both parts easily on PartSelect.com and the total cost for both, including shipping, was $30, less than 1/3 of the cost of an ohmmeter. Not knowing for sure which part it was that was bad, I ordered both, figuring, since I had to pull out the panel anyway, I might just as well replace them both ... the price was right. (In retrospect I should have order 4 Temperature Sensors as my fridge has two in both the freezer side and the Fresh Food side. Any one of them being bad could have caused the same problem. Fortunately, I was lucky because it was either ONLY the Defrost Thermostat or I just happened to pick the right Sensor, but the repair worked.)
The repair was easy: Unplug the power. A Nut Driver removed the four screws holding on the panel in the back of the freezer. A screw driver removes the one screw holding the lamp cover in place. Remove the light bulbs, pull off the panel and right above the freezer coils you'll see both parts -- plain as day. (If your coils are clogged with ice, you will probably need de-ice first.) Cut the wires to both parts as close to the parts as you can to leave as much wire exposed as possible. Strip the ends of all four wires about 1/2 inch and also on the new parts. Match up the wires in the fridge to the wires on the parts and twist the ends together (Note: both wires on the Sensor are white so they match up either way, but the two wire on the thermostat will need to match up orange to orange and pink to pink.) I used silicone filled wire nuts, which you can buy at any hardware store or use your own wing nuts and fill them with silicone or shoe goo which works just as well ... anything to keep the moisture out and prevent the wires ends from corroding. Tuck the wires up and replace the panel, light bulbs and light cover That's it. Very easy. By far the hardest part was wedging my wide body into the narrow freezer compartment. Some one-handed work added a little extra time to the project.
In my case the freezer fan didn't kick in for about twenty minutes after I plugged it back in, but I assume that it either begins in the defrost mode or it takes that long for it to reset itself ... either way the repair worked great.
vegetables freezing in fridge, freezer getting warm, always running
168 of 258 peoplefound this instruction helpful.
joseph from mastic, NY
Easy
1- 2 hours
Nutdriver
1st symptom, water dispenser not working. 2nd symptom, carrots freezing in fridge lower drawer. 3rd symptom, 3 days later, freezer getting warmer and warmer, fan always running, back of inside wall of freezer building up with ice. Originally changed water valve for dispenser thinking it was the only problem. After noti
... Read morecing the freezer getting warmer and doing some reading, I decided the best guesstimate would be the defrost thermostat or heater behind the inside freezer wall. Defrosting all that ice to get behind the wall is the time consuming part of this job. Not wishing to defrost and troubleshoot to determine which component failed, they are cheap enough to just buy both the heater and t-stat and replace both and be done with it. It turned out to be the heater, an element encased in glass, the glass turns black on the ends when it is toasted. This is a very easy fix. If you do not have crimpers for the butt connectors for the 2 wires for the t-stat, you can use a wire nut to twist them together and seal it with silicone/rtv. The heater just plugs in on both ends. Remember it is glass and very delicate, take your time. Start to finish this could be a 3 hour job, but most of that time is melting the ice, cleaning up and putting everything back in the freezer.
freezer defrost and then after some time would work.
92 of 96 peoplefound this instruction helpful.
anthony from burke, VA
A Bit Difficult
1- 2 hours
Nutdriver, Pliers
one repair man said I needed freon. sears repair man said my evaporators leaked. and should buy a new fridge. I installed the parts for less than $30. dried the freezer compartment removed back panel and asst parts. removed screws from evaporator assy and replaced def therm. soldered leads/wing nuts. removed cover from sensor
... Read moretemp and again connected leads. working fine.
frige not cooling, freezer working, frost buildup. also door for ice dispenser stuck open!
81 of 103 peoplefound this instruction helpful.
stan from winder, GA
A Bit Difficult
1- 2 hours
Nutdriver, Screw drivers
first I removed shelves, bottom drawer, one drawer slide. then removed plastic cover from inside, light bulb, removed two screws from back panel (inside refrigerator, removed panel. You will see heater towards bottom. Remove screws (2) that hold heater in place, disconnect wires from heater, thermostat is attached to line just abov
... Read moree where heater is attached. You will find that is quicker to cut thermostat wire, then splice together with wire nut. reassemble in reverse order. To check ice door, you must remove inner door panel, mine had to selenoid rusted and locked up. Removed , cleaned, reinstalledm worked ok. Hope this helps someone. Thank you partselect from your good service!
Freezer compartment would freeze sold so the fridge would go warm.
77 of 93 peoplefound this instruction helpful.
Michael from American Fork, UT
Easy
30 - 60 mins
Nutdriver, Pliers, Wrench (Adjustable)
Emptied the fridge and freezer. Unplugged it and in so do doing defrosted the freezer coils. Replace the listed parts, for they were right there easy to get at and replace. Between the three of them we had an 80% chance of getting what was wrong. The freezer and the refridgerator are both working just fine. No more warm milk.
For several years, had problem with water accumulating in the bottom of the refrigerator...took out the "custom cool" drawer and assigned my kids the responsibility to dry it out daily after supper (about a fourth of cup of water daily)...the water was condensing and dripping down the left side of the refrigerator... NOT coming from the r
... Read moreefregerator evaporator drip pan area. Then the refrigerator and freeezer had erratic cooling...paid 4 grand for this GE stainless steel on the front/sides frig about 5 years ago... then my wife said she wanted a new refrigerator...what the heck...went on to numerous websites and finally decided to do my own "overall"...had nothing to lose except the price of the parts. A helpful web site is the GE technician site at...www.manualinstruction.com/wp-content/uploads/2011/10/ge-sidebyside.pdf. I ordered the four thermisters, a new freezer defroster (the old one was probably OK...the freezer coils were not "iced Up"), and a new defroster thermonmeter. While I was at it, I ordered a new refrigerator evaporator drip pan that was rusting a bit. As per other instructions in this website, just spliced in the new thermisters,used wire twist caps and eletrical tape to seal them. The GE site is a bit more elaborate on the "correct" way to do this. The refrigerator evaporator coil is a bit tricky...see the above ge site...but I just cut the rubber thermister holder down the middle and then tracked the thermister through the holder and stuck it in the block and taped the holder back together...(removed the block first ) and then zip-lined the block back to the coil like it was originally. It was about 3 hours to do everything...and guess what...temp in the freezer is -5...temp in the frig is 36...and NO MORE WATER IN THE BOTTOM OF THE REFRIGERATOR, NO MORE WATER DRIPPING DOWN THE LEFT SIDE OF THE REFRIGERATOR...what will my kids do...I feel like the refrigerator guru now. Wish I had done this several years ago. The parts I ordered came in 3 days. I'm lovin my refrigerator now and my wife is lovin me. It's really easier than I thought it would be...the GE tech website has some "diagnostic" info to isolate different problems... but I just decided to replace "everything" since the parts were not that expensive and it was going to be a "do or die" on getting a new refrigerator.
Ice maker failure due to chunks of ice building up in tray
63 of 84 peoplefound this instruction helpful.
Terrence from Escalon, CA
Easy
30 - 60 mins
Nutdriver
My problem began with having to replace the auger due to damage (broken blade). Unknown at that time the unit was having a defrost cycle issue. Once auger was repaired, then the motor to auger failed. Once repaired the GE unit then began shutting down without warning. Mother board replaced. All was fine for two weeks then noticed odd perf
... Read moreormance by ice-maker (chunks of Ice again)and frozen package containers showing signs of dampness and then refreezing. Read through the Parts Select web site to see what other users may have had gone wrong with their GE's and what the parts overview section may reveal for me. Found that the defrost thermo and temp-sensor controlled defrost functions. The parts were cheap, $20.00 for the pair so I replaced them both since they are both located next to one another in the freezer compartment. The repair video furnished on the P/S web was great and very accurate. The entire job only took about an hour. The repair video indicated using wire-nuts and electircal tape Instead, I chose to solder the wires and use shrink-tubing to provide the moisture barrier. PartSelect folks are great not only for their parts pricing but also for the informative videos. The GE works better than ever
I Placed A Heat Gun In The Freezer Section To Defrost The Coils And Did Not Return In Time. The Heat From The Heat Gun Rose Upward And Melted All Of The Soft Plastic Parts. The Good News Was That The 16 Parts Were Not Expensive But The One Main Part That Was Needed To Put It All Back Together Took 3
63 of 113 peoplefound this instruction helpful.
Guy from New Palestine, IN
Really Easy
30 - 60 mins
Nutdriver
I replaced all of the plastic parts as well as the heat coil that is mounted at the bottom of the coils that keeps the coils from freezing up. If I had not melted the plastic parts the coil could have been replaced in 2 days, 1 day to receive the part and the next to do the work. This is the second time I have had to replace this heater
... Read more.
Fridge and Freezer would no longer cool (coils iced over)
52 of 60 peoplefound this instruction helpful.
Erik from Chardon, OH
Easy
1- 2 hours
Nutdriver, Screw drivers
First I posted the symptoms on appliance repair forum. Within a very short amount of time, an expert responded with suggestions (that ended up being right on!) and links to How-to articles, diagrams, and the correct parts catalog. They diagnosed it as a failed defrost heater or a bad defrost thermostat that caused the heater to go bad.
... Read more /> I removed all the food from the freezer, removed the shelving and ice maker tray, then removed the back panel (nut driver). The coils were severely iced over. I let the coils defrost (didn't take long in the summer heat). The water from the melted ice completely saturated about two full size bath towels. DO NOT let the coils drain into the normal drain hole. Then I removed the defrost heater (2 screws) and the glass element was dark and cloudy like a burnt-out light bulb.
I placed my order on Parts Select with normal priority shipping. The defrost thermostat was listed as in-stock and the defrost heater was listed as "on order". Both parts arrived 4 days later. The thermostat was a genuine GE part and the heater was a universal aftermarket. My original was a single element heater and the replacement was dual element. The wiring was slightly different, but they included instructions on how to wire up the dual element. The heater wires had to be re-routed and extended (wire cutting, stripping, and crimping are required). The extra length of wire and the wire crimp connector were included with the replacement heater. I also (per the instructions) sealed the crimp connector with RTV sealant. After completing the wiring, I re-attached the heater using the 2 factory screws. Then I had to cut the thermostat wires and splice in using wire nuts (not included) and RTV to seal the connection (not included).
Then I re-attached the back panel using the factory screws and attached the grounding clamp. I installed the shelves and ice maker tray and started the unit. It has been running fine for two weeks now.
The overall repair experience was fantastic. This fridge is only 3 years old and has broken twice in the last year costing me over $500 in food (total for both failures). I also bought a chest freezer last year when the fridge failed the first time. That minimized my frozen food loss this year. The failure last summer was the controller board. I paid the GE technician to come out and fix that because I did not know about this website. I am an engineer and I much prefer the DIY approach, especially when they make it so easy on this website to diagnose and get the right parts.
My only complaints (and they are so minor that complaint might be too harsh of a word) are: The repair was easy, but would have been significantly easier if they had supplied a direct replacement single element heater. I wish they would have included the RTV sealant in the repair kit. I happened to have it, but I have to imagine that not everybody will and they won't know that they need it until they read the instructions. The replacement dual element heater was slightly wider and thus a slightly tighter fit than the original equipment. Lastly (and this really is no big deal). I got my "Order Shipped" e-mail 6 days after the parts had arrived.
Ask our experts a question about this part and we'll get back to you as soon as possible!
We may have answered a similar question already! Search questions and answers left by others using simple keywords like "fit", "broken", "easy", or "quality" to find questions that match.
Search filter:
Clear Filter
Your search term must have 3 or more characters.
Sort by:
Prev
1
2
3
Next
Sorry, we couldn't find any existing answers that matched.Try using some different or simpler keywords, or submit your new question by using the "Ask a Question" button above!
Diaz
July 20, 2017
I was told to replace the defrost limiter thermostat when I realized that my freezer is getting too hot during the defrost cycle but it didn’t fix the problem. I don’t want to keep guessing and checking what the problem is because that will eventually get too expensive. Based on my symptoms what should I check for next?
Hello Diaz, the thermistor found on top of the evaporator is the most likely reason you are experiencing these symptoms. To replace this part, you can find it here WR55X10025. Best of luck with this repair.
29 peoplefound this instruction helpful.
Was this helpful?
Thank you for voting!
Tania
July 20, 2017
My fridge is maxed out on settings and will not get cold. The freezer seems to be in good condition though. What could be causing only my fridge to stay warm? Where should is tart looking/what am I looking for?
Hi Tania, we recommend first checking the evaporator coils in the freezer to see if there is ice affecting them. Then we suggest checking the evaporator fan motor to make sure it is running. If the coils are impacted then you are looking at a defrost problem, and the defrost thermostat and defrost heater need testing for continuity. If that check goes well that leaves you with a defrost control issue.
21 peoplefound this instruction helpful.
Was this helpful?
Thank you for voting!
MATTHEW - For model number 6SS23SGSASS
August 12, 2017
Is their a way to test the defrost thermostat?
Hi Matthew,
Thank you for your inquiry. Yes there is a way. You will have to us a multi-meter to test the defrost thermostat. What you will have to do first is calibrate your multi-meter. Set it all the way to its lowest setting. Then calibrate the needle so that it is set on to zero. After you have disconnected the power to your appliance and taken the part out, take both probes and touch them to the defrost thermostat's terminals. If the needle stays on zero or reads infinite ohms, that means that your part needs to be replaced. Good luck with your repair!
18 peoplefound this instruction helpful.
Was this helpful?
Thank you for voting!
Ian - For model number GSH22JFTA
December 23, 2017
My freezer was jam packed with frost and ice. I manually defrosted it with a hair dryer. What should the defrost thermostat read in ohms? If at room temperature? And if in ice water?
Hello Ian,
Thanks for your question. This part should read 0 ohms in a frosty setting. It will read "closed" at room temperature.The defrost thermostat opens at around 150 degrees as it is an overtemp. We would advise testing the sensor on the upper left side of the evaporator for resistance as well. In frost, it should read 42.2k ohms, and would read 5k ohms at room temperature.
I hope this helps.
I took a thermistor original by GE and it has a red thick cable and a white one.How can I fit the cables with the red and orange of the original thermistor?
Hi Radu, Thank you for the question.The defroster thermostats do not have a positive or negative side so it makes no difference which of the 2 wires connects to each other, It is just passing voltage from one side to the other when in defrost. Hope this helps!
9 peoplefound this instruction helpful.
Was this helpful?
Thank you for voting!
Henry
July 20, 2017
I installed the defrost limiter thermostat and my fridge will no longer turn on. What did I do wrong when making this installation?
Hi Henry, installing a defrost thermostat incorrectly would not affect the fridge turning on. If your unit is not running at all, the most common reason would be a problem with the defrost control. Please let us know if you have any further questions.
8 peoplefound this instruction helpful.
Was this helpful?
Thank you for voting!
Gary
January 10, 2019
At what temperature does sensor open and close
Hello Gary, thank you for your question. Unfortunately, we do not have the specifications on this part. We were able to find some information on what the reading should be when tested. The defrost thermistor located on the evaporator should have a resistance of 42.2K ohms of resistance. I hope this helps!
5 peoplefound this instruction helpful.
Was this helpful?
Thank you for voting!
James - For model number GSS22JFMDWW
September 15, 2017
Refrigerator isn't getting cold and the freezer is workin fine. What part do i need?
Hi James,
Thank you for your question. I would suggest checking your defrost thermostat, defrost heater, and your temperature sensor. You can test these parts with a multimeter. Good luck with your repair.
5 peoplefound this instruction helpful.
Was this helpful?
Thank you for voting!
Fernando - For model number PSC23SGRDSS
October 10, 2017
Where this part is located in freezer? Thank you.
Hi Fernando,
Thank you for your question. This part is attached to your evaporator. You would have to get at the part through the back panel of your freezer. Good luck with your repair.
4 peoplefound this instruction helpful.
Was this helpful?
Thank you for voting!
Joe
July 31, 2018
Is there a way to check thermistor with a meter
Hello Joe, Thank you for the question. Yes there is a way to test the thermostat . You will have to us a multi-meter to test the defrost thermostat. What you will have to do first is calibrate your multi-meter. Set it all the way to its lowest setting. Then calibrate the needle so that it is set on to zero. After you have disconnected the power to your appliance and taken the part out, take both probes and touch them to the defrost thermostat's terminals. If the needle stays on zero or reads infinite ohms, that means that your part needs to be replaced. Good luck with your repair!
3 peoplefound this instruction helpful.
Was this helpful?
Thank you for voting!
Prev
1
2
3
Next
✖
Ask a Question
Ask our experts a question on this part and we'll respond as soon as we can.



 My Orders