




















MAH14PNSAW Maytag Washer - Instructions
Keep searches simple. Use keywords, e.g. "leaking", "pump", "broken" or "fit".
water leaking in the front of the machine
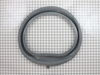
My 16 yr old son replaced the door boot. He said it was very easy although the wire was alittle tricky. But all in all it was very easy for him. Saved me alot of money.
Parts Used:
-
Susan from Mayville, MI
-
Difficulty Level:Really Easy
-
Total Repair Time:15 - 30 mins
-
Tools:Screw drivers
Was this instruction helpful to you?
Thank you for voting!
Rubber Boot between Tub and Door had a hole
When I looked up the part number, there was an installation video on the same page. I ordered the part then and there, and once it arrived, I put the iPad right on top of the machine and paused the video whenever I was doing the steps. It was TOO EASY!
Parts Used:
-
David from El Paso, TX
-
Difficulty Level:Really Easy
-
Total Repair Time:15 - 30 mins
-
Tools:Pliers, Screw drivers, Socket set
Was this instruction helpful to you?
Thank you for voting!
Appliance repair company did a poor job and the motor fell off because of a missing isolator
I opened the back of the washer, put the isolator in the hole it belongs in. I then inserted the motor pivot pins into the holes, and installed the motor bolt. Installed and tensioned the belt, tightened the motor bolt, and installed the back cover.
Parts Used:

-
John from Rochester, NY
-
Difficulty Level:Easy
-
Total Repair Time:Less than 15 mins
-
Tools:Socket set
Was this instruction helpful to you?
Thank you for voting!
Door sagging
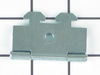
The service representative knew exactly what was needed from the description of the problem that was given to her. The hinges were received within a few days. The door was removed and the hinges were replaced and it does not sag anymore. Thank you for your great service.
Parts Used:
-
Norma from Donald, OR
-
Difficulty Level:Really Easy
-
Total Repair Time:15 - 30 mins
-
Tools:Screw drivers
Was this instruction helpful to you?
Thank you for voting!
Bellows was soiled
I followed the video for the installation. I did find that installing the spring was no way as easy as it looked in the video. Otherwise, OK.
Parts Used:

-
Jack from Haymarket, VA
-
Difficulty Level:Easy
-
Total Repair Time:1- 2 hours
-
Tools:Nutdriver, Pliers, Screw drivers, Wrench (Adjustable)
Was this instruction helpful to you?
Thank you for voting!
leaking boot around drum
The video was great. The only problem was getting the spring back on. It was way too stiff, so I put it in a vise and stretched it a bit. It's a bit fussy but your site made it go pretty easy. thanks
Parts Used:
-
John from Portland, OR
-
Difficulty Level:Easy
-
Total Repair Time:1- 2 hours
-
Tools:Nutdriver, Pliers, Screw drivers
Was this instruction helpful to you?
Thank you for voting!
broken drive belt
My first time attempted to repair washer and step by step video instruction attached with order confirmation did it for me. Thank you
Parts Used:

-
Truc from San Diego, CA
-
Difficulty Level:Really Easy
-
Total Repair Time:30 - 60 mins
-
Tools:Nutdriver, Screw drivers, Socket set
Was this instruction helpful to you?
Thank you for voting!
washer was leaking water all over the place
removed the door &the top took the tightener off the bellow took old one out put new one on and clean all parts and put it back together works like a new one love it.
Parts Used:
-
DONNA from WALKER, WV
-
Difficulty Level:Really Easy
-
Total Repair Time:1- 2 hours
-
Tools:Pliers, Screw drivers, Socket set
Was this instruction helpful to you?
Thank you for voting!
washer smelled hot on spin cycle
Replaced the belt and motor isolators. Watching your video made it very easy.
Parts Used:
-
Tom from Oak Ridge, TN
-
Difficulty Level:Really Easy
-
Total Repair Time:30 - 60 mins
-
Tools:Nutdriver, Pliers, Wrench set
Was this instruction helpful to you?
Thank you for voting!
Washer wouldn't agitate, though would spin
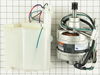
Received motor control board and new motor in one day - awesome! Took off front panel, disconnected power and water supplies. Disconnected wiring connections between motor control board and motor. Removed old control board. Removed back access panel. Replaced old motor with new motor. Put rear access panel back on. Installed new motor control board. Reconnected wiring connections between motor and control board. Put front panel back on. Reconnected power and water supplies. Done! The hardest part was moving my stack washer/dryer around to get at the rear access panel. I ended up putting the entire unit "face down" to make it easy to get access to the motor. Instructions that came with the motor/board kit were easy to follow. Only down side - I believe my old motor still worked fine. I'm sorry I had to replace it to replace the motor control board. Machine works great now.
Parts Used:
-
Christopher from Washington, DC
-
Difficulty Level:Easy
-
Total Repair Time:30 - 60 mins
-
Tools:Screw drivers, Wrench set
Was this instruction helpful to you?
Thank you for voting!
Squeeky belt
Followed instructions that came with replacement part, good as new!
Parts Used:
-
Randy from Queen Creek, AZ
-
Difficulty Level:Easy
-
Total Repair Time:30 - 60 mins
-
Tools:Nutdriver
Was this instruction helpful to you?
Thank you for voting!
The washer was leaking
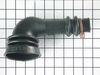
I removed the rear access panel, used a nut driver and pliers to remove the old hose. I tried to connect the new hose with the spring clamp on the pump end of the hose. I gave up on that after a few attepmts because the clamp was very hard to manipulate with standard pliers. I used a standard screw type hose clamp (2") that I had instead. The tub end was easier because a standard hose clamp was used there already. The washer no longer leaks, and I saved a lot of money by doing the job myself!
Parts Used:
-
Keith from Rocklin, CA
-
Difficulty Level:Easy
-
Total Repair Time:30 - 60 mins
-
Tools:Nutdriver, Screw drivers
Was this instruction helpful to you?
Thank you for voting!
Moldy Bellow
I watched the provided video that EXCELLENTLY showed the replacement of the part. Then I was able to complete the task with no trouble at all
Parts Used:
-
Jeffrey from Winston Salem, NC
-
Difficulty Level:Easy
-
Total Repair Time:30 - 60 mins
-
Tools:Nutdriver, Pliers, Screw drivers
Was this instruction helpful to you?
Thank you for voting!
The "boot" or bellow was torn in several places.
I went on your web site and printed the instructions given by the first entry after the product description. I had called my friend who is also a handy man and he did the repair very quickly [I helped very little]. The directions were very complete and very simple to follow. MAH5522BW
Parts Used:
-
Vivian from Scottsdale, AZ
-
Difficulty Level:Easy
-
Total Repair Time:30 - 60 mins
-
Tools:Pliers, Screw drivers, Socket set
Was this instruction helpful to you?
Thank you for voting!
mold on rubber door seal (boot)
Watched the video. Video was great. Used a vicegrip to stretch spring since it was slipping out of normal pliers.
Parts Used:
-
carl from geneva, IL
-
Difficulty Level:Easy
-
Total Repair Time:30 - 60 mins
-
Tools:Nutdriver, Pliers, Screw drivers
Was this instruction helpful to you?
Thank you for voting!