




















CW2079CWD LG Washer - Instructions
Keep searches simple. Use keywords, e.g. "leaking", "pump", "broken" or "fit".
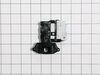
door lock malfunction
ridiculously easy. removed the door gasket ring clamp. separated the gasket from the face. unscrewed the lock, removed the wire(gently). replaced the wire on the new lock. replaced the lock. replaced door gasket and ring clamp. washed clothes. Note- I had called a repair service and was given a $360 estimate in addition to the $130 dollar service charge. All total- $50 dollar part(with shipping), less than 45 min total time and I'm no mechanic!
Parts Used:
-
paul from DELAND, FL
-
Difficulty Level:Really Easy
-
Total Repair Time:30 - 60 mins
-
Tools:Pliers, Screw drivers
2 of 2 people
found this instruction helpful.
Was this instruction helpful to you?
Thank you for voting!
Washer was leaking.
After watching the video for installation of the bellow, I followed the suggested repair method and was able to repair my washer.
Parts Used:


-
Memo from LA MIRADA, CA
-
Difficulty Level:A Bit Difficult
-
Total Repair Time:1- 2 hours
-
Tools:Nutdriver, Screw drivers, Wrench (Adjustable)
2 of 2 people
found this instruction helpful.
Was this instruction helpful to you?
Thank you for voting!
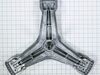
Noisy Bearings
In order to replace the bearings of a front loader LG Washer you will need to disassemble the entire unit. you should have excellent mechanical skills to tackle this project with necessary tools. Plan on replacing both bearings and rear seal, also plan on replacing the spider and drum seal. The Spider that supports the inner drum will be corroded due in part to seal failure. By the time you are hearing the bearing noise the damage to the spider will have taken place and need replacing. You can watch a few videos on youtube with similar appliances to give you an idea of the project at hand. Once disassembled cleaned and inspected the assembly goes real smooth. The washer now works as good as new and is ready for another 10+ years of service. Doing this project myself has saved me from buying a new one and that savings amounts to over $1000 bucks. LG washers are built to last and you will see that while working on it! Good Luck and do your homework!
Parts Used:

-
Gary from Pine, AZ
-
Difficulty Level:Difficult
-
Total Repair Time:More than 2 hours
-
Tools:Nutdriver, Pliers, Screw drivers, Socket set, Wrench set
2 of 2 people
found this instruction helpful.
Was this instruction helpful to you?
Thank you for voting!
Washer door lock would not stay locked; consequently, washer did not run.
Unscrewed 2 screws holding part. Removed old part & replaced with new.
Parts Used:
-
Rosie from SPRING, TX
-
Difficulty Level:Really Easy
-
Total Repair Time:15 - 30 mins
-
Tools:Screw drivers
2 of 2 people
found this instruction helpful.
Was this instruction helpful to you?
Thank you for voting!
Did not draw the water and did not finish its cycle
Remove where the water pumps are and remove the one that was damaged easily
Parts Used:
-
saul from NEW YORK, NY
-
Difficulty Level:Really Easy
-
Total Repair Time:15 - 30 mins
-
Tools:Pliers, Screw drivers
2 of 2 people
found this instruction helpful.
Was this instruction helpful to you?
Thank you for voting!
The hot water valve was leaking
It went great. First of all, thank you Part Select for the video on how to do this myself. My home warranty company was giving me a hard time. Blah, blah, blah. A mechanic friend of mine referred me to this site. Within minutes I found the part I need and a GREAT!!!! price. Ordered it, got it super fast, fixed it my self and my second hand washer is no longer peeing all over the floor. Very very happy. I will definitely be a repeat customer, hopefully not anytime soon.
Thank you again for an amazing experience.
Thank you again for an amazing experience.
Parts Used:
-
christen from HUMBLE, TX
-
Difficulty Level:Very Easy
-
Total Repair Time:Less than 15 mins
-
Tools:Pliers, Wrench (Adjustable)
2 of 2 people
found this instruction helpful.
Was this instruction helpful to you?
Thank you for voting!
WASHER WOULD NOT FUNCTION BECAUSE DOOR LOCK ACTUATOR (ORIGINAL) FAILED.
WATCHED VIDEO PROVIDED BY PART SELECT, AND FOLLOWED INSTRUCTIONS. VERY SIMPLE REPAIR.
Parts Used:
-
BRAD from AUBURN, MA
-
Difficulty Level:Really Easy
-
Total Repair Time:Less than 15 mins
-
Tools:Screw drivers
2 of 2 people
found this instruction helpful.
Was this instruction helpful to you?
Thank you for voting!
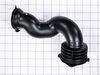
Noticed small tear in hose bellows and leak during reassembly
I already had the top of the washer open, from previous disassembly to clean the front loader seal, and when I ran a trial load, noticed a small 1/4" tear in the hose bellows that attaches to the drum.
Very simple repair, remove the existing hose by loosening the clamps, paying attention to their orientation. Install the existing hose clamps onto the new hose, install and tighten the hose clamps.
5 minute job, if the washer top is off (which is also simple).
Very simple repair, remove the existing hose by loosening the clamps, paying attention to their orientation. Install the existing hose clamps onto the new hose, install and tighten the hose clamps.
5 minute job, if the washer top is off (which is also simple).
Parts Used:
-
Ryan from HIGHLAND, UT
-
Difficulty Level:Very Easy
-
Total Repair Time:Less than 15 mins
-
Tools:Screw drivers
2 of 3 people
found this instruction helpful.
Was this instruction helpful to you?
Thank you for voting!
washer would not run
-
kirk from WEST COLUMBIA, SC
-
Difficulty Level:Really Easy
-
Total Repair Time:15 - 30 mins
-
Tools:Screw drivers
2 of 3 people
found this instruction helpful.
Was this instruction helpful to you?
Thank you for voting!
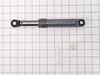
Washer was giving an error and not removing water/spinning
Followed instructions on YouTube link. Replaced the shock absorber and washer is working really well.
Parts Used:
-
Magalys from WYOMING, MI
-
Difficulty Level:Easy
-
Total Repair Time:1- 2 hours
-
Tools:Pliers, Screw drivers, Socket set, Wrench set
3 of 6 people
found this instruction helpful.
Was this instruction helpful to you?
Thank you for voting!
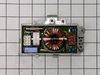
No power to dishwasher. Confirmed that outlet had power coming out.
Turn off circuit breaker. Turn off water at shutoff valve usually located under sink. Disconnect water line from dishwasher. Disconnect wires for the power feed from cord, Marked corresponding wires upon removal for re-installation. Remove 2 mounting screws that secure dishwasher to counter. Slide dishwasher out from counter and turn upside down. Use a blanket to prevent scratching of surfaces. Locate component on the back portion of the dishwasher. Unplug 2 wiring harnesses. My part was held on by 2 phillip screws. One in front, the other in the back along the leg bracket support. Once removed, reverse the order of removal. The i a You Tube video you can locate fr this removal. They said that you needed to release a clip to get the part out. Mine had a screw holding it on the back side. This difference cause about an extra 1/2 hour before I was able to figure out that there was NO clip that was being shown on the video. After that, The replacement went smoothly and we were having the dishes washed later that day.
Parts Used:
-
JOHN from FORT MYERS, FL
-
Difficulty Level:Easy
-
Total Repair Time:30 - 60 mins
-
Tools:Screw drivers, Wrench (Adjustable)
4 of 9 people
found this instruction helpful.
Was this instruction helpful to you?
Thank you for voting!
Hot water inlet had leak, kept filling washer, when offw
-
Rudy from SAN DIEGO, CA
-
Difficulty Level:Really Easy
-
Total Repair Time:30 - 60 mins
1 person
found this instruction helpful.
Was this instruction helpful to you?
Thank you for voting!
Could not remove one of the pins
Removed the front and rear covers ,the control panel , removed the shock absorber pins and shocks installed new shocks and reassembled
Parts Used:
-
Leslie from ORLAND HILLS, IL
-
Difficulty Level:A Bit Difficult
-
Total Repair Time:1- 2 hours
-
Tools:Pliers, Screw drivers
1 person
found this instruction helpful.
Was this instruction helpful to you?
Thank you for voting!
The drain hose was leaking
First I had to elevate the washer on 3-5 gal. buckets in order to get underneath it and find the leak. Then I tried to repair the hose itself-which actually worked-but then the rest of the hose just started splitting everywhere I touched it. So I ordered the new part which took some careful comparing and examination online. But it was exactly the right part. You have to remove the top of the washer which is just 2 or 3 screws. Then taking the hose out was a little challenge-knowing I would have to put the new one back in carefully. Use Vaseline on rubber fitting at the end of the hose that connects to the washer. Need at least 2 people to raise the washer up in air to work on it.
Parts Used:

-
Julia from Mena, AR
-
Difficulty Level:Difficult
-
Total Repair Time:1- 2 hours
-
Tools:Pliers, Screw drivers
1 person
found this instruction helpful.
Was this instruction helpful to you?
Thank you for voting!
Washer was leaking water (Door boot had a tear in it)
Watch the videos on u-tube. I used the video where they did not take the top and front of the machine off. Make sure you get the spring pliers because they really do help
Parts Used:

-
Scot from West Seneca, NY
-
Difficulty Level:Really Easy
-
Total Repair Time:30 - 60 mins
-
Tools:Screw drivers
1 person
found this instruction helpful.
Was this instruction helpful to you?
Thank you for voting!