




















BGEF3042KFD Frigidaire Range - Instructions
Keep searches simple. Use keywords, e.g. "leaking", "pump", "broken" or "fit".
no heat
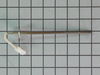
Replaced the oven probe because a no heat problem. also had to replace the oven control. That was a bit expensive but still saved me hundreds not calling a serviceman. By the way, it works like new.....
Parts Used:
-
John M. from PLEASANT PRAIRIE, WI
-
Difficulty Level:Easy
-
Total Repair Time:Less than 15 mins
-
Tools:Nutdriver
Was this instruction helpful to you?
Thank you for voting!
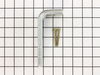
Needed to install an anti-tip bracket on my stove.
Moved the stove. Used the template to position the bracket. Put the supplied screws to attach bracket to the floor. Slid stove back into place. DONE!
Parts Used:
-
Daniel from Provo, UT
-
Difficulty Level:Really Easy
-
Total Repair Time:Less than 15 mins
-
Tools:Socket set
Was this instruction helpful to you?
Thank you for voting!
Oven not heating up properly
I removed back cover and replaced the probe. The troubleshooting info indicated this is the problem 99% of the time. Guess what, it did not help! Further checks indicate that broil element may be out. Am going to resistance check and order if that is the problem.
Parts Used:
-
Larry from Jordan, AR
-
Difficulty Level:Really Easy
-
Total Repair Time:Less than 15 mins
-
Tools:Nutdriver
Was this instruction helpful to you?
Thank you for voting!
Small plastic lens on control panel broken.
Pulled the range out, unplugged it, removed upper back panel, inserted lens through front of control panel, slid the notch on the actual light onto the lip on the back of the plastic lens. Done!
Parts Used:
-
James from Louisville, KY
-
Difficulty Level:Really Easy
-
Total Repair Time:Less than 15 mins
-
Tools:Nutdriver
Was this instruction helpful to you?
Thank you for voting!
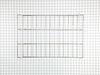
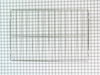
racks had tarnished, because they had not been removed during self-cleaning cycle.
When I called parts select, the agent was helpful and knowledgeable. She walked me through which rack number was necessary to replace my damaged racks. I received the parts the following day, less than 24 hours following the placement of the order. I will definitely use parts select when needing parts in the future.
Parts Used:
-
Ed from Ormond Beach, FL
-
Difficulty Level:Really Easy
-
Total Repair Time:Less than 15 mins
Was this instruction helpful to you?
Thank you for voting!
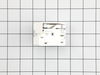
shorted out small element burner switch
First, I disconnected the electrical power by pulling apart the plug behind the range. Next, I removed the screws holding the service plate on back of the top panel.I removed the switch knob by gently pulling it from the stem. Underneath I found 2 screws holding the switch in the panel. I removed these with a phillips screwdriver.I was able to pull the entire switch out to the rear leaving all wires attached.The new switch looked different from the original and the wires were configured differently but the wires were clearly marked. By removing one at a time and placing it on the new switch to the corresponding marking,it was a simple matter to wire the switch.I reinstalled the switch in the panel,put back in the screws to hold the switch, slid the knob back on the stem, reinstalled the rear panel,and plugged the power cord back in.The switch worked perfectly.
Parts Used:
-
Alvie from Walnut Cove, NC
-
Difficulty Level:Easy
-
Total Repair Time:15 - 30 mins
-
Tools:Nutdriver, Pliers, Screw drivers
Was this instruction helpful to you?
Thank you for voting!
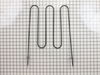
broiler element burned out.
Unscrewed the old element (2) screws, then unscrewed the (2) brackets holding the element up, pulled the element out of the back wall of the oven unhooked the (2) electrical wires and left them hanging. Installation is in the exact reverse order.
Parts Used:
-
Kellyjean from Springfield, MA
-
Difficulty Level:Really Easy
-
Total Repair Time:15 - 30 mins
-
Tools:Screw drivers
Was this instruction helpful to you?
Thank you for voting!
Broiler element broken
Removed broken element, four screws. Element ends were attached to the oven via wire clips. Removed those too. Placed clips on the ends of the new element and remounted to the top of the oven enclosure with the fours screens. Took twenty to twenty five minutes. We had Tbones a little while later. Saved over 125.00 for repairman.
Parts Used:
-
Robert from Newark, DE
-
Difficulty Level:Easy
-
Total Repair Time:15 - 30 mins
-
Tools:Screw drivers
Was this instruction helpful to you?
Thank you for voting!
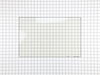
inner glass uncleanable
Took door apart, went online to partselect, ordered new glass, and put it back together. Oven looks like new. Makes sense to order the isolation as well when you do the repair
Parts Used:
-
Krista from Newtown, CT
-
Difficulty Level:Easy
-
Total Repair Time:15 - 30 mins
-
Tools:Screw drivers
Was this instruction helpful to you?
Thank you for voting!
oven took too long to heat up
un bolted the 6 nut driver heads found probe wire un pluged it 1/4 turn from lock it was in and pull out replace slide in new probe 1/4 turn to lock it in place replace nut driver self tappers and test simple!!
Parts Used:
-
JAONNE from GAFILED, NJ
-
Difficulty Level:Really Easy
-
Total Repair Time:15 - 30 mins
-
Tools:Nutdriver
Was this instruction helpful to you?
Thank you for voting!
No current to the burner
Checked the burner and no power to heat the burner. removed the old switch and put on the new one.
Parts Used:
-
terry from Pensacola, FL
-
Difficulty Level:Really Easy
-
Total Repair Time:15 - 30 mins
-
Tools:Nutdriver, Screw drivers
Was this instruction helpful to you?
Thank you for voting!
inner glass door was broken
removed the door from the range. removed the 4 layers of glass and carefully set aside the unbroken ones. the 3rd and 4th glasses were held together with a metal frame which had to be dismantled. The old broken glass was rusted and hard to get out of the frame. It had to be cleaned thoroughly of broken glass and rust. the removal process could then be reversed to assemble the parts and re assemble the door to the front of the range
Parts Used:
-
Norma J from Riverview, FL
-
Difficulty Level:Difficult
-
Total Repair Time:30 - 60 mins
Was this instruction helpful to you?
Thank you for voting!
Broken oven door glass
I followed directions for replacement of the glass from the web. Replacement was simple and easy.
Parts Used:
-
Joseph from Cranberry township, PA
-
Difficulty Level:Easy
-
Total Repair Time:30 - 60 mins
-
Tools:Nutdriver, Screw drivers
Was this instruction helpful to you?
Thank you for voting!
inner oven door glass broken
I was unable to loosen the screws myself so I called my friends husband to help me. We watched the video together and followed the instructions. The door in the video was a bit different than mine but this repair was easy.
Parts Used:
-
Cheryl from Derby, NY
-
Difficulty Level:Really Easy
-
Total Repair Time:30 - 60 mins
-
Tools:Screw drivers
Was this instruction helpful to you?
Thank you for voting!
Oven overheating and smell of overheated wires
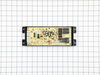
Remove back cover located and replace probe by unplugging wire and removing one 1/4 screw with nut driver replace probe by plugging one wire and one screw. Remove the timer by unplugging two plugs and removing four 1/4 screws remove decal from old timer and place it on the new one replace the timer by replacing four screws plug in the wires replace the cover you're done. (Note) be sure to unplug the main power to the oven before you start.
Parts Used:
-
Therman from Clarksville, TN
-
Difficulty Level:Really Easy
-
Total Repair Time:30 - 60 mins
-
Tools:Nutdriver
Was this instruction helpful to you?
Thank you for voting!