




















9825XUB Magic Chef Wall Oven - Instructions
Keep searches simple. Use keywords, e.g. "leaking", "pump", "broken" or "fit".
Temp spikes.
Remove sensor from oven. Disconnected wire from back. Connected new sensor and reinstalled. Temps now stay stable.
Parts Used:

-
Wayne from Grantsburg, WI
-
Difficulty Level:Easy
-
Total Repair Time:30 - 60 mins
-
Tools:Pliers, Screw drivers
Was this instruction helpful to you?
Thank you for voting!
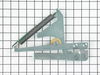
Springs on both hinges for upper over (double-over) needed replacing. Oven door slammed down and could have hurt someone.
Couldn't get oven to slide all the way out of cabinet. Disconnected electrical (first threw correct circuit breaker), then slid oven out. Removed applicable parts to get to the hinges. Later realized the oven WOULD slide all the way out of cabinet WITHOUT disconnecting electrical. Once oven was slide out far enough from cabinet, oven door hinges were easily accessable and it each hinge only had two screws.
Parts Used:
-
Derek from Marietta, GA
-
Difficulty Level:A Bit Difficult
-
Total Repair Time:More than 2 hours
-
Tools:Screw drivers, Wrench set
Was this instruction helpful to you?
Thank you for voting!
oven not staying on. fault cod F-3 showing
Removed the back of the stove, un-pluged the sensor wires, removed the sensor from inside the oven. installed the new sensor, pluged in the wires, and replaced the back of the stove. A phillips screwdriver was the only tool needed.
Parts Used:
-
James from Cumberland, MD
-
Difficulty Level:Really Easy
-
Total Repair Time:30 - 60 mins
-
Tools:Screw drivers
Was this instruction helpful to you?
Thank you for voting!
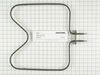
The Bake Element Ceased To Bake.
Turn off the breaker. Remove the two screws holding the bake element and disconnect the two wires. Plug the new element in and re install the screws. Trip the breaker back on and test the oven. It works.
Parts Used:
-
Robert from Pasadena, TX
-
Difficulty Level:Really Easy
-
Total Repair Time:Less than 15 mins
-
Tools:Screw drivers
Was this instruction helpful to you?
Thank you for voting!
Heating element not working
Unscrewed two screws, unplugged two small plugs, plugged the new ones in and screwed the screws back in. Less than 10 minutes.
Parts Used:
-
sherri from Topeka, KS
-
Difficulty Level:Really Easy
-
Total Repair Time:Less than 15 mins
-
Tools:Screw drivers
Was this instruction helpful to you?
Thank you for voting!
Damaged the oven lamp socket while removing a broken bulb.
Upon receiving the replacement part, I noted that the socket was held in place by simple expanding tabs. TURN OFF POWER TO THE OVEN. Using a right angle pick or similar tool, bend the tabs inward on the existing socket and remove. Disconnect the white, black and green wires. Note which tab is the green tab. Attach the wires to the new socket. Push the new socket into place, aligning the key bump on the socket with he slot in the oven wall opening. Install bulb and diffuser.
Parts Used:

-
Ronald from Dover, DE
-
Difficulty Level:Really Easy
-
Total Repair Time:Less than 15 mins
Was this instruction helpful to you?
Thank you for voting!
burnt out element
Very easy. remove two screwa , pull element forward, unplug.Set new element in place, plug in. push back in. Screw in both screws and your done.
Parts Used:
-
Glenn from Rochester, NY
-
Difficulty Level:Really Easy
-
Total Repair Time:Less than 15 mins
-
Tools:Screw drivers
Was this instruction helpful to you?
Thank you for voting!
bake element burned through.
Very simple. Removed two screws-pulled element out about 3-4 inches-pulled off the contacts-reversed procedure using the provided screws, turned the breaker switch on and everything worked fine. Excellent service from parts select and quick shipping.
Parts Used:
-
Ronnie from Albuquerque, NM
-
Difficulty Level:Really Easy
-
Total Repair Time:Less than 15 mins
-
Tools:Screw drivers
Was this instruction helpful to you?
Thank you for voting!
Had code F1 and F3 on my oven. Oven wouldn't heat.
Watched the video and it was as easy as described. Not many things go as easily as this.
Parts Used:
-
Cindy from Polson, MT
-
Difficulty Level:Really Easy
-
Total Repair Time:Less than 15 mins
-
Tools:Screw drivers
Was this instruction helpful to you?
Thank you for voting!
would not heat
-
robert from pantego, TX
-
Difficulty Level:Really Easy
-
Total Repair Time:Less than 15 mins
-
Tools:Screw drivers
Was this instruction helpful to you?
Thank you for voting!
Insulation along the top of the oven cracked and broke off
Took old insulation off and replaced it with new by hooking new part in its place.
Parts Used:
-
Carol from Park Ridge, IL
-
Difficulty Level:Really Easy
-
Total Repair Time:Less than 15 mins
Was this instruction helpful to you?
Thank you for voting!
Light lens broke when self clean cycle was used
I searched Whirlpool, Sears and random appliance stores and Part Select was the only company to have the lens available. All other manufacturers said the lens was no longer manufactured as a stand alone piece and I would have to buy the entire light assembly. Thank you Parts Select!!!!!
Parts Used:

-
James from Buford, GA
-
Difficulty Level:Really Easy
-
Total Repair Time:Less than 15 mins
Was this instruction helpful to you?
Thank you for voting!
Broken plastic knob
-
Judy from McKinney, TX
-
Difficulty Level:Really Easy
-
Total Repair Time:Less than 15 mins
Was this instruction helpful to you?
Thank you for voting!
Fan runs continually ,door locked,error code f2,f3,f7
Turned off breaker,opened door with bent coat hanger by sliding right to left the coat hanger to open the door, remover 2 screws holding in the sensor in upper left corner of the oven. Remove the sensor (gently) with the wire connection from back of oven pulling sensor out a out 8 inches . Disconnect plug. Install new sensor with matched harness /.connection, installed 2 screws ,turned on breaker.
Parts Used:
-
John from Dacula, GA
-
Difficulty Level:Really Easy
-
Total Repair Time:Less than 15 mins
-
Tools:Screw drivers
Was this instruction helpful to you?
Thank you for voting!
Oven element would not heat.
Turned power off by switching off the breaker. Removed both racks from oven. Removed two Phillips head screws at back of oven securing the old heat element. Pulled old heat element forward about four inches exposing the two power wires connected to it. Removed the wires from their connectors. Removed old element. Connected new element to power wires and pushed it back in place. Replaced new Phillips head screws. Replaced racks, and turned power back on. Oven was fixed in less than five minutes. Disposed of old element. Life is good.
Parts Used:
-
Denver from Denton, TX
-
Difficulty Level:Really Easy
-
Total Repair Time:Less than 15 mins
-
Tools:Screw drivers
Was this instruction helpful to you?
Thank you for voting!