




















91149239300 Kenmore Microwave Oven Combo - Instructions
Keep searches simple. Use keywords, e.g. "leaking", "pump", "broken" or "fit".
Broken Door Switch
I unplugged the defective plug and replaced it with the new one. Took 5 min total
Parts Used:
-
Peter from Green Valley, AZ
-
Difficulty Level:Really Easy
-
Total Repair Time:Less than 15 mins
Was this instruction helpful to you?
Thank you for voting!
3 of 4 Oven Lamps burnt out
Remove the glass cover to the halogen lamp fixture (counter clockwise turn, about a 1/4 turn). Recommend use of rubber coated gloves as the glass covers do not offer much by way of a good grip. Gently remove the halogen lamp (bulb) and insert new bulb into socket. Since the oven door is open, the lamp will light up indicating successful installation. Replace the glass cover (clockwise turn) until secure. Pitch the burnt out halogen lamp in the trash.
Parts Used:
-
Dave from Woodbine, MD
-
Difficulty Level:Easy
-
Total Repair Time:Less than 15 mins
Was this instruction helpful to you?
Thank you for voting!
diode burnt
-
MANUEL from ESCONDIDO, CA
-
Difficulty Level:Really Easy
-
Total Repair Time:Less than 15 mins
-
Tools:Screw drivers
Was this instruction helpful to you?
Thank you for voting!
Not heating
Removed the above stove microhood. Removed the side panels & the top panel. Diode located on right hand side of microwave. Removed with screwdriver & replaced new diode. It's best to get the microwave schematic online to pinpoint location of the part.
Parts Used:
-
Debra from Concord, CA
-
Difficulty Level:Easy
-
Total Repair Time:Less than 15 mins
-
Tools:Nutdriver, Screw drivers
Was this instruction helpful to you?
Thank you for voting!
defective oven door seal
pull out defective seal with pliers clean area and press new seal into place making sure the spring clips on seal are completely inserted into door slots push ends of seal into holes in bottom of door
Parts Used:
-
Brenda from Cave Creek, AZ
-
Difficulty Level:Really Easy
-
Total Repair Time:Less than 15 mins
-
Tools:Pliers
Was this instruction helpful to you?
Thank you for voting!
broken switch
This was a wall mounted oven. Turned off breaker. Pulled panel off by removing 6 screws. Pulled connectors off old switch. Removed old switch. Just a friction fit. I used my jack knife to get it moving. Pushed in the new switch and connected wires. (just push on tabs) Put panel back together and turned on breaker. Done, easy.
Parts Used:
-
Bob from Marcy, NY
-
Difficulty Level:Easy
-
Total Repair Time:15 - 30 mins
-
Tools:Screw drivers
Was this instruction helpful to you?
Thank you for voting!
gasket replacement
Took about 15 minutes to take the old one off and put the new one on. Not difficult at all.
Parts Used:
-
Marilyn from Auburn, WA
-
Difficulty Level:Easy
-
Total Repair Time:15 - 30 mins
-
Tools:Screw drivers
Was this instruction helpful to you?
Thank you for voting!
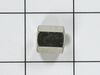
Convection fan came loose from shaft
Convection fan came loose from the shaft with a lout rattle and grinding as the fan spun down. Had to remove four metal screws to remove the fan cover. Initially tried to just put the nut back on to hold the fan. However, I could not get the nut to start, so I assumed that threads were stripped on the nut or the shaft. Ordered the replacement nut, hoping that it was the nut that was the problem. However, I had the same problem with the new nut. I could see no damage on the shaft. It finally occurred to me that the nut and shaft had left-hand threads (counter-clockwise to tighten). At that point, it was extremely easy to put the nut back on and tighten it. I did not try using the old nut, since I had already received the new one, but I'm certain that if I had come to that realization earlier, I could have saved time and money. So, if you have the same problem, try putting the nut on "backwards."
Parts Used:
-
Thomas from Albuquerque, NM
-
Difficulty Level:Easy
-
Total Repair Time:15 - 30 mins
-
Tools:Socket set
Was this instruction helpful to you?
Thank you for voting!