




















36358892894 Kenmore Refrigerator - Instructions
Keep searches simple. Use keywords, e.g. "leaking", "pump", "broken" or "fit".
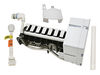
broken auger in the bucket assembly.
I ordered the wrong part, the ice maker assembly, because your diagram was not marked properly. I returned the part and you credited my account. Thanks. Ordered the new bucket. It worked fine. Now I have ice and crushed Ice whenever I want. Thanks.
p.s. I didnt use any tools, but to satisfy you I select nut driver.
p.s. I didnt use any tools, but to satisfy you I select nut driver.
Parts Used:
-
Chip from Mandeville, LA
-
Difficulty Level:Easy
-
Total Repair Time:Less than 15 mins
-
Tools:Nutdriver
6 of 9 people
found this instruction helpful.
Was this instruction helpful to you?
Thank you for voting!
Plastic drawer side rails broke. The rails and the drawers seem very flimsy for the cost of the refrigerator.
Very simple fix. Unscrewed broken drawer rails and replaced with the new. No big deal. But again, these seem very flimsy for this model of refrigerator. they should use metal drawer rails with rollers to better accomodate the wieght of produce in the drawers.
Parts Used:
-
john from Fairfax, VA
-
Difficulty Level:Really Easy
-
Total Repair Time:Less than 15 mins
-
Tools:Screw drivers
6 of 9 people
found this instruction helpful.
Was this instruction helpful to you?
Thank you for voting!
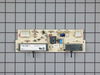
Ice Despenser wouldn't dispence ice
All i had to do was pop off the front trim, remove 4 small screws, unplug two plugs and replace the board.
It took me a grand total of 9 minutes to get the job done.
Way cheaper than having a repair man come to the house twice, once to diagnose, and once to replace the board he would have ordered and marked up.
It took me a grand total of 9 minutes to get the job done.
Way cheaper than having a repair man come to the house twice, once to diagnose, and once to replace the board he would have ordered and marked up.
Parts Used:
-
Blair from Evanston, WY
-
Difficulty Level:Really Easy
-
Total Repair Time:Less than 15 mins
-
Tools:Screw drivers
5 of 6 people
found this instruction helpful.
Was this instruction helpful to you?
Thank you for voting!
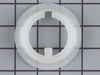
Drive cup broke due to ice cube jamming it
Remove three screws insert part; manually checked out drive and waited for ice to buildup and it worked like new.
Parts Used:
-
Bruce from Mobile, AL
-
Difficulty Level:Really Easy
-
Total Repair Time:Less than 15 mins
-
Tools:Screw drivers
5 of 6 people
found this instruction helpful.
Was this instruction helpful to you?
Thank you for voting!
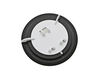
Ice chute frosted up
Procedure for Replacing the Ice Chute Plate
1. Turn off the power.
2. Snap off the outside trim ring. Use a plastic screwdriver to avoid scratching the cabinet.
3. Locate the three small holes below the control panel facing, just above ice chute. The center hole is not used. With a small, blunt, object (wire – blunted nail) that is slightly smaller than the holes, push up rather firmly up through the outer holes to release front control panel.
4. Remove the three wire connectors from printed circuit board. Firmly pull/pry them straight out of retaining clip. Use caution: Excessive force will break clips.
5. Release the secondary panel by removing four screws (one in each corner).
6. Remove the flap assembly.
7. Clean all accessible areas with 1/10 bleach water to sanitize. Rinse the cleaned area with clear water and thoroughly dry everything before re-assembling the panel.
8. Install the new flap assembly.
9. Re-installed everything in the reverse order and check the functionality.
10. Order a spare ice chute flapper to be ready for the next event.
1. Turn off the power.
2. Snap off the outside trim ring. Use a plastic screwdriver to avoid scratching the cabinet.
3. Locate the three small holes below the control panel facing, just above ice chute. The center hole is not used. With a small, blunt, object (wire – blunted nail) that is slightly smaller than the holes, push up rather firmly up through the outer holes to release front control panel.
4. Remove the three wire connectors from printed circuit board. Firmly pull/pry them straight out of retaining clip. Use caution: Excessive force will break clips.
5. Release the secondary panel by removing four screws (one in each corner).
6. Remove the flap assembly.
7. Clean all accessible areas with 1/10 bleach water to sanitize. Rinse the cleaned area with clear water and thoroughly dry everything before re-assembling the panel.
8. Install the new flap assembly.
9. Re-installed everything in the reverse order and check the functionality.
10. Order a spare ice chute flapper to be ready for the next event.
Parts Used:
-
Phillip from Springfield, VA
-
Difficulty Level:Easy
-
Total Repair Time:30 - 60 mins
-
Tools:Screw drivers
6 of 9 people
found this instruction helpful.
Was this instruction helpful to you?
Thank you for voting!
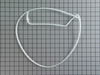
Water Line Broke that brings water to the Door
First Remove the screw and cover from the left top front of the fridge using a Phillips Screw Driver # 2
Then using a nut driver 1/4 of inch (or Socket set)
remove the two nuts holding the door hinge keeping the door in closed position. Now unplug the electrical connector between the door and the fridge body(Simply pulling it apart) Now hold the door from the middle and raise it up so that it can slide out from the bottom hole, on the main body
Now place the door on a table or a flat surface(Put may be a sheet or some thing to prevent the finish from getting scratched) Now remove the nuts around the inner panel of the door(nut Driver or Socket set) Remove the old lining and discard .Install the new lines and then replace every thing in the reverse order.
Note : Before tighting the top nuts of the door, make sure you keep the door aligened so you would not have to do it after completeing the job.
Then using a nut driver 1/4 of inch (or Socket set)
remove the two nuts holding the door hinge keeping the door in closed position. Now unplug the electrical connector between the door and the fridge body(Simply pulling it apart) Now hold the door from the middle and raise it up so that it can slide out from the bottom hole, on the main body
Now place the door on a table or a flat surface(Put may be a sheet or some thing to prevent the finish from getting scratched) Now remove the nuts around the inner panel of the door(nut Driver or Socket set) Remove the old lining and discard .Install the new lines and then replace every thing in the reverse order.
Note : Before tighting the top nuts of the door, make sure you keep the door aligened so you would not have to do it after completeing the job.
Parts Used:
-
Ather from Commerce, CA
-
Difficulty Level:Really Easy
-
Total Repair Time:30 - 60 mins
-
Tools:Nutdriver, Pliers, Screw drivers
11 of 24 people
found this instruction helpful.
Was this instruction helpful to you?
Thank you for voting!
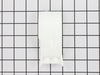
crushed ice feature inoperative, broken pieces in water dispensed.
Found broken pieces of deflector in delivered ice. Removed dispenser, carefully disassembled it, marking fasteners, sprimgs, and levers. Local repaimen say no replacement part available, must replace entire ice maker @ $350. Found exact part in your online reference, ordered at price of $3.76, part arrived two days later--perfect fit, exactly same as original. Reassembled, and it works exactly like new. Family very happy. Good job!!!!!
Parts Used:
-
Jim from Jacksonville, FL
-
Difficulty Level:Really Easy
-
Total Repair Time:30 - 60 mins
-
Tools:Nutdriver, Screw drivers
6 of 9 people
found this instruction helpful.
Was this instruction helpful to you?
Thank you for voting!
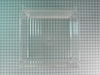
The vegetable pan was broken from closing the door on it too hard when still open
I just slide the new one in place, using exsisting sliders. I had to remove the old grab handle from old pan and snap it into place on new pan.
Parts Used:
-
John from Randle, WA
-
Difficulty Level:Easy
-
Total Repair Time:Less than 15 mins
4 of 4 people
found this instruction helpful.
Was this instruction helpful to you?
Thank you for voting!
Refrigerat
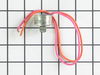
rerfrigator side not cooling After determinating that the defrost timer was running I turned it to defrost and watched tosee if frost started to melt. When it didn't I checked the heater with ohmeter, checked OK, so the only other component in the defrost system is the thermostat. Then just a matter of cutting and splicing wires and snapping the new thermost in place
Parts Used:
-
Charles from Rose Bud, AR
-
Difficulty Level:Easy
-
Total Repair Time:15 - 30 mins
-
Tools:Screw drivers, Wrench set
5 of 7 people
found this instruction helpful.
Was this instruction helpful to you?
Thank you for voting!
The Icemaker failed to make ice
I pulled the refrigerator away from the wall and turned off the water to the refrigerator and unplugged it from the wall. After removing the icebucket from the freezer I located the mounting screws, loosened them, unplugged the electrical connection below the icemaker and carefully removed it from the freezer. I unpacked the replacement icemaker, matched it against the original and attached the electrical connection adapter. Using the slots provided on the new icemaker I placed it over the mounting screws after aligning the water inlet pipe properly. I tightened the mounting screws while maintaining the icemaker in a level position. I plugged in the electrical connector. Then I replaced the icebucket, plugged in the refigerator back into the 110VAC outlet, turned on the water and repositioned the refrigerator in it's normal position.
Parts Used:
-
Dean from Folsom, CA
-
Difficulty Level:Really Easy
-
Total Repair Time:15 - 30 mins
-
Tools:Screw drivers
8 of 16 people
found this instruction helpful.
Was this instruction helpful to you?
Thank you for voting!
Water / Crushed Ice / Cubed Ice Switch Broken
Unplugged and shut off water. Popped off the face plate from below. Unscrewed 4 screws. Pulled out control board assembly. Pulled off two wire connectors. Unscrewed 2 screws to remove control board fastener. Replaced control board and reversed steps to assemble. When plugged in fridge, the switch was stuck on, so unplugged. Had to remove the rubber push plate and reassemble making sure the plastic lever was set properly in the control board. Reassembled and it worked properly.
Parts Used:
-
Alan from Jonestown, TX
-
Difficulty Level:Really Easy
-
Total Repair Time:30 - 60 mins
-
Tools:Pliers, Screw drivers
4 of 4 people
found this instruction helpful.
Was this instruction helpful to you?
Thank you for voting!
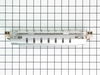
Freezer coils were iced up,was not cold enough,suspected the heater was the culprit
I had looked at videos on you tube,it looked simple enough. I mostly do my own repairs so I gave it a shot. the job went well,if you do not fix things around the house don't try to do the repair,find a handyman in your neighborhood to help you out,cheaper than calling a refrigeration man. It is not that hard to do.
Parts Used:
-
robert from WOONSOCKET, RI
-
Difficulty Level:Easy
-
Total Repair Time:30 - 60 mins
-
Tools:Nutdriver, Pliers, Screw drivers
4 of 4 people
found this instruction helpful.
Was this instruction helpful to you?
Thank you for voting!
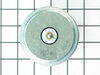
There was a warm spot at the front edge of dividing wall. The fan motor was not working.
I followed the directions of Steve on the installation video. He makes it easy to do the repair with his step by step description of the installation. I have repaired three different aging appliances with help of Steve and PartSelect's very helpful Customer Service.
I wish Steve a wonderful retirement and hope PartSelect can find someone as easy to follow for future videos. The videos are priceless for the repairs.
I wish Steve a wonderful retirement and hope PartSelect can find someone as easy to follow for future videos. The videos are priceless for the repairs.
Parts Used:
-
Kathrine from FORT MILL, SC
-
Difficulty Level:Really Easy
-
Total Repair Time:30 - 60 mins
-
Tools:Nutdriver, Pliers, Screw drivers, Socket set
4 of 4 people
found this instruction helpful.
Was this instruction helpful to you?
Thank you for voting!
Tubing from vavle to reservoir had been degraded by compressor heat and had cracked, leaking water when door water dispenser was used.
- Disconnect the valve assembly and remove electrical connection to water dispenser valve to prevent accidental water discharge
- Disconnect tubing from valve assembly, remove and keep compression nut.
-Disconnect tubing from junction to door tube remove and keep compression nut
-Remove screws used to mount reservoir, pull tubing into main refrigerator compartment and remove old reservoir and tubing.
- Note that one of the tubes on the new reservoir is 2' too short.
- Go to hardware store to purchase 5/16" universal tubing compression junction.
- Install reservoir and feed tubing through holes in main refrigerator compartment.
- Route tubing through woven tubing protectors and clips.
- Trim tubing to length and install in valve using old compression nut.
- Splice the piece of tubing trimmed from supply side of reservoir to the outlet side tube using the fitting purchased from the hardware store.
- Connect end of tubing to existing junction using old compression nut.
- Re-connect wires to valve solonoid and test for leaks.
- Re-install valve assembly to refrigerator frame.
- Disconnect tubing from valve assembly, remove and keep compression nut.
-Disconnect tubing from junction to door tube remove and keep compression nut
-Remove screws used to mount reservoir, pull tubing into main refrigerator compartment and remove old reservoir and tubing.
- Note that one of the tubes on the new reservoir is 2' too short.
- Go to hardware store to purchase 5/16" universal tubing compression junction.
- Install reservoir and feed tubing through holes in main refrigerator compartment.
- Route tubing through woven tubing protectors and clips.
- Trim tubing to length and install in valve using old compression nut.
- Splice the piece of tubing trimmed from supply side of reservoir to the outlet side tube using the fitting purchased from the hardware store.
- Connect end of tubing to existing junction using old compression nut.
- Re-connect wires to valve solonoid and test for leaks.
- Re-install valve assembly to refrigerator frame.
Parts Used:

-
Scot from Fort Collins, CO
-
Difficulty Level:Difficult
-
Total Repair Time:More than 2 hours
-
Tools:Nutdriver, Screw drivers, Wrench set
6 of 10 people
found this instruction helpful.
Was this instruction helpful to you?
Thank you for voting!
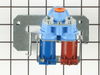
valvue was leaking
valve was very easy to change... less than fifteen minutes. in the process i discovered that the plastic tubes were brittle and it took near 5 hours to replace them (including 2 trips to the depot for parts). Still a huge saving over the alternative
Parts Used:
-
Steven from Athens, GA
-
Difficulty Level:Really Easy
-
Total Repair Time:More than 2 hours
-
Tools:Nutdriver, Screw drivers, Wrench (Adjustable), Wrench set
9 of 19 people
found this instruction helpful.
Was this instruction helpful to you?
Thank you for voting!