




















1985816151 Kenmore Freezer - Instructions
Keep searches simple. Use keywords, e.g. "leaking", "pump", "broken" or "fit".
Washer sometimes filled while power was off.
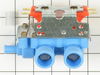
Same technique as the PartSelect video, except the result leaked to the outside at the outlet port because the two halves of the mold that made it were slightly misaligned, and there were two steps, one on each side of the fitting. Filed the steps away, and used Evinrude gasket sealant to make sure it wouldn't leak, and it didn't.
Parts Used:
-
Ronald from Yorktown, VA
-
Difficulty Level:Easy
-
Total Repair Time:1- 2 hours
-
Tools:Nutdriver, Screw drivers
Was this instruction helpful to you?
Thank you for voting!
Cold water coming into washer VERY, VERY slowly
My husband did the repair. Since he owned a laundry quite a few years ago, he knew what he was doing. After hooking everything back up, the cold water was coming in hot. When hooking up the hoses, he had hooked the cold into the top intake. After watching the online video, he realized that the plate that was to be installed over the hoses, on the back of the washer, clearly stated "H" on top and "C" on the bottom. So we switched the position of the hoses and everything ran perfectly after that. I would suggest to ANYONE doing this repair, to watch the online video first, before starting, because it is very, very helpful.
Parts Used:
-
Grace from New Auburn, WI
-
Difficulty Level:Easy
-
Total Repair Time:1- 2 hours
-
Tools:Nutdriver, Pliers, Screw drivers, Wrench (Adjustable)
Was this instruction helpful to you?
Thank you for voting!
cold water was not flowing into wash tub
After watching the video on PartSelect, I ordered the part and received it the next day! The hoses involved were over 24 years old and is the only reason it took longer than about 10 minutes. The hot water hose was dificult to remove. Once I removed the hose, the old water inlet valve was replaced with the new valve within minutes...quick as per the video. The washer is back and was down for less than 1 full day.
Parts Used:
-
PATRICK from HUNTINGTON BEACH, CA
-
Difficulty Level:Easy
-
Total Repair Time:30 - 60 mins
-
Tools:Pliers, Screw drivers, Wrench (Adjustable), Wrench set
Was this instruction helpful to you?
Thank you for voting!
slow and noisy cold water inlet
Remove the front panel by removing the screws at the bottom of the panel; remove the screws holding top and swing back on hinges; loosen the screws on the back holding the valve and replace the valve following how the defective one was attached and then reverse the operation.
Parts Used:
-
Thomas from Alice, TX
-
Difficulty Level:Easy
-
Total Repair Time:30 - 60 mins
-
Tools:Nutdriver, Pliers, Screw drivers
Was this instruction helpful to you?
Thank you for voting!
Making noise when selected hot water
First I looked it up on the computer and clicked on Part Select's page and it came up with the part needed and then I watched the video on installing the part. It was easy to follow their instructions and the repair was made. I was so pleased with everything I ran across a man in the hardware store this morning and he was having cloths dryer trouble that I told him to just click on your site and the rest would be easy. He said he would do that. In fact I took the Wife out to dinner on just part of what money you saved me. Thanks, Harold
Parts Used:
-
Harold from Birmingham, IA
-
Difficulty Level:Really Easy
-
Total Repair Time:30 - 60 mins
-
Tools:Socket set, Wrench (Adjustable)
Was this instruction helpful to you?
Thank you for voting!
Water inlet valve was leaking and needed replacement.
Followed the video on how to replace step by step. It all went perfectly except the hose clamp needed to be replaced. Used a small screw automotive clamp.This Maytag is 35 years old and still ticking.
Parts Used:
-
Lawrence from Addison, IL
-
Difficulty Level:Easy
-
Total Repair Time:30 - 60 mins
-
Tools:Nutdriver, Pliers, Screw drivers
Was this instruction helpful to you?
Thank you for voting!
Nylon housing, brass hose coupling.
Be very, very careful not to cross thread the filler hose, onto the nylon valve housing. Recommend some lubrication, and a pair of velvet gloves.
Parts Used:
-
Richard from Lafayette Hill, PA
-
Difficulty Level:Really Easy
-
Total Repair Time:30 - 60 mins
-
Tools:Nutdriver, Screw drivers, Wrench (Adjustable)
Was this instruction helpful to you?
Thank you for voting!
water flow would not stop
just like the vidio, only a had to remove the back panel to replace the valve. but we ., or should say my mother has a working wacher now,thank you for your help,
Parts Used:
-
luis from riverside, CA
-
Difficulty Level:Easy
-
Total Repair Time:30 - 60 mins
-
Tools:Nutdriver, Pliers, Screw drivers, Socket set, Wrench (Adjustable), Wrench set
Was this instruction helpful to you?
Thank you for voting!
Water leaks into wash tub when machine is not in use
Unplugged AC cord. Removed hot and cold supply hoses. Removed front cover (2 Phillips screws near bottom). Raised lid, and removed fastening screw for injector tube. Removed retaining screws for inlet valve mounting plate. Positioned mounting plate partially inside rear of machine and removed (4) wires for solenoid connections. Re-positioned mounting plate slightly outside machine and removed valve mounting screws and old valve. Attached new valve (no modification to valve needed for my machine), and worked backwards through the steps listed above.
Parts Used:
-
David from Beavercreek, OH
-
Difficulty Level:Easy
-
Total Repair Time:30 - 60 mins
-
Tools:Nutdriver, Pliers, Screw drivers
Was this instruction helpful to you?
Thank you for voting!
washer not filling with water
Maytag made this easy. The water value was mounted to a plate on the back of the washer removed one screw, pulled the plate from the washer, removed the valve, reconnected the electrical connections and outlet hose, re inserted the plate, attached with screw and tested. 30 minutes tops and I hwve never done this before. Thanks to partsselect and others for recomenning the correct repair. Others had suggestjng the timer device ($180 +) for the parts. OUCH !!!!!
Parts Used:
-
Jerry from Troy, OH
-
Difficulty Level:Easy
-
Total Repair Time:15 - 30 mins
-
Tools:Nutdriver, Screw drivers, Socket set
Was this instruction helpful to you?
Thank you for voting!
water leaking through injection valve
very simple to repair, three screws and disconnecting water supply pulling four wires then reverse steps and done, time spent less than 15 minutes.
Parts Used:
-
David from Elba, AL
-
Difficulty Level:Really Easy
-
Total Repair Time:15 - 30 mins
-
Tools:Nutdriver, Pliers
Was this instruction helpful to you?
Thank you for voting!
The cold water continued to run even when it should be off.
My husband figured out what the problem was and I looked for the part. It was easy to find on your web-site, and the picture was spot on! I ordered it and had the part in 2 days. The repair took 15 minutes or less, and my washer is as good as new. Thank you PartSelect for being there when we needed. I will recommend this to everyone.
Parts Used:
-
Dianne from Grant Park, IL
-
Difficulty Level:Really Easy
-
Total Repair Time:15 - 30 mins
-
Tools:Nutdriver, Screw drivers
Was this instruction helpful to you?
Thank you for voting!
Valve Was Not On A Plate As Instuction
-
Ron from Golden valley, MN
-
Difficulty Level:Difficult
-
Total Repair Time:1- 2 hours
-
Tools:Nutdriver, Pliers, Screw drivers
Was this instruction helpful to you?
Thank you for voting!