




















11079132413 Kenmore Dryer - Instructions
Keep searches simple. Use keywords, e.g. "leaking", "pump", "broken" or "fit".
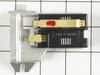
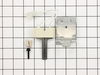
dryer would not work .
Took the old parts out and installed the new parts in , everything that you sent fit perfect!!!!!
Parts Used:

-
Tom from MEARS, MI
-
Difficulty Level:Really Easy
-
Total Repair Time:15 - 30 mins
-
Tools:Socket set
3 of 3 people
found this instruction helpful.
Was this instruction helpful to you?
Thank you for voting!
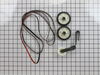
Broken belt
-
Mark from MILFORD, CT
-
Difficulty Level:Very Easy
-
Total Repair Time:15 - 30 mins
-
Tools:Pliers, Screw drivers, Socket set
4 of 6 people
found this instruction helpful.
Was this instruction helpful to you?
Thank you for voting!
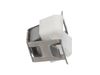
Broken door catch
The original door catch had broken and would no longer stay shut. Ordered the part from this site with ease. Very easy to replace the broken door catch on my Amana dryer. Tool needed was a flat head screwdriver to loosen the cover, remove broken piece and easily replace with new part. Followed the video and it was back to normal operation within minutes.
Parts Used:
-
Christine from Virginia Beach, VA
-
Difficulty Level:Very Easy
-
Total Repair Time:Less than 15 mins
-
Tools:Screw drivers
3 of 3 people
found this instruction helpful.
Was this instruction helpful to you?
Thank you for voting!
Dryer running and no heat
Checked fuse with Volmeter, had continuity (acted as a short) not the problem. Disconnected Hot Surface Igniter 2 Position connector to check resistance for a range of 50-300 Ohms of resistance with Voltohm Meter. Meter read open (High Resistance). Removed Igniter by unscrewing 5/16" hex nut on igniter plate assembly and noticed silicon carbide element was cracked in the middle. Ordered a new igniter and noticed assembly was required. Be careful here as igniter element is fragile, also do not touch it with your bare hands. You have to lay down on floor to reinstall igniter assembly and you might want to practice anchoring the defective igniter to gain confidence. Finally with slow movements anchored new igniter assembly and turned on dryer. Watched igniter glow heating gas valve and heating gas flame returned. Dryer fixed for a few hours of study online and cost only $24, plus learned how the gas dryer works.
Parts Used:
-
Ken from ROCHESTER, NY
-
Difficulty Level:A Bit Difficult
-
Total Repair Time:30 - 60 mins
-
Tools:Nutdriver
3 of 3 people
found this instruction helpful.
Was this instruction helpful to you?
Thank you for voting!
Belt broke
-
Thomas from Okemos, MI
-
Difficulty Level:Very Easy
-
Total Repair Time:30 - 60 mins
-
Tools:Nutdriver, Screw drivers
4 of 6 people
found this instruction helpful.
Was this instruction helpful to you?
Thank you for voting!
Gas Dryer Runs With Heat for Less Than 5 minutes, Timer Won't Advance in Autodry
My gas dryer would run with heat for 5 minutes in all settings, but kick off and not heat again. Timer would not advance in autodry. Thought it was the cycling thermostat, so replaced that, but did not solve the issue. Ordered the coils, and cleaned out heavily clogged lint from bottom of lint trap, especially right above the fan motor at the bottom of the trap. Received the coils, opened the top and front, took out drum, and replaced the coils. The replacement took less than 2 minutes. Be careful putting the drum back on to make sure the felt is not caught inside the drum. You can give it a spin to make sure. Wear gloves, as I cut myself up pretty good on the edges of the dryer body. The inside of my dryer looks like a crime scene! Anyway, I put it back together, and it runs great. Solved the timer advance issue in autodry, and the heat kicks on and off when it is supposed to. Good luck! Thanks Part Select!
Parts Used:
-
julia from WOODRIDGE, IL
-
Difficulty Level:Easy
-
Total Repair Time:30 - 60 mins
-
Tools:Screw drivers, Socket set
3 of 3 people
found this instruction helpful.
Was this instruction helpful to you?
Thank you for voting!
Dryer squealing loudly during operation
Unplug dryer from 220VAC outlet
Remove bottom cover panel, slip a flat blade screwdriver into each clamp, and bottom piece becomes removable. Pull forward and lift bottom cover piece.
Pull up top section from dryer frame. Disconnect dryer door off/on contact three wire switch by pressing plastic connector together. You may need a small flat blade screwdriver to seperate connector.
Remove two Torx (T15 head) screws in the far left and right corners of the front door panel.
Remove two screws underneath dryer lint screen, be careful to not let front door and front cover fall forward. The rotating dryer drum will now be loose.
Underneath drum, there is a cover panel over the dryer motor. Likely you will find a bunch of lint all about. This dryer had likely not been cleaned in many years.
Remove screws on dryer motor cover.
Remove panel. Likely, you’ll more lint about.
After vacuuming, use a flashlight and hand mirror to locate belt tensioner, back side of motor. If your belt is not broken, press down on the tensioner spring and remove belt from tensioner and motor. Inspect belt, replace if worn. In this instance the belt was well worn.
Slowly pull dryer drum forward, walking belt along as you bring drum forward out of the dryer casing.
At this point you have plenty of room to access the one bolt holding the tensioner, in this instance it was a 13mm socket. Be careful to remove the tensioner springs before removing the bracket. Your PartsSelect is an identical match to the original one.
Install new tensioner, tighten slightly, then put springs back on.
Reverse this entire process to get your dryer back together and back running smooth and quiet as it was when new.
This dryer was quieter than its owners remembered it being back when new 15 years ago.
Well worth saving the $ doing your own work.
Good luck on your repair endeavor!
Remove bottom cover panel, slip a flat blade screwdriver into each clamp, and bottom piece becomes removable. Pull forward and lift bottom cover piece.
Pull up top section from dryer frame. Disconnect dryer door off/on contact three wire switch by pressing plastic connector together. You may need a small flat blade screwdriver to seperate connector.
Remove two Torx (T15 head) screws in the far left and right corners of the front door panel.
Remove two screws underneath dryer lint screen, be careful to not let front door and front cover fall forward. The rotating dryer drum will now be loose.
Underneath drum, there is a cover panel over the dryer motor. Likely you will find a bunch of lint all about. This dryer had likely not been cleaned in many years.
Remove screws on dryer motor cover.
Remove panel. Likely, you’ll more lint about.
After vacuuming, use a flashlight and hand mirror to locate belt tensioner, back side of motor. If your belt is not broken, press down on the tensioner spring and remove belt from tensioner and motor. Inspect belt, replace if worn. In this instance the belt was well worn.
Slowly pull dryer drum forward, walking belt along as you bring drum forward out of the dryer casing.
At this point you have plenty of room to access the one bolt holding the tensioner, in this instance it was a 13mm socket. Be careful to remove the tensioner springs before removing the bracket. Your PartsSelect is an identical match to the original one.
Install new tensioner, tighten slightly, then put springs back on.
Reverse this entire process to get your dryer back together and back running smooth and quiet as it was when new.
This dryer was quieter than its owners remembered it being back when new 15 years ago.
Well worth saving the $ doing your own work.
Good luck on your repair endeavor!
Parts Used:
-
Joseph from WEST PALM BCH, FL
-
Difficulty Level:A Bit Difficult
-
Total Repair Time:30 - 60 mins
-
Tools:Screw drivers, Socket set
3 of 3 people
found this instruction helpful.
Was this instruction helpful to you?
Thank you for voting!
Making a racket.
Took the top off and then front off and drum out . Replaced Drum roller and shaft support bolts.
Parts Used:
-
Carl from MARION, KY
-
Difficulty Level:Really Easy
-
Total Repair Time:More than 2 hours
-
Tools:Nutdriver, Pliers, Screw drivers, Socket set
3 of 3 people
found this instruction helpful.
Was this instruction helpful to you?
Thank you for voting!
ignitor failed to ignite gas or would fail to after first ignition.
Watched youtube video to problem shoot. Cause determined to be coils bad. Searched web found Parts Select to be easiest site to deal with and had coils for best price. Followed instructions supplied with parts. Dryer works like new.
Parts Used:
-
CHUCK from HARDIN, KY
-
Difficulty Level:Easy
-
Total Repair Time:15 - 30 mins
-
Tools:Nutdriver, Screw drivers
4 of 6 people
found this instruction helpful.
Was this instruction helpful to you?
Thank you for voting!
dryer would light up gas coil bad
-
Louis from CHARLES CITY, IA
-
Difficulty Level:Very Easy
-
Total Repair Time:Less than 15 mins
-
Tools:Screw drivers
3 of 3 people
found this instruction helpful.
Was this instruction helpful to you?
Thank you for voting!
Heat up then gas flame shuts down after 5 or so minutes igniter glows again trying to reignite but no gas supply coming out of the tube.
I ordered the top 5 items that may cause this problem based on the troubleshooting guide presented by the technicians I found in youtube. I replaced the coils and that fixed the problem. The coils are the first to go out according to techs, but I have the other parts just in case I may need them later on. My Maytag dryer which is over 19 years old is alive and working again. The coils are accessible from the bottom access panel secured by 2 nut screws, unplug the dryer first, then the coils are secured by a bracket with 2 small philips head screw, I used a stubby philips screw driver to remove the bracket, undo the 2 electrical connectors on the coils one with 2 prongs and the other with 3 prongs. Put the new coils attached the electrical connectors and secured them with the bracket. Checked for any loose wiring ensuring connectors are secured in place, then test run the dryer with the panel off so you can see the if the flame stays on, if you run the dryer without wet clothes the flame may stop after 15 or so minutes. It is better to test run the dryer with wet clothes just like when your drying fresh washed and wringed clothes. It was really easy, good luck!
Parts Used:
-
Jodel from SAN DIEGO, CA
-
Difficulty Level:Really Easy
-
Total Repair Time:Less than 15 mins
-
Tools:Nutdriver, Screw drivers
3 of 3 people
found this instruction helpful.
Was this instruction helpful to you?
Thank you for voting!
YouTube video dated 9/28/2015
How to repair E1 error/fault on Whirlpool Duet dryer model GEW9200LW0 please watch that video very helpful.
Parts Used:

-
Madeline from PANA, IL
-
Difficulty Level:Difficult
-
Total Repair Time:30 - 60 mins
-
Tools:Screw drivers, Socket set, Wrench (Adjustable), Wrench set
3 of 3 people
found this instruction helpful.
Was this instruction helpful to you?
Thank you for voting!
Squealing when running
You tube and supplied video directions for the make and model. Follow step by step and the repair went easy. Worried when removing the dryer drum but it went smooth.
Parts Used:
-
MICHAEL from Baden, PA
-
Difficulty Level:A Bit Difficult
-
Total Repair Time:30 - 60 mins
-
Tools:Nutdriver, Pliers, Screw drivers, Socket set
3 of 3 people
found this instruction helpful.
Was this instruction helpful to you?
Thank you for voting!
Intermittent squealing sound while dryer running
Take pictures along the way.
1. Remove lower front panel using screwdriver to lift up on tabs on top of panel.
2. remove door
3. unplug moisture sensor plugs
4. remove lint trap
5. on back of dryer, remove screws holding upper lid
6. slid up lid forward just a small amount, its hooked in towards the front of the upper lid. you will need to do this so you can can remove two screws under the lid holding the front panel of the dryer on
7. remove the front panel screws mentioned in step 6.
8. Remove lower front panel screws
9. remove front panel
10. reach into dryer at the bottom and release tension from belt pulley, sliding the belt off. (make a note of how the belt is routed around the drive and idler pulleys)
11. slide out tumbling drum
12. with drum removed, use socket wrench and socket to remove old idler pulley.
13. install new idler pulley
14. reinstall tumbling drum
15. slide belt back around tumbling drum, looping belt around drive pulley and around idler pulley.
16. When belt is installed, rotate drum a few revolutions to ensure belt rides correctly.
17. Reinstall front panel
18 slide top panel back into place and secure with screws from back
19. reinstall door
20. reattach moisture sensor plugs
21. reinstall lower panel
1. Remove lower front panel using screwdriver to lift up on tabs on top of panel.
2. remove door
3. unplug moisture sensor plugs
4. remove lint trap
5. on back of dryer, remove screws holding upper lid
6. slid up lid forward just a small amount, its hooked in towards the front of the upper lid. you will need to do this so you can can remove two screws under the lid holding the front panel of the dryer on
7. remove the front panel screws mentioned in step 6.
8. Remove lower front panel screws
9. remove front panel
10. reach into dryer at the bottom and release tension from belt pulley, sliding the belt off. (make a note of how the belt is routed around the drive and idler pulleys)
11. slide out tumbling drum
12. with drum removed, use socket wrench and socket to remove old idler pulley.
13. install new idler pulley
14. reinstall tumbling drum
15. slide belt back around tumbling drum, looping belt around drive pulley and around idler pulley.
16. When belt is installed, rotate drum a few revolutions to ensure belt rides correctly.
17. Reinstall front panel
18 slide top panel back into place and secure with screws from back
19. reinstall door
20. reattach moisture sensor plugs
21. reinstall lower panel
Parts Used:
-
John from LAKE ZURICH, IL
-
Difficulty Level:Easy
-
Total Repair Time:1- 2 hours
-
Tools:Nutdriver, Pliers, Screw drivers, Wrench (Adjustable)
4 of 6 people
found this instruction helpful.
Was this instruction helpful to you?
Thank you for voting!
Replaced the air duct due to marks being left on clothes
Removed all screws from back of dryer. Used tin snips to cut metal around gas inlet so gas didn't have to be disconnected. Replaced air duct and reassembled
Parts Used:
-
Brian from MINNETRISTA, MN
-
Difficulty Level:Easy
-
Total Repair Time:30 - 60 mins
-
Tools:Nutdriver
3 of 3 people
found this instruction helpful.
Was this instruction helpful to you?
Thank you for voting!