




















106621 Kenmore Refrigerator - Instructions
Keep searches simple. Use keywords, e.g. "leaking", "pump", "broken" or "fit".
light not working in fridge
It was so easy!
Thanks for the rush to my home on the part.
I just unscrewed the plate that locks in the light switch (screwdriver) and unplugged the old faulty part and plugged in the new switch, screwed the cover back on and I was done!
Easy!
And I am not Mr. Fix-it!
Thanks for the rush to my home on the part.
I just unscrewed the plate that locks in the light switch (screwdriver) and unplugged the old faulty part and plugged in the new switch, screwed the cover back on and I was done!
Easy!
And I am not Mr. Fix-it!
Parts Used:

-
Michael from East Meadow, NY
-
Difficulty Level:Really Easy
-
Total Repair Time:Less than 15 mins
-
Tools:Screw drivers
7 of 8 people
found this instruction helpful.
Was this instruction helpful to you?
Thank you for voting!
broken end cap
Simple....snapped it right on...the important thing is that we ordered it for a reasonable price, and it arrived quickly...within 3 days. thanks!!!
Parts Used:

-
Stefanie from Sycamore, IL
-
Difficulty Level:Really Easy
-
Total Repair Time:Less than 15 mins
10 of 17 people
found this instruction helpful.
Was this instruction helpful to you?
Thank you for voting!
No ice was being made
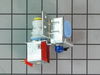
I looked up the refrigerator on the internet and found this website. I got the diagram of the parts of the icemaker and found that the valve must be defective because no water was coming up to the icemaker.
I ordered the part which came the next day. Took out the screws, conected the water line to the new part. moved the electrical connection to the new part and we had ice. Saved a lot of money that the plumber would have cost.
I ordered the part which came the next day. Took out the screws, conected the water line to the new part. moved the electrical connection to the new part and we had ice. Saved a lot of money that the plumber would have cost.
Parts Used:
-
Reinhold from Cheshire, CT
-
Difficulty Level:Really Easy
-
Total Repair Time:30 - 60 mins
-
Tools:Screw drivers, Wrench (Adjustable)
11 of 21 people
found this instruction helpful.
Was this instruction helpful to you?
Thank you for voting!
Black flecks in ice
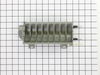
The lining of the ice mold (Whirlpool) started flecking off (black flecks in the ice cubes), so I decided to replace the mold.
Loosen the two 1/4 inch upper nuts and remove the lower nut to remove the ice maker from the freezer. The hardest part was getting it unplugged. I used a small blade screwdriver to release the catch on the connector and pull it out.
Remove the ice maker front cover. If you have a skinny enough phillips screw driver, there are two deep set screws through two holes on the lower portion of the control module (otherwise, remove the three screws on the controller, unlatch the shut-off arm from the control module, and separate the controller to access the mold screws). Unhook the shut-off wire from the end of the tray. Unscrew the two screws holding the mold and remove the mold.
Remove the plastic hardware from the old mold and install on the new mold.
Attach the new mold on to the control module.
WARNING WARNING WARNING!!! The mold I bought already had the alumilastic on it for the contact point to the thermostat. When I installed it and tightened the screws, the alumilastic was dried out, didn't squash down, and dented the bi-metal thermostat on the controller, ruining it. I had to buy a new thermostat. Be sure to check that the alumilastic is pliable. If not, take it off and buy some fresh to put on there.
Re-install the ice maker. It took a while to get the first batch of ice because the ice maker was at room temperature and I had the freezer door open for several minutes. So the freezer had to get cold and the ice maker had to chill down. Once everything got cold, it started making ice again.
Loosen the two 1/4 inch upper nuts and remove the lower nut to remove the ice maker from the freezer. The hardest part was getting it unplugged. I used a small blade screwdriver to release the catch on the connector and pull it out.
Remove the ice maker front cover. If you have a skinny enough phillips screw driver, there are two deep set screws through two holes on the lower portion of the control module (otherwise, remove the three screws on the controller, unlatch the shut-off arm from the control module, and separate the controller to access the mold screws). Unhook the shut-off wire from the end of the tray. Unscrew the two screws holding the mold and remove the mold.
Remove the plastic hardware from the old mold and install on the new mold.
Attach the new mold on to the control module.
WARNING WARNING WARNING!!! The mold I bought already had the alumilastic on it for the contact point to the thermostat. When I installed it and tightened the screws, the alumilastic was dried out, didn't squash down, and dented the bi-metal thermostat on the controller, ruining it. I had to buy a new thermostat. Be sure to check that the alumilastic is pliable. If not, take it off and buy some fresh to put on there.
Re-install the ice maker. It took a while to get the first batch of ice because the ice maker was at room temperature and I had the freezer door open for several minutes. So the freezer had to get cold and the ice maker had to chill down. Once everything got cold, it started making ice again.
Parts Used:
-
Anthony from Billings, MT
-
Difficulty Level:A Bit Difficult
-
Total Repair Time:More than 2 hours
-
Tools:Nutdriver, Screw drivers
6 of 6 people
found this instruction helpful.
Was this instruction helpful to you?
Thank you for voting!
The old motor has built in wire harness. The new motor has connectors on it.
Remove and clean out everything from the freezer and unplug the refrigerator. Take out the wire shelf in the freezer. (The fan motor is behind the back wall of the freezer, SO YOU CAN KEEP THE REFRIGERATOR CLOSED). Pop off the little cover on the center of the plastic shroud. Remove the little screw and carefully remove the plastic shroud. Remove the plastic cover for the optional ice maker on the upper left corner of the back wall. Take out the two screws in the upper corners on the back wall of the freezer and the last two screws holding the fan motor. The fan motor won't drop, remove the back wall and you will see two screws holding the motor mount. Remover those two screws, and pop the bracket out and separate.Take the two rubber motor mounts off the ends of the old motor and install them on the new motor. (Now you will have to cut the wires off the old motor), unplug the little wire harness, strip the ends and crimp on wire connectors to plug them onto your new motor. Its an AC motor so it shouldn't matter which hot goes on which of the two terminals. JUST MAKE SURE THE GROUND IS CORRECT! (After reinstalling the motor, plug in the refrigerator, turn it on before installing the shroud and make sure the fan is blowing outward. If all is correct, turn the refrigerator off, unplug and finish assembling the freezer. I found the new motor seems to run more efficiently than the old one.
Parts Used:

-
Leo from EAGLE, WI
-
Difficulty Level:A Bit Difficult
-
Total Repair Time:30 - 60 mins
-
Tools:Nutdriver, Pliers, Screw drivers
6 of 6 people
found this instruction helpful.
Was this instruction helpful to you?
Thank you for voting!
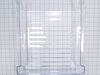
Running edges of meat drawer were cracked and broken from the door closing with the drawer open.
I slid out the old one and threw it away and slid in the new one. 10 second repair. The kind I like.
Parts Used:
-
Joseph from Rockwall, TX
-
Difficulty Level:Really Easy
-
Total Repair Time:Less than 15 mins
7 of 9 people
found this instruction helpful.
Was this instruction helpful to you?
Thank you for voting!
no power to the ice maker
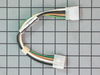
The wiring harness was a straightfoward plug in replacement after depressing the securing tabs, and did provide power to the icemaker. However, the icemaker would continually cycle, with the mold heater on at all times. I suspect this is what caused the thermal fuse to blow in the first place. Rather than spend more time replacing individual components, I eneded up replacing the full ice maker assy. The new ice maker works properly.
Parts Used:
-
Thomas from Indianapolis, IN
-
Difficulty Level:Really Easy
-
Total Repair Time:Less than 15 mins
-
Tools:Nutdriver
11 of 21 people
found this instruction helpful.
Was this instruction helpful to you?
Thank you for voting!
Middle drawer track cracked
I read the other comments on how easy the repair was, followed their advice, and it worked like a charm. Just use a screwdriver or butter knife to pop the track off the shelf and pop the new one back in.
The hardest part was getting the items in the refrigerator out of the way!
The hardest part was getting the items in the refrigerator out of the way!
Parts Used:

-
Debbie from Irvine, CA
-
Difficulty Level:Very Easy
-
Total Repair Time:Less than 15 mins
-
Tools:Screw drivers
6 of 6 people
found this instruction helpful.
Was this instruction helpful to you?
Thank you for voting!
Warm ref and frz
Removed old starter and capacitor as per your website instruction.
Plugged in new parts.
Compresser turned on
Plugged in new parts.
Compresser turned on
Parts Used:

-
Peter from MASSAPEQUA PK, NY
-
Difficulty Level:Very Easy
-
Total Repair Time:Less than 15 mins
-
Tools:Nutdriver, Pliers
6 of 6 people
found this instruction helpful.
Was this instruction helpful to you?
Thank you for voting!
old valve was not shutting off fully, flooding ice-maker, creating a glacier
Shut off water supply, removed old valve (two screws, 1/4' nut driver), disconnect electrical plug, remove water lines (adjustable wrench). Cut fitting off tube to ice-maker (new unit has a push-to-connect fitting). Replace water lines and electrical connector. Mount valve back on cabinet. Turn water back on.
Parts Used:
-
duncan from HOWELL, NJ
-
Difficulty Level:Very Easy
-
Total Repair Time:Less than 15 mins
-
Tools:Nutdriver, Wrench (Adjustable)
6 of 6 people
found this instruction helpful.
Was this instruction helpful to you?
Thank you for voting!
Stopped cooling/freezing
It is as easy as is shown in the self-help video. (1) Disconnect the power, (2) Roll the appliance out so you can get to the back, (3) Using a nut driver remove all the screws from the lower back panel then remove the panel, (4) Remove the tensioner wire, (5) unplug the electrical connection to the capacitor, (6) gently but firmly remove the capacitor and starter relay as one unit, (7) preassemble your new capacitor and starter relay as one unit, (8) now simply reverse your steps for installing and you are done! These two parts saved me the cost of a new refrigerator. Almost as easy as changing a light bulb. PS: while you have the panel removed you can do a thorough cleaning with a soft brush and vacuum.
Parts Used:
-
Roper from PALM BAY, FL
-
Difficulty Level:Really Easy
-
Total Repair Time:15 - 30 mins
-
Tools:Nutdriver
6 of 6 people
found this instruction helpful.
Was this instruction helpful to you?
Thank you for voting!
Evaporator fan in freezer.
I took the old fan out and replaced it with the new one,right easy task.
Parts Used:

-
Alfred from NEWPORT, NC
-
Difficulty Level:Easy
-
Total Repair Time:30 - 60 mins
-
Tools:Screw drivers
6 of 7 people
found this instruction helpful.
Was this instruction helpful to you?
Thank you for voting!
Icemaker Quit Making Ice
Removed the two screws that hold flaping door. Removed the single screw that covers the connecting wires. Disconnected the wiring plug. I wiggled out the ice maker. Took off the motor cover. Swapped out one motor for the other. Reinstalled the icemaker in the resverse order of removal. Note the wiring plug in the freeze is very from. It makine s the reconnection differcult.
Parts Used:
-
JOSEPH from LINDENHURST, NY
-
Difficulty Level:A Bit Difficult
-
Total Repair Time:15 - 30 mins
-
Tools:Screw drivers
6 of 7 people
found this instruction helpful.
Was this instruction helpful to you?
Thank you for voting!
Water dispensed, but no ice.
We have a side-by-side and the tutorial was different than what we have. Had trouble getting cover off, but finally repaired and WE HAVE ICE! Also took longer than expected.
Saved a lot!
Saved a lot!
Parts Used:
-
NANCY from VALLEY VIEW, OH
-
Difficulty Level:A Bit Difficult
-
Total Repair Time:30 - 60 mins
-
Tools:Nutdriver, Screw drivers
6 of 7 people
found this instruction helpful.
Was this instruction helpful to you?
Thank you for voting!
The light was blown
-
Frances from TUNNEL HILL, GA
-
Difficulty Level:Very Easy
-
Total Repair Time:Less than 15 mins
9 of 16 people
found this instruction helpful.
Was this instruction helpful to you?
Thank you for voting!