




















10641123211 Kenmore Refrigerator - Instructions
Keep searches simple. Use keywords, e.g. "leaking", "pump", "broken" or "fit".
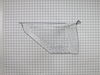
Broken meat drawer
This story is less about the repair than the service. On Monday, I removed the meat drawer to give it a quick rinse. Unfortunately, I fumbled the ball getting it back to the fridge, dropped the drawer on the hard stone floor, shattering it.
Instead of calling a repair man or going to the local appliance store, I opened up my macbook, found partselect.com, ordered the part and they had it taken care of in 5 minutes. Two days later, Fed Ex handed me a box with the replacement drawer, and I slide it in. Done. Total time to repair -- 6 minutes.
Sure beats leaving the house!
Instead of calling a repair man or going to the local appliance store, I opened up my macbook, found partselect.com, ordered the part and they had it taken care of in 5 minutes. Two days later, Fed Ex handed me a box with the replacement drawer, and I slide it in. Done. Total time to repair -- 6 minutes.
Sure beats leaving the house!
Parts Used:
-
Lionel from Escondido, CA
-
Difficulty Level:Really Easy
-
Total Repair Time:Less than 15 mins
6 of 11 people
found this instruction helpful.
Was this instruction helpful to you?
Thank you for voting!
Wanted a storage (shelve) for the inside door of my frig
No repair needed. Just inserted the storage bin onto the hooks provided on the inside of the door.
Parts Used:

-
Ernestine from NORMAL, IL
-
Difficulty Level:Very Easy
-
Total Repair Time:Less than 15 mins
4 of 5 people
found this instruction helpful.
Was this instruction helpful to you?
Thank you for voting!
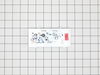
LED Light was out in freezer
Unplugged the old one and put in new one. So simple I didn’t need my husband’s help
Parts Used:
-
Victoria from SCARBOROUGH, ME
-
Difficulty Level:Very Easy
-
Total Repair Time:Less than 15 mins
5 of 8 people
found this instruction helpful.
Was this instruction helpful to you?
Thank you for voting!
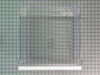
Snack pan drawer was out when refrigerator door was closed. The snack pan drawer was cracked and needed to be replaced.
Replacing the drawer was extremely easy. The refrigerator door need to be completely opened. Drawer slides out very easily and new drawer slides in where old drawer came out. Three minute job, tops.
Parts Used:
-
Jack from Austin, TX
-
Difficulty Level:Really Easy
-
Total Repair Time:Less than 15 mins
4 of 5 people
found this instruction helpful.
Was this instruction helpful to you?
Thank you for voting!
I added an ice maker to a 20 year old refridgerator
I added an icemaker kit. Everything I needed was in the kit. The refrigerator was presetup for an icemaker it was just never added. The only problem I had was that the holes for attaching the water solenoid were not pre drilled so I had to drill them myself and use sheet metal screws. The icemaker is working great.
Parts Used:

-
Nicholas from WEST CHESTER, OH
-
Difficulty Level:Easy
-
Total Repair Time:30 - 60 mins
-
Tools:Pliers, Socket set
4 of 5 people
found this instruction helpful.
Was this instruction helpful to you?
Thank you for voting!
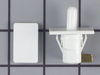
Lights not working some times
-
Harry from COLUMBIA STA, OH
-
Difficulty Level:A Bit Difficult
-
Total Repair Time:30 - 60 mins
-
Tools:Nutdriver, Screw drivers
4 of 5 people
found this instruction helpful.
Was this instruction helpful to you?
Thank you for voting!
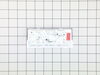
LED light in freezer not working
Unplugged frig. With flat head screwdriver, removed light module and unplugged. Installed replacement module and snapped back into place. Replugged frig.
But did not work!! Repeated steps 2x, but no change.
Had been told the frig LED light was the same module as the freezer, but that is not the case. I had hoped to try the new module in the frig. So, back to square one and since I installed the new part, can't return!
But did not work!! Repeated steps 2x, but no change.
Had been told the frig LED light was the same module as the freezer, but that is not the case. I had hoped to try the new module in the frig. So, back to square one and since I installed the new part, can't return!
Parts Used:
-
Judith from RIDGWAY, CO
-
Difficulty Level:A Bit Difficult
-
Total Repair Time:15 - 30 mins
-
Tools:Screw drivers
4 of 5 people
found this instruction helpful.
Was this instruction helpful to you?
Thank you for voting!
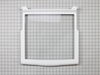
needed another shelf
-
Carol from JUPITER, FL
-
Difficulty Level:Very Easy
-
Total Repair Time:Less than 15 mins
4 of 5 people
found this instruction helpful.
Was this instruction helpful to you?
Thank you for voting!
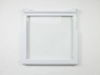
Broken shelf for snack drawer
-
Kay from LA CRESCENTA, CA
-
Difficulty Level:Very Easy
-
Total Repair Time:Less than 15 mins
4 of 5 people
found this instruction helpful.
Was this instruction helpful to you?
Thank you for voting!
Part went bad the freezer was freezing up and refrigerator not getting cold
I pulled off the panel covering the part in the freezer cut and stripped the wires. Used crimper and connectors put the new part on put the wires band panel back on and plugged the refrigerator back in. Everything works just fine now.
Parts Used:

-
Jessica from WILLIAMSBURG, VA
-
Difficulty Level:Really Easy
-
Total Repair Time:15 - 30 mins
-
Tools:Nutdriver
3 of 3 people
found this instruction helpful.
Was this instruction helpful to you?
Thank you for voting!
Getting Ice Maker to sit in place prior to tightening screws.
Don not completely remove holding icemaker screws. Unit slips over screws and drops down into place and the use nutdriver to tighten in place. Rest of unit was sound and wasn’t replaced.
After icemaker is installed wait for a while and unit self activated and creates ice cubes.
After icemaker is installed wait for a while and unit self activated and creates ice cubes.
Parts Used:
-
George from POWELL, OH
-
Difficulty Level:Easy
-
Total Repair Time:15 - 30 mins
-
Tools:Nutdriver
3 of 3 people
found this instruction helpful.
Was this instruction helpful to you?
Thank you for voting!
Installed a Ice Maker
-
Don from HOUMA, LA
-
Difficulty Level:Very Easy
-
Total Repair Time:15 - 30 mins
-
Tools:Nutdriver, Screw drivers
3 of 3 people
found this instruction helpful.
Was this instruction helpful to you?
Thank you for voting!
lights wouldn't come on/work in refrigerator
Referencing the info/schematics you have on your website, I unscrewed/unattached top-front panel (carefully), from behind the panel you have to detach the wires (2) from the switch, pushed "in" the switch to remove, put in new switch and attach wires to test BEFORE remounting panel. Tada!! Thank you PartSelect! You saved me at least $80...would have been at least $100 to have a repair person come to the house!
Parts Used:

-
Jane from Albuquerque, NM
-
Difficulty Level:Easy
-
Total Repair Time:15 - 30 mins
-
Tools:Pliers, Screw drivers, Socket set
4 of 6 people
found this instruction helpful.
Was this instruction helpful to you?
Thank you for voting!
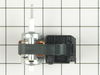
Noisy operation (from the inside)
Unplug, then on the freezer side, remove the drawers, then remove the screws holding the sheet metal cover, remove the rails (for the drawer) that interfere with removing the sheet metal cover. pull the wires off the motor. There is a big plastic piece that holds a small plastic piece that holds the motor. Remove the plastic piece that holds the motor/fan (you might be able to swap the motor by removing the little plastic piece that holds the motor, or you can remove the bigger piece and then remove the small piece that holds the motor). Pull the fan blade off (to reuse), swap the motor. NOTE - the new motor wire terminals may be on the opposite side of the motor vs. the old motor - that is not a problem - there is plenty of room for the wires. After the motor is installed put the fan blade back on, reinstall the removed plastic pieces in the back of the refrigerator. Now, I'd suggest a quick test. Make sure the new motor works and the fan blows before you button it up. Once you know it works, power it off, and put the sheet metal cover back on, reinstall the basket brackets, put the baskets back in place, close the door, and turn it back on.
Parts Used:
-
Frederick from APEX, NC
-
Difficulty Level:A Bit Difficult
-
Total Repair Time:30 - 60 mins
-
Tools:Nutdriver, Screw drivers
3 of 3 people
found this instruction helpful.
Was this instruction helpful to you?
Thank you for voting!
It was my first time to install a ice maker.
I first read the instruction manual then I watched the installation video. My water line to it was 3/8. Went to the local ACE Hardware to purchase a short peace of 1/4 copper tubing and the fittings to connect them together. It makes ice every 55 minutes.
Parts Used:
-
Gary from MACOMB, OK
-
Difficulty Level:Easy
-
Total Repair Time:1- 2 hours
-
Tools:Nutdriver, Screw drivers, Wrench (Adjustable), Wrench set
3 of 3 people
found this instruction helpful.
Was this instruction helpful to you?
Thank you for voting!