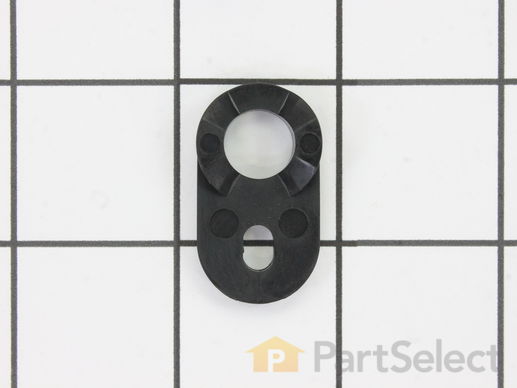
Hinge Cam Riser
$14.95
Special Order
PartSelect Number
PS284596
Manufacturer Part Number
WR02X10140
Manufactured by
GE
Product Description
Hinge Cam Riser Specifications
This part helps with the closing of the door and helps keep it in position.
How Buying OEM Parts Can Save You Time and Money
Part Videos
Replacing your General Electric Refrigerator Hinge Cam Riser
Troubleshooting
This part fixes the following symptoms:
Door won’t open or close | Door Sweating
This part works with the following products:
Refrigerator.
This part works with the following products:
General Electric, Kenmore, Hotpoint.
Part# WR02X10140 replaces these:
AP2057539, 289905, WR02X8830, WR02X9421, WR2X10140, WR2X8830, WR2X9421
Customer Repair Stories
Average Repair Rating: 4.1 / 5.0, 26 reviews.
What's this?
- < Prev
- 1
- 2
- 3
- Next >
Sort by:
Search filter:
Clear Filter
Your search term must have 3 or more characters.
Keep searches simple. Use keywords, e.g. "leaking", "pump", "broken" or "fit".
Sorry, we couldn't find any existing installation instruction that matched.
The refrigerator door side of the side-by-side refrigerator/freezer, bottom cams that auto close the door were broken.
First, I removed all items on the door shelves and the shelves themselves to reduce the weight of the door. Second, I removed the cover on the top hinge assembly and removed the two screws that secured that hinge. Third I lifted the door from the bottom hinge assembly and placed the door horizontal on the kitchen table to all easier access to the bottom of the door. I then removed two screws holding the door closing cam and shim and replaced them with the new parts. Next was to removed the old hinge assembly on the refrigerator itself and replace it with a new hinge assembly. All down hill from this point. Time to reinstall the door, aligning the bottom of the door cam over the hinge assembly and setting the door down on it making sure the door sets on the hinge assembly cams. To the top of the refrigerator. reinstalled the top door hinge assembly and cover, job complete. Total time from start to finish including cleaning the inside of the door and shelves about 30 minutes.
As for the replacing of the light lens in the freezer section. This was almost to easy. I removed the ice drawer from the freezer which exposed the one phillips screw that holds the lens in place. Removed the screw and what was left of the old lens, inserted the new lens from the underneath the ice drawer compartment and screw, replaced the ice drawer and, the task was complete. Total time about 5 minutes.
Other Parts Used:
-
Larry from Clinton, SC
-
Difficulty Level:Really Easy
-
Total Repair Time:15 - 30 mins
-
Tools:Screw drivers, Socket set
190 of 194 people
found this instruction helpful.
Was this instruction helpful to you?
Thank you for voting!
Hinge at base of doors cracked and broke causing door to slip down when opened
Note difference between Freezer and Fresh food door.
Also, did not need the Door Stop but should have ordered one water tube union (PS299116). See Freezer below
Fresh Food Door
1. Removed cap at top of fresh food door (Philips screw) and used socket wrench to remove two hex head screws from top of refrigerator.
2. This allowed door to be lifted off base.
3. Removed door stop, hinge shim and broken cam riser from door using socket set and nut driver. Two hex head screws.
4. Replaced all three parts with new parts, re-attached using existing Hex Screws. Make sure cam riser is aligned properly to allow door to fit back on hinge. If it's slightly off, the door will not settle on hinge properly.
5. Replaced door, make sure it aligns properly before tightening Hex Screws to top of Refrigerator. Replaced cap at top.
Same process for freezer door except:
a. At the top of the door, I had an electrical connection due to Ice/water dispenser in the door. This connection is fairly easy to disconnect.
b. There is a drain tube that runs inside the door and through the hinge assembly in the base of the door. The door can not be removed unless the tube is disconnected or cut. There was a Water Tube Union (PS299116) just beyond the bottom hinge which I was able to disassemble to free the tube. However, this took considerable force and luck and I would recommend you consider buying a new part in case it breaks or you need to cut the tube. Otherwise you will not be able to get the door off. Once the tube is disconnected, it easily slides through the hinge and the door can be removed.
Also, did not need the Door Stop but should have ordered one water tube union (PS299116). See Freezer below
Fresh Food Door
1. Removed cap at top of fresh food door (Philips screw) and used socket wrench to remove two hex head screws from top of refrigerator.
2. This allowed door to be lifted off base.
3. Removed door stop, hinge shim and broken cam riser from door using socket set and nut driver. Two hex head screws.
4. Replaced all three parts with new parts, re-attached using existing Hex Screws. Make sure cam riser is aligned properly to allow door to fit back on hinge. If it's slightly off, the door will not settle on hinge properly.
5. Replaced door, make sure it aligns properly before tightening Hex Screws to top of Refrigerator. Replaced cap at top.
Same process for freezer door except:
a. At the top of the door, I had an electrical connection due to Ice/water dispenser in the door. This connection is fairly easy to disconnect.
b. There is a drain tube that runs inside the door and through the hinge assembly in the base of the door. The door can not be removed unless the tube is disconnected or cut. There was a Water Tube Union (PS299116) just beyond the bottom hinge which I was able to disassemble to free the tube. However, this took considerable force and luck and I would recommend you consider buying a new part in case it breaks or you need to cut the tube. Otherwise you will not be able to get the door off. Once the tube is disconnected, it easily slides through the hinge and the door can be removed.
Other Parts Used:
-
James from Cromwell, CT
-
Difficulty Level:Easy
-
Total Repair Time:30 - 60 mins
-
Tools:Nutdriver, Pliers, Screw drivers, Socket set
12 of 12 people
found this instruction helpful.
Was this instruction helpful to you?
Thank you for voting!
Both doors wouldn't self close, the freezer door would also stick in the open position.
Another post that said you don't need to buy the whole metal mounting bracket with these cam risers is right. Also, I found 3 different parts that seemed the same ranging from $1.27 up to the mid $20's. I bought 4 of the cheap ones and 2 of the washers. Worked perfectly! Also, the reason this happens is because no one lubricates the cams, like everything else. Add some grease when you put it back together.
I used a 5/16 nut driver to take off the top hinge bracket. Lift off the door after emptying it. Place the door on something so you can work on it. Unscrew the cam attached to the bottom of the door with your nut driver. Remove the bottom hinge bracket with the nut driver and drill out the rivet holding on the cam piece. Attach the new cam plastic piece and place the washer in the space under the plastic where the hinge post will go. Put grease on both cams! Place the door back on the hinge post. Reattach the top bracket. Adjust the top bracket by sliding the door around until it is straight. Then tighten the top screws.
$10 in parts to get a new working door. The seal even grabs better!
Other Parts Used:
-
Jeff from Elk, CA
-
Difficulty Level:Easy
-
Total Repair Time:15 - 30 mins
-
Tools:Nutdriver
8 of 10 people
found this instruction helpful.
Was this instruction helpful to you?
Thank you for voting!
Door Closing cam & hinge cam riser had broken
Blocked door from dropping ,removed hinge and loosened outer bolt holding door closing cam, removed old ,replaced w/ new installed new hinge .
worked like new
worked like new
Other Parts Used:
-
Eugene from Dunbar, PA
-
Difficulty Level:Really Easy
-
Total Repair Time:30 - 60 mins
-
Tools:Socket set
7 of 8 people
found this instruction helpful.
Was this instruction helpful to you?
Thank you for voting!
Bottem assembly broken off causing door to make loud noice when opening or closing.
Shiimmed up the door unscrewed top and bottem hinges and replaced the bottem assembly. Note, if you do this replace the entire assembly because the hinge itself has a cam which is built into the hinge, therefore you must replace it also.
Other Parts Used:
-
Donald from Millersville, MD
-
Difficulty Level:Really Easy
-
Total Repair Time:Less than 15 mins
-
Tools:Nutdriver
5 of 8 people
found this instruction helpful.
Was this instruction helpful to you?
Thank you for voting!
Hinge Cam Riser broke - door wouldn't self-close
I removed all of the items in the refrigerator door. I then removed the top hinge cover with a Philips screwdriver, and removed the two machine screws holding the top hinge using a socket wrench. This allowed me to lift the door off the bottom hinge pins and set the door on its side. I removed the two screws holding on the broken bottom hinge cam riser block and replace it with the new one. After tighening it back with a socket wrench, I tried to put the door back in place. I asked my wife to hold the door steady while I lay on the floor to guide the door downward over the bottom hinge pin. I then replaced the top hinge screws and checked the door. It still didn't close on its own! I realized I had to loosen the top hinge screws and adjust the door so that it stands more vertically (evening the gap with the freezer door). With this adjustment, the door closes fine.
Other Parts Used:
-
Richard from Los Altos, CA
-
Difficulty Level:Really Easy
-
Total Repair Time:15 - 30 mins
-
Tools:Screw drivers, Socket set
4 of 4 people
found this instruction helpful.
Was this instruction helpful to you?
Thank you for voting!
Door was not properly closing
Note: I was not aware that the Cam Riser came with the Hinge Assembly, and did not need the part.
1)Removed all food from right refridge door, then removed all shelves etc.
2)Removed phillips screw holding protective plastic cap on upper hinge, then removed cap.
3)Removed upper hinge using socket (to loosen and tighten) and nut driver, then removed door.
4)Removed Old hinge assembly, replaced with new using socket and nut driver
5)Removed Old Door Shim Cam & Door Hinge Shim from bottom of Door, then replaced with new parts.
6)Re-Installed Door, adjusting the top hinge for door to close properly, then put shelved and food back.
Other Parts Used:
-
Kevin from Northbridge, MA
-
Difficulty Level:Easy
-
Total Repair Time:15 - 30 mins
-
Tools:Nutdriver, Screw drivers, Socket set
3 of 5 people
found this instruction helpful.
Was this instruction helpful to you?
Thank you for voting!
Replacing the Hinge Cam Riser (GE Part # WR02X10140) - it was brooken
I have just followed the instructions on the youtube video: It is really easy. I did. Thank you
Other Parts Used:
-
Itamar from SARASOTA, FL
-
Difficulty Level:Easy
-
Total Repair Time:15 - 30 mins
-
Tools:Nutdriver, Screw drivers
2 of 2 people
found this instruction helpful.
Was this instruction helpful to you?
Thank you for voting!
Produce side of the refridgerator was warm, freezer side cold.
removed the back of the freezer unit and replaced the defrost heater and thermastat. took the controls out of the produce side and replaced the defrost timer.
Other Parts Used:
-
Mike from Lawrence, KS
-
Difficulty Level:Easy
-
Total Repair Time:15 - 30 mins
-
Tools:Nutdriver, Screw drivers
2 of 2 people
found this instruction helpful.
Was this instruction helpful to you?
Thank you for voting!
Hinge cam riser wore out and split into peices
I checked the exploded view of the door assembly and the box assembly and determined the parts needed to properly solve the problem. I guessed correctly that the lower cam on the hinge assembly should be replaced at the same time since they had to work together. It ended up I had just the right parts and all of the nut head fasteners were the same size so only one wrench was needed. The door did have to be removed by detaching the top hinge as well.
Other Parts Used:
-
Kenneth from Gold Canyon, AZ
-
Difficulty Level:Easy
-
Total Repair Time:30 - 60 mins
-
Tools:Nutdriver, Screw drivers
1 of 2 people
found this instruction helpful.
Was this instruction helpful to you?
Thank you for voting!
- < Prev
- 1
- 2
- 3
- Next >
Questions and Answers
We're sorry, but our Q&A experts are temporarily unavailable.
Please check back later if you still haven't found the answer you need.
Related Parts
Model Cross Reference
This part works with the following models:
PartSelect Number: PS284596
Manufacturer Part Number: WR02X10140
Brand
Model Number
Description