OEM stands for Original Equipment Manufacturer. This means that the company who made your appliance is also supplying the replacement part.
Features
OEM
Generic
Genuine brand name
Guaranteed to fit
Superior Quality
Long term value
Part Videos
Watch our pros, then fix it yourself.
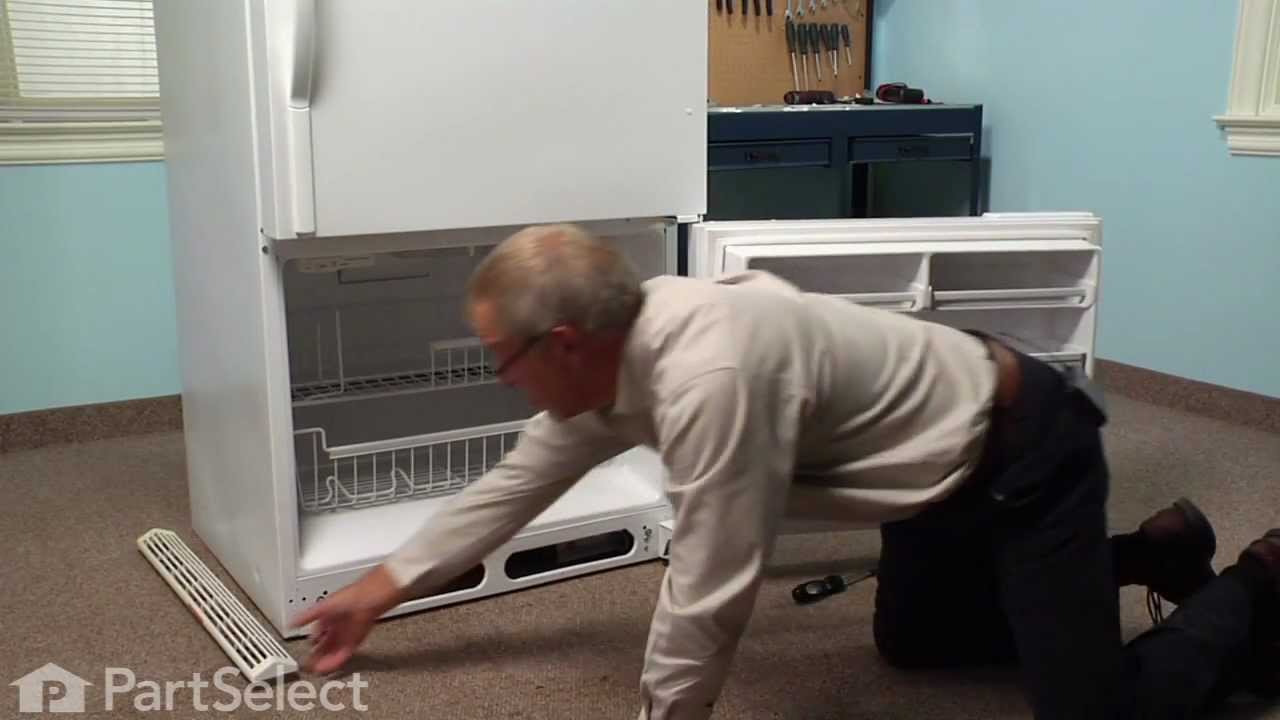
Replacing your Amana Refrigerator Defrost Timer Kit - 120V 60Hz
About this fix
Common problems and models this part fixes.
Easy
30 - 60 mins
Rated by verified customers
What this part fixes:
Fridge too warm
Freezer section too warm
Freezer not defrosting
Fridge runs too long
Will Not Start
Too warm
Fridge and Freezer are too warm
Frost buildup
Freezer too cold
Noisy
Works with the following products:
Refrigerator
Part# R0131577 replaces these:
AP4246797, 1156627, R0131577, 0312555, 101229304, 10129304, 10530702, 10530703, 14205006, 14205629, 14206787, 14212499, 4344280, 8170404, D70041-4, D7004104, D7790403, R0131577, R0131577VP, Y0312555
...
Show more, Y312555 Show less
Customer Reviews
Real ratings from other people who bought this part.
Average Rating:
★★★★★
★★★★★
15 Reviews
4.5
Out of 5
5 Stars
11
4 Stars
3
3 Stars
0
2 Stars
0
1 Star
1
Search reviews left by others. DIY doesn't mean you have to do it alone. Use simple keywords like "fit", "broken", "easy", or "quality" to find reviews that match!
Search filter:
Clear Filter
Your search term must have 3 or more characters.
Sort by:
Prev
1
2
Next
Sorry, we couldn't find any existing reviews that matched. Try using some different or simpler keywords.
★★★★★
★★★★★
CURT H - October 6, 2022
Verified Purchase
Part was exactly as advertised ,direct fit
Description for problem with fridge and part to repair was spot on. I have used parts select several times for different appliance repairs and pleased with resultsAlso help line/customer service is very knowledgeable at guiding you to correct part ,delivery quick/quick.
★★★★★
★★★★★
John N - February 10, 2021
Verified Purchase
Defrost timer replacement
A quick and easy replacement. The new part came less than 24 hours of placing the order. Great turnaround time.
★★★★★
★★★★★
Philip M - October 24, 2023
Verified Purchase
Defrost Timer Kit
Great part, great price, great service from customer reps. No hassle warranty and great diagnostic help on Website to understand the possibility of issues and the components required to fix the problem.
★★★★★
★★★★★
Johanne Anaclet L - August 5, 2020
Verified Purchase
Good service
I received the part in a short time. According to my order I received the the part ordered. This was according to the schematic of the refrigerator. I couldn't find out where to replace the part. Therefore I called the repairman and after inspection it was not the right part.
★★★★★
★★★★★
Gary W - August 14, 2020
Verified Purchase
Ease of purchase and replacement
The part was the correct replacement piece and the attached video on the website really helped in making it easy to install.
★★★★★
★★★★★
Lorne S - August 27, 2018
Verified Purchase
Defrost timer
The component was a perfect fit and works like new easy to install and came quickly.
★★★★★
★★★★★
KEN M - June 13, 2019
Verified Purchase
The part was the exact replacement.
The part was well-packaged and received in excellent condition. This repair corrected the problem. The original assembly was "hanging up" in the defrost position.
★★★★★
★★★★★
Art M - September 10, 2019
Verified Purchase
Great part
Fixed the problem
★★★★★
★★★★★
Steve P - November 15, 2019
Verified Purchase
Fridge too Warm
The part came fast and fixed the problem. Partselect’s info and DIY video are excellent.
★★★★★
★★★★★
Brian S - August 6, 2024
Verified Purchase
The Correct Part, Installed Easy.
Packaged New part arrived quickly and in good condition. The old part was broken, when I shook it, there was a rattle sound. The new part installed quickly and now freezer is working again. Thanks PartSelect.
Prev
1
2
Next
Repair Tips
See how others fixed this model. Time, tools, difficulty, and steps that lead to victory!
Easy
30 - 60 mins
Average repair rating from 51 real customers like you
Sort by:
Prev
1
2
3
Next
Search repair tips from other customers using simple keywords like "replace", "fit", "remove", "inspect". DIY doesn't mean you have to do it alone!
Search filter:
Clear Filter
Your search term must have 3 or more characters.
Sorry, we couldn't find any existing installation instruction that matched.
Fridge and freezer didn't cool enough
106 of 117 peoplefound this instruction helpful.
Peter from Eden, UT
Really Easy
Less than 15 mins
Socket set
I diagnosed the problem via the internet. Diagrams helped a lot. Coils were frozen over. Thawed them out overnight. Manually advanced timer and the defrost heater was operable. The defrost timer wasn't "turning" on it's own. I turned the fridge back on while I awaited the part. It worked fine for the time I had to wait. (over two
... Read moreweeks since I had delayed ordering the part) New timer arrived as promised. Undid 4 hex head (1/4") screws. Unplugged 4 prong connection. Plugged in new timer and replaced the 4 screws. Frigde works great.
Read less
Was this helpful?
Thank you for voting!
Refrigerator keeps running and will not turn off automatically.
92 of 95 peoplefound this instruction helpful.
Robert from Danville, CA
A Bit Difficult
30 - 60 mins
Nutdriver, Pliers, Screw drivers
Mine is a top refrigerator and bottom freezer. Whenever working with electrical applicances always disconnect the electrical power before beginning work on it. Never try to force anything. If there is abnormal resistance, use logic and determine if there is an obstable that needs to be dealt with. Loosen all screws halfway then take
... Read morethem off completely. Replace all screws part way and begin by inserting and starting the screws by hand then use the nut dreiver and last tighten until snug. Also, be ware that wires can get brittle and may break so handle them with care. The wires and other parts may have been frozen and defrosted many times over the life of the refrigerator. Have a flash light or other light source so you see everything well. The light will be off because you disconnected the electrical cord.
First check the defrost timer. On my unit it is located in the bottom front corner behind the removable ventilation grill. Remove about 4 hex screws. Its most useful to use a nut driver (looks like a screw driver but the tip fits different hex screws. To check the defrost timer you can turn the orange/red knob to the right and see if you can advance the timet to turn on the defrost cycle. If this works then the problem is not the defrost timer. I changed my defrost time anyway not that it was broken.
To replace the defrost thermostat, remove the food and shelves from the freezer. Use the hex nut driver and remove the hex screws from the back panel of the freezer section. If needed you will need to remove the ice maker. I don't have an ice maker. Once the back panel is removed you will see some coils, wires and other parts. Disconnect the two wires for the defrost thermostat, you can identify the defrost timer because you purchased one on-line. Carefully remove the defrost thermostat which is attached by a tension clip. The ends of the wires (terminals) may not be the same style. If needed cut the wire terminal plus two inches of excess wire from the old defrost thermostat and splice it to the new defrost thermostat. If you have a soldering iron, solder it, if not use a wire nut and electrical tape or just twist the wires together and cover with two layers of electrical tape. Now, attach the wire terminals of the new defrost thermostat to the wires that you disconnect earlier. You can not mix them up because the ends are different. Pull the tension clip slightly apart and slip onto the tubing where it came off of originally. Replace the back cover and air grill and fasten the hex screws. Attach the ice maker if you have one. Replace the shelves and food and close the freezer door. Plug in the refrigerator. It may not go on immediately. If this is the case, go to the defrost timer and turn the orange/red knob to the right and you will cycle the defrost timer to activate the freezer. Let the refrigerator run for a while, even a few hours is okay, and then it will hopefully go into the normal automatic cycle.
Other parts that may go bad and need replacing are the condenser fan that you will find by removing the cover in the back of the refrigerator. This fan runs when the refrigerator is on to cool the compressor. Also a heater coil is used to defrost the freezer. Infrequently, this part goes bad.
There is no separate cooling unit for the refrigerator compartment of the refrigerator. The cold air for both the refrigerator compartment and freezer compartment originate from the freezer. The temperature dial in the refrigerator compartment regulates the amount of cold air from the freezer that will circulate to the refrigerator. (This just give you a clue that if the refrigerator compartment is warm the problem will still concern the freezer.)
Also, please clean off the coils that are covered with dust and webs.
This is a brief summary and depending on your level of experience and general logic and problem solving skills. This repair may or may not be easily understood. One last tip,
freezer defrost failure - ice up - temperature rise
59 of 70 peoplefound this instruction helpful.
Robert from San Jose, CA
Really Easy
15 - 30 mins
Nutdriver
After replacing the defrost timer (easy: pop off the grill; unscsrew the bracket; pull out the old one and plug in the new one) [didn't fix problem] and replacing the defrost heater element (harder: use nut driver to remove ice maker and rear interior panel in freezer section; use pliers to remove clips holding the heater element to evap
... Read morecoil CAREFULLY - puncture evap coil and unit is junk!!! - replace with new heater element)[didn't fix problem] I replaced the defrost thermostat: moderate difficutly. Use nut driver (5/16") to remove ice maker (loosen screws and slde IM up and off) and rear interior panel (don't need to pop the ice maker electrical connector off the rear panel) and unclip the thermostat from the evap coil. Replace with good thermostat and enjoy your "self defrost" freezer/fridge for another fefw years.
Evaporator coils were freezing up and the water dispenser would not work
24 of 27 peoplefound this instruction helpful.
Sammy from Clarksville, TX
Easy
15 - 30 mins
Nutdriver
I was not sure what the fix was on my refrig, so I ordered the defrost timer kit, bimetal defrost thermostat, and the evaporator heater(about 100.00 in parts) I think my entire problem was the bimetal defrost thermostat, as it was somewhat bulged out on the plastic side. The evaporator coils would freeze over--the evap. fan wo
... Read moreuld not work and the cold water dispenser would not work. I did't have time to just replace one part at a time so I ordered all three parts that have to do with the defrosting of the evap. coils. The parts worked and the refrig. is operating fine. Thanks to parts select for a super fast delivery(one day).
First of all, I do not have a history of repairing appliances or even the knowledge of what all the parts are named or how it all works. That said, please excuse my other than technical explanation of the repair. After reading a few posts, I decided to order the two parts and give it a try. The Defrost timer was easy to remove - two sc
... Read morerews to remove the housing and two screws to remove the timer. The bimetal defrost thermostat was an easy installation - after removing the cover plate (back of freezer section) I removed the two wire caps that was connecting the existing thermostat to whatever it connects to - I guess the heating element and ? I was a little confused because the replacement thermostat had more wires that the existing one. I decided to cut away the extra wires and connect it just like the old one was connected. I didn't work at first and I was about to call in a pro. I turned the defrost timer knob and everything started to work. It has worked beautifully since and I got to brag a little to my wife - that was short lived because she reminded me of the other "stuff" that needed to be fixed! Thanks to the folks that posted before me - it helped me understand the problem and the repair.
Refrigerator compartment warm, Freezer cold, (veggies freezing for a year or more)
17 of 19 peoplefound this instruction helpful.
Aaron from Duncan, AZ
Easy
1- 2 hours
Nutdriver, Screw drivers
First I had to determine what was wrong. Obviously the compressor was working since the freezer was cold. Digging for awhile revealed that the evaporator coils for the freezer had frozen up into a solid block of ice. Then I had to figure out why. Tested the defrost heater in place--small resistance (~3 ohms), OK. Removed and tested t
... Read morehe timer--unsure. Removed and tested the defrost thermostat--did not turn on when plunged in ice water or frozen with canned air (turn the can upside down--be careful!, you can instantly freeze-burn your skin), bad. Chose to purchase and replace both the timer and the thermostat. Took the opportunity to THOROUGHLY clean everything, front, back, and underneath. Found the drip tray transition piping cracked at the junction and replaced it with a cut-off funnel "glued" into place and to the underside piping with the RTV Silicone. When parts arrived, tested them and confirmed that the original timer was OK and the thermostat was bad. Installed the new thermostat (and went ahead and installed the new timer). NOTE: one connector on the thermostat was not identical to the orginal equipment. Rather than cut the refrig wiring, I chose to build a jumper with the original connector on one end and a new one for the new thermostat on the other. Buttoned everything back up, re-leveled it, and let it run for 24 hours at the manufacturer's recommended "first" settings (4 and 4) without being disturbed. Seemed fine, loaded it with food, everything is great including non-frozen veggies! (I suspect the ice was forming frequently and blocking the return from the refrig compartment, which is right next to the veggie drawer.)
Removed the back wall (several screws) of the freezer too get at the thermostat and removed the thermostat and after checking to makes sure I plugged the wires in correctly I replaced the defrost timer by removing the housing that held it in place, which was located underneath the freezer compartment on outside of the unit. That was it!
I unplugged the unit, removed the freezer racks and removed the back panel to expose the evaporator. I removed the defrost thermostat, unplugged the wires, and installed the new thermostat. I replaced the panel and racks then removed the defrost timer kit by removing the two screws that fastened the cover to the refrigerator and the two
... Read more screws that secured the timer to the cover. The timer is centered behind the front toe grille assembly. I installed the new timer, replaced the cover, and plugged the refrigerator in. It took several minutes for the defrost timer to advance before the evaporator fan would come on.
I removed the Icemaker then the backpanel in the freezer. The fan motor removal required only to hex screws and three wires to dismount. The biggest problem I had was the replacement motor had the connecting pins for the wire harness on the reverse side. I thought I could unbolt the motor and flip it but this did not work. I remounted
... Read more the new motor and was able to get the wires connected. The thermostat clipped in place but one of the wires had a different connector than the new unit. I used a wiring snap connector to complete the connection. The defroster timer was under the refridgerator and after taking two screws off the cover plate was just an unplug and plug in the new unit. When I first turn the unit back on nothing happend. I soon realized I had to advance the timer until the unit kick on. It has worked fine since and solve both the noise problem and defrost issue.
freezer would work ,then heat up melt all ice then freeze the water , temps up and down fridge would be warm ,cold, warm ,cold
10 of 13 peoplefound this instruction helpful.
vincent from Huffman, TX
Really Easy
15 - 30 mins
Nutdriver, Pliers
took out back panel of freezer compartment , exposed fan and coil thermostat was clipped on to coil, removed ,replaced,each wire one at time , the 2 extra wire that go out back dont go to anything its for factory testing.clipped them off pulled out from back, put wire ties on to keep wires from fan area . closed up . timer is in a metal b
... Read moreox under the freezer door pulled off bottom facia 1 screw on metal box remove old timer installed new . everything working great now. no more warm beer
Ask our experts a question about this part and we'll get back to you as soon as possible!
We may have answered a similar question already! Search questions and answers left by others using simple keywords like "fit", "broken", "easy", or "quality" to find questions that match.
Search filter:
Clear Filter
Your search term must have 3 or more characters.
Sort by:
Prev
1
Next
Sorry, we couldn't find any existing answers that matched.Try using some different or simpler keywords, or submit your new question by using the "Ask a Question" button above!
Frank - For model number Bz22re
December 12, 2018
Does this part have an adjustment. I see the knob , knob can be rotated , and as it’s turned the fan will turn off .Is this an adjustable dial to keep the condenser/evaporater fan pushing cold air to the refrigerator portion .Or is this a preset part . Thank you
Hi Frank,
Thank you for your question. This would be a preset timer. The defrost timer is an electro-mechanical timer that operates a set of contacts that control both the compressor circuit as well as the defrost heater circuit. Most timers will activate a defrost cycle every 8-10 hours of compressor run time. This normally occurs about once every day or two. The defrost timer will normally terminate the defrost cycle after 20 to 30 minutes and the compressor and fans will start again. I hope this helps. Thank you and have a great day!
7 peoplefound this instruction helpful.
Was this helpful?
Thank you for voting!
Ken - For model number BR18V1S-P1320707WS
April 13, 2022
I have an Amana refrigerator, bottom freezer, Model BR18V1S-P1320707WS.
The freezer and is warm and the refrigerator doesn’t get colder than 46.
The red knob dial on the Defrost Timer does rotate. Can the Defrost Timer red knob dial rotate and the Defrost Timer still be malfunctioning?
Hello Ken, thank you for writing. Using a multimeter, the defrost heater can be checked for 29 ohms, the defrost thermostat is closed at 20 degrees and lower, it opens at 50 degrees, the defrost timer with refrigerator running, should be turning, you can usually see the internal gear turning through a sight window on the side of it. It can be turned by hand to the defrost cycle and it should send 120v out to the defrost circuit on terminal 2 of the time and it should come out of defrost and back to running the compressor after about 20 min. The Defrost Timer Kit is part PS2167006. We have a video for you to access. If you need help placing an order, customer service is open 7 days a week. Please feel free to give us a call. We look forward to hearing from you.
4 peoplefound this instruction helpful.
Was this helpful?
Thank you for voting!
Gary - For model number AMANA FRIG BX21TW
April 29, 2023
THE DEFROST TIMER NO. R0131577 FOR THE AMANA FRID . PLEASE TELL ME HOW MANY TIMES IN A 24 HOUR PERIOD SHOULD THE TIMER TURN THE FRIG FREEZER COMP. TURN IT OFF AND ON. OTHER NO. PS2167006 . YOU PEOPLE ARE WONDERFUL
Hello Gary, thank you for your query. The defrost timer usually activates a defrost cycle every 8 to 10 hours of compressor runtime. This normally occurs about once every day or two. The defrost cycle will normally terminate after 20 to 30 minutes, and the compressor and fans will start again. If this is not the case, then you may need to replace the defrost timer, part number PS2167006, to fix the issue. We hope this information helps!
1 personfound this instruction helpful.
Was this helpful?
Thank you for voting!
Jim - For model number BX20RL
October 7, 2019
My 31 year old fridge is failing to defrost .... are there any individual tests you can recommend on the three elements involved: defrost timer, heater assembly and thermostat? i would like to avoid buying the individual parts and replacing them one-by-one to identify the bad guy. fridge cools just fine. i'm a retired electrical engineer and used to using volt/ohm-meter to test connections, continuity, etc. any advice will be appreciated
Hi Jim, thank you for your question. When you are having temperature problems in your fridge, there are a few parts that could cause the issue. You can use a multi meter to test most of the parts. Make sure you cut power to your appliance before doing any repairs or tests. First you should test your defrost thermostat. Place the thermostat in ice cold water for 2-3 minutes after removing it from your appliance. It should be reading 0 ohms to be working correctly. Another part to check would be your defrost heater. Remove it from the appliance. It should be reading anywhere between 0 - 50 ohms to be working. You could check your temperature sensor. To find the correct reading for this part you will have to refer to your tech sheet that comes with your appliance. You can usually find this tech sheet behind the bottom grille of your fridge on either the right or left side. These are the most common parts that cause this issue in your appliance. So it is suggested you check them first. I hope that helps. Good luck with your repair.
1 personfound this instruction helpful.
Was this helpful?
Thank you for voting!
MIKE - For model number SQD25VW
July 15, 2021
Circulating fan works but will not come on. Wired it direct but the coils freeze up about every 5 days.
Hi Mike,
Thank you for your question. If the coils in your freezer are freezing every couple of days , there are some parts that you will need to check to see which one is causing the issue. You will need to check the defrost heater, the defrost thermostat, the timer and the door gasket. If the door is not sealing correctly, then moisture will get inside the refrigerator and frost will form when it cools. We hope this helps! Good luck with the repair!
Mike - For model number Model SXd25S2L, Mfg No P1198901WL
June 12, 2019
I can’t find the defrost timer on my refrigerator. My refrigerator is at 38 degrees. But my freezer will not go below 34 degrees. I vacuumed it all out underneath and let it sit overnight to thaw. Any suggestions? Start device and capacitor?
Hello Mike, Thank you for the question. The timer is part of the Adaptive Defrost Control Board, PartSelect Number PS2004546 located by the condenser at the back of the appliance. If the appliance is still running normally then the Start device and capacitor shoudl be fine. Sounds like the Control Board is defection. I looked up the part and it is listed as No Longer Available/Discontinued. There is no part substitutions listed. My suggestion here would be to call the manufacturer and see if they can provide you with a substitution for these part numbers. Hope this helps!
The freezer section will not get colder than about 20 F. The refrigerator is working fine. I have replaced the freezer temperature control and the defrost timer. I have also disconnected the defrost heater thermostat, and the freezer will still not get colder than the low 20's? Any suggestions?
Hi Joe, thank you for contacting us. We have researched the model and would recommend checking the condenser coils and making sure they are clean and free of frost. If the issue remains, the problem might be with the condenser fan motor, part number PS395284, the evaporator fan motor, part number PS11738465, or the compressor kit, part number PS2580804. We hope this helps, good luck with this repair!
The freezer temp is not getting to temp recommended, the fridge temp is. I have checked the defrost timer with a multimeter and timed the defrost phase, both are good. Any ideas on why the freezer is not getting to temp? Multimeter test on compressor was good as well.
Hi Rick, thank you for reaching out. According to our research, you may need to check the following parts to fix this issue: freezer door gasket, part number PS11738515, and evaporator fan motor, part number PS11738242. We hope this solves your problem!
Item is in stock and is estimated to be delivered in 2-3 business days via Standard Shipping.
On Order
Item is not in stock and usually ships 3-5 business days from the time you place your order.
Special Order
Item is not in stock and usually ships 10-15 business days from the time you place your order.
NLA - No Longer Available
This item is no longer being made by the manufacturer, and cannot be added to your shopping cart.
[{"position":0,"name":"Home","title":"Home","url":"/"},{"position":1,"name":"Circuit Board or Touch Pad","title":"Circuit Board or Touch Pad","url":"/Refrigerator-Circuit-Boards-and-Touch-Pads.htm"},{"position":2,"name":"R0131577","title":"R0131577","url":""}]



 My Orders