Average Repair Rating: 2.8 / 5.0, 1 reviews.
What's this?
< Prev
1
Next >
Sort by:
Search filter:
Clear Filter
Your search term must have 3 or more characters.
Keep searches simple. Use keywords, e.g. "leaking", "pump", "broken" or "fit".
Sorry, we couldn't find any existing installation instruction that matched.
Screen on the hot air vent disintegrated
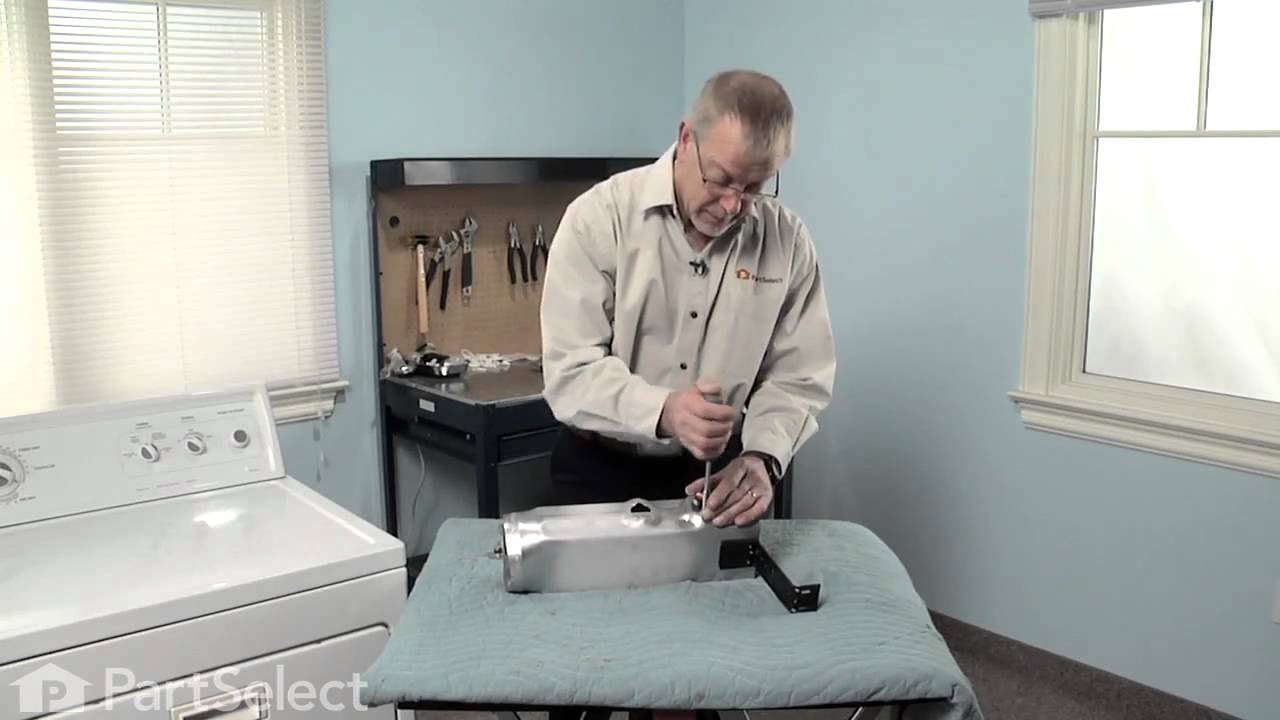
It is odd that this part needed replacement but I am in an area near the Atlantic ocean in a vacation house which is vacant most of the year. The exhaust vent probably brings excessive moisture down to the dryer in the basement. The screen you can see at the inside back of the tumbler (where the heated air enters) rotten out, pieces fell inside and there was danger of something falling in and catching fire. I found no useful source for information (including YouTube) as this part is most easily replaced from the rear of the dryer and the available info was about repairing the heating element, the circuit board, or the exhaust venting pieces which is done from the front.
The bottom line is that the back removes easily. You should: 1. unplug and remove the exhaust shoot 2. remove the top per YouTube or other source 3. take off the back panel over the electrical connections and unscrew the ground; tuck it inside. Don't undo any electrical connections except the ground 4. take off the screws holding the back on (8-9, one is hidden above the exhaust vent) and pull it out of the way; you then have compete access to the "DUCT-AIR" part 4. undo the clip that holds the vent tube (from the heating element) to the part 5. remove the screws that hold the part to the inside back (3?) and push it out of the way 6. remove the clips and remove the old part 7. reassemble in reverse order
I'm over 70 so I took lots of time and breaks but was still done in under two hours. The 2 clips holding the heater element tube to the part were badly rusted and should have been replaced but I made do with the old ones.
Other Parts Used:
Thomas from Edgartown, MA
Difficulty Level:
Easy
Total Repair Time:
1- 2 hours
Tools:
Nutdriver, Pliers, Screw drivers, Socket set
3 of 3 peoplefound this instruction helpful.
Was this instruction helpful to you?
Thank you for voting!
< Prev
1
Next >
Questions and Answers
Ask our experts a question about this part and we'll get back to you as soon as possible!
2 questions answered by our experts.
< Prev
1
Next >
Sort by:
Search filter:
Clear Filter
Your search term must have 3 or more characters.
Keep searches simple. Use keywords, e.g. "leaking", "pump", "broken" or "fit".
Sorry, we couldn't find any existing answers that matched.Try using some different or simpler keywords, or submit your new question by using the "Ask a Question" button above!
Nellie
September 23, 2023
Can lint, dust get into the duct air?
How do you clean it?
For model number GEW9200LW1
Hi Nellie, thank you for the question. Aside from the lint trap and slot, lint can also build up in the dryer’s drum, vent and duct system. You can clean these areas of your dryer yourself. To clean the air duct, you may need to remove it from the dryer. To remove the air duct, first secure the top of the lint filter housing. Then, you may remove the top of the dryer by pulling it forward and lifting it up. Un-thread the screws that hold the front panel to secure the front and remove the tub of the dryer. Once you have secured the tub, you may remove the rear bulkhead by un-threading the screws, and you can then remove the air duct to clean it. You can clean the air duct by brushing it, or you can also use a vacuum to clean it. We hope this solves your problem!
1 person found this helpful.
Was this helpful?
Thank you for voting!
John
November 23, 2021
My dryer heats up but does not dry the clothes for a long time
For model number MEDC700VW0
Hello John, Thank you for the question. We suggest testing the High Limit Thermostat. At room temperature, testing the thermostat should produce a reading of zero. You can also test the Internal-Bias Thermostat. You should see a reading of close to 0 ohms on a multimeter if the thermostat has continuity. Also make sure the vents and cabinet are clear of any lint build up to have proper air flow. If you need help placing an order, customer service is open 7 days a week. Please feel free to give us a call. We look forward to hearing from you!
Fresh Flow Produce Preserver is made for your refrigerator to help keep produce fresh for longer by absorbing the chemical, ethylene, that causes your fruits and vegetables to ripen quicker. Your produce could be fresh f...
This solid element restorer is for ranges and cooktops. Solid element restorer restores and protects solid elements from rusting and spotting. Follow the instructions on the label when using this product.
This front load washer cleaner removes odor-causing residue. Use it once a month and it will keep your machine fresh and clean. Package comes with 3 tablets.
This low-odor gel, easily cleans away tough burnt-on deposits at room temperature. Apply the gel evenly on the cooled oven surface. Leave the gel to set overnight then wipe away with a clean cloth.
Make your cooktop shine with Frigidaire ReadyClean Glass and Ceramic Cleaner. Our scratch-free, streak-free formula removes smudges, grease, burnt-on food, dirt and oil, while protecting and polishing to repel dust and d...
Our scratch-free, streak-free formula removes fingerprints, smudges, grease, dirt and oil, while protecting and polishing to repel dust and dirt. Use on all stainless steel appliance brands and surfaces. Stainless Steel ...
Model Cross Reference
This part works with the following models:
PartSelect Number: PS11741422
Manufacturer Part Number: WP3387911