Keep searches simple. Use keywords, e.g. "leaking", "pump", "broken" or "fit".
Sorry, we couldn't find any existing reviews that matched. Try using some different or simpler keywords.
★★★★★
★★★★★
Teresita V - November 5, 2021
Verified Purchase
Great part!
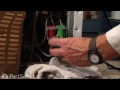
Part fits perfectly and shipping was fast. Video of installation was very helpful. Saves us money by doing it ourselves!
★★★★★
★★★★★
Mark D - April 29, 2021
Verified Purchase
Great Service
I ordered Ice Maker and Water Dispenser Dual Inlet Valve and got it in four days. Installed it and my fridge is making ice again. I also had to contact customer service. They were very helpful. I will definitely order parts from them again
< Prev
1
Next >
Customer Repair Stories
Average Repair Rating: 4.0 / 5.0, 67 reviews.
What's this?
< Prev
1
2
3
Next >
Sort by:
Search filter:
Clear Filter
Your search term must have 3 or more characters.
Keep searches simple. Use keywords, e.g. "leaking", "pump", "broken" or "fit".
Sorry, we couldn't find any existing installation instruction that matched.
Ice Maker Fill Tube Freezes Up
After a bit of troubleshooting it became obvious that the fill tube was freezing shut because the dispenser valve was not fully closing between fills. It was allowing small drops of water to creep into the fill tube where they would freeze as they entered the freezer compartment eventually plugging the tube shut. The fix was to replace the valve which was conveniently located on the back of the refrigerator in the lower right corner (where you attached the water inlet line from the house). After unplugging the refrigerator and shutting off the water outlet valve (in the wall), a small crescent wrench easily removed the inlet water line from the valve on the refrigerator. I then had to remove about five or six screws which held the black (cardboard like) flap which covered the valve. This cardboard is part of the overall cover that encompasses the entire back of the refrigerator. Two sheet metal screws (which held the valve to the refigerator frame) were then removed and the valve was easily pulled from the frame about three inches. At that point four electical (plug like) connections (they're grouped in twos) were easily pulled off, and the two water lines which feed the ice maker and the drinking water dispenser were easily removed using a pair of pliers (and fingers). To install the new unit, the aforementioned process was reversed and the unit has worked (and fixed the problem) perfectly! The only problem I encountered was that I had a small leak where you attach the water line from the wall to the new valve. This was fixed with some plumbers tape.
Other Parts Used:
Joseph from Jacksonville, FL
Difficulty Level:
Really Easy
Total Repair Time:
15 - 30 mins
Tools:
Pliers, Screw drivers, Wrench (Adjustable)
230 of 248 peoplefound this instruction helpful.
Was this instruction helpful to you?
Thank you for voting!
water dispenser started leaking
i wasn't sure it was the inlet valve unit because the leak was at the water dispenser in the freezer door. after some research it looked like the water inlet valve located in the back lower part of the refrigerator was the problem. to replace, take off the cardboard cover, about 6 screws, you have access to the water inlet valve, disconnect the hoses (i think it goes without saying that you should have turned off the water to the frig) replace the inlet valve, connect hoses, turn water back on and you'll be back in business. very easy repair.
No water from dispenser but was getting water to ice maker
I unpluged the refigerator and turned off the water supply valve to the refigerator. I then disconnected the main water line to the refigerator and the 2 lines underneath the unit. I then unscrewed (2 screws) the unit from the refigerator. Then disconnected the 2 small plugs to the unit (sylonoid valves). I reinstalled the new unit in reverse. Turned the water back on checking for leaks then plugged the refigerator back in and tested the water despensor.
It was that easy.
Other Parts Used:
vince from antioch, CA
Difficulty Level:
Really Easy
Total Repair Time:
15 - 30 mins
Tools:
Nutdriver, Wrench (Adjustable)
66 of 82 peoplefound this instruction helpful.
Was this instruction helpful to you?
Thank you for voting!
Ice maker over flowing in freezer
After finding my ice maker and ice bin over flowing with frozen water. I unthawed my freezer wiped it down and started over again, only to find the water flowing into the ice maker didn't stop flowing. I determined the problem to be with the DIspenser valve. To replace this vave was a 15 min. job. Shut off the water to the refrigerator. Unplug the refrigerator. Remover the cardboard cover on the back of the frig. In the lower right hand corner of the frig is the dispenser valve. Remover the 2 screws holding it to the frig frame. Then it is just a matter of unplugging the 2 wires and unscrewing the 3 water lines from the old valve and placeing them in the same places in the new valve. Replace the cardboard,plug in the frig and turn the water back on. It did take a few ice making cycles for the ice maker arm to stop sticking in the up position. Very easy job!
Other Parts Used:
Dean from Sheboygan, WI
Difficulty Level:
Really Easy
Total Repair Time:
Less than 15 mins
Tools:
Nutdriver, Pliers
52 of 60 peoplefound this instruction helpful.
Was this instruction helpful to you?
Thank you for voting!
water dispense stopped working
1. Removed cover panel which was attached with seven screws. 2. Turned off the water supply valve to the refrigerator. 3. Unplugged the power to the refrigeration. 4. Unfastened the inlet valve which was fastened with two screws. 5. Unfastened three water hoses from the inlet valve with an adjustable wrench. 6. Unplugged two sets of electrical wires from the inlet valve. 7. Reverse the steps to install new inlet valve.
Other Parts Used:
Stanley from Sacramento, CA
Difficulty Level:
Really Easy
Total Repair Time:
Less than 15 mins
Tools:
Nutdriver, Wrench (Adjustable)
32 of 37 peoplefound this instruction helpful.
Was this instruction helpful to you?
Thank you for voting!
Freezer quit freezing -Fan motor quit and the water froze like a frozen waterfall and didn't make enough ice cubes.
First I unplug the refrigerator, then I unscrewed the cardbord cover with a screwdriver, disconnected the wires, unscrewed the screws, removed fan bracket with the fan. Since my wire connector was different, I had to strip the wires to connect the fan, twist wires together with the connecting wires, use wire nuts wire nuts and wrapped in black tape. I then hooked together the connection making sure the fan was rotating in the right direction. I then placed the fan bracket back in its place, lined up the screwed holes and installed the screws back to the original tightness. I plugged the refrigerator up to see if the fan was working properly. It was so I unplugged it again to start the nwxt part replacement. The next part I installed was a icemaker and water dispenser water inlet valve. I turned off the incoming water valve. I removed the two screws that held the old water valve in place. Unplugged the two connectors, removed the water lines and reinstalled the new water inlet valve hooking it up the way I unhooked it. Then I turned on incoming water line, checked for leaks. I put the cardboard panel back on and was done. The two parts were successfully installed in an hour. We now have a efficiently working refrigerator and a cold freezer and have the proper amount of ice cubes that are supposed to be made.
water in the door despencer stopped working and did not make ice
first thing i did was to turn off the water supply line to the frig,then pulled it away from the wall and removed the cardboard backing at the bottom of the frig. then i loosened the nut on the supply line to the fill valve removed the two screwsholding in the fill valve,un hooked the two electrical plugs.[i had allready disconected the electric when i pulled the frig out]then i un hooked the other two water line conected to the fill valve,replaced the valve with the new one rehooked everything . the ice machine tube was only a matter of loosining up the nut on the tub takeing off the two nuts on the back of the frig the just pull out the old tude install the new one rehook the water line ,turn the water back on check for leaks get all the air out of the line by using the water despencer in the door and your good to go .
The water dispenser was slow and the ice maker did not work.
I determined that the inlet valve was the common device to both the drinking water and the ice maker so I changed that out. That required shutting off the water supply and un plugging the refrigerator. After that as I pulled wire connectors and removed water tubing from the existing part I hooked them to the new inlet valve. This replacement was easy and straight forward. It fixed the drinking water flow, but the ice maker still would not operate. I ordered the complete replacement ice maker and following the included instructions replaced the old one within 20 minutes. The wireing harness on the new part did not need to be changed out. I used the shut off bail from the original unit and I also used the front cover from the original unit as it had instruction / graphics on it which the new unit did not. After several hours we still did not have ice. I read all of the ice maker repair stories and re- looked at the diagrams for the ice maker and decided that there must be a blockage in the ice filler tube. After shutting offf the feed water and un plugging the refrigerator I disconnected the ice maker feed line from the inlet valve and the back of the refrigerator. I could not blow through the tube and on closer inspection I found ice in the part of the tube that goes directly to the ice maker. At last after clearing this our new ice maker is running great and we have all the cold drinking water we need. In retro speck we deffinitley needed the new inlet valve but probably would not have needed the ice maker. However after 12 years of service and the fact we were having some intermittent problems with it leading up to the change out we decided to keep the new ice maker. We definitly will think of PartSelect in the future, their service was excellent.
Other Parts Used:
William from Westerville, OH
Difficulty Level:
Easy
Total Repair Time:
15 - 30 mins
Tools:
Nutdriver, Screw drivers, Wrench (Adjustable)
20 of 23 peoplefound this instruction helpful.
Was this instruction helpful to you?
Thank you for voting!
Stopped making ice
Loosen the 2 screws at the top of the icemaker with a nutdriver while holding the unit in place. Remove the single screw at the bottom of the icemaker. Remove the old icemaker after disconnecting.
The replacement unit had the exact connector, I just connected it and put the screws back.
Replacing the valves was also easy. All the connectors and fittings matched perfectly.
I ordered the parts on a Sunday, and they showed up on Tues.
Nice job on the website and providing parts that make it really simple to fix an appliance and save a bunch of money. Thanks!
made sure the water was off to the applaince and it is unplugged from the outlet, removed the two bolts that hold the water fill valve to the appliance, disconnect the water inlet line, also the two water lines going to the ice maker and the chilled water dispenser. disconnect to 2 electrical connections to the valve, connect the two water lines to to new valve, reconnect the electrical connections reconnect the water supply and attach the water fill valve to the appliance, turn on the water supply, plug into outlet, test for leaks, total time about 10 minutes
Other Parts Used:
Stanley from Norwich, CT
Difficulty Level:
Really Easy
Total Repair Time:
Less than 15 mins
Tools:
Wrench set
16 of 22 peoplefound this instruction helpful.
Was this instruction helpful to you?
Thank you for voting!
< Prev
1
2
3
Next >
Questions and Answers
Ask our experts a question about this part and we'll get back to you as soon as possible!
4 questions answered by our experts.
< Prev
1
Next >
Sort by:
Search filter:
Clear Filter
Your search term must have 3 or more characters.
Keep searches simple. Use keywords, e.g. "leaking", "pump", "broken" or "fit".
Sorry, we couldn't find any existing answers that matched.Try using some different or simpler keywords, or submit your new question by using the "Ask a Question" button above!
Larry
October 12, 2017
I have a 2188542 double solenoid valve. Where can i find the water- line threaded coupling nuts that accept the push-in plastic water lines? The threaded nuts are different sizes, one smaller than the other
Hi Larry,
Thank you for your question. Actually, if your original water lines have those nuts on the end, you will have to cut them off as straight as you can. Then push the tubes into the push on ports on your valve. I hope that helps. Good luck with your repair.
1 person found this helpful.
Was this helpful?
Thank you for voting!
Stacey
November 3, 2017
My icemaker does not get a signal to the solenoid so it does not get water to it. I replaced the solenoid and it still doesn't work. The module just keeps rotating but does not signal the solenoid to fill. Do you have any solutions?
For model number ED25TQXGW00
Hello Stacey,
Thanks for your question. It may be a good idea to add water to the icemaker to see if it is able to make ice to begin with. If it is able to, it may be worth replacing the icemaker assembly itself, part number PS358591, to ensure that the correct signals go to the water valve from its power board.
I hope this helps.
I changed ice maker, inlet valve, and solenoid and i still have to chip out frozen block of ice from ice tray. I don't know what to do next since all of the ice maker components have been changed and i still have same problem
For model number ED27PQXEW01
Hi Don,
Thank you for your question. If there is frozen ice in the tray, check to see if the chute is sealing correctly after use. If it is not sealing correctly, then warm air can get into the area where the ice is and cause condensation to form and the ice to melt. When cold air circulates in the container again, the ice cubes will freeze, forming blocks of ice in the container. If the chute is not sealing correctly, you may need to replace it. I hope this helps. Thank you and have a great day!
Was this helpful?
Thank you for voting!
Frank
August 8, 2019
Does this part work for the Kenmore model and does it work onn 115vac?
For model number Kenrefrigerator model #-106.57572790
Hello Frank, thank you for your question. Unfortunately, that is not the right part. Per the manufacturer, the valve for your unit is PartSelect Number: PS11731255. Please enter the part number into the site for current price and availability. Good luck with your repair!
Was this helpful?
Thank you for voting!
< Prev
1
Next >
✖
Ask a Question
Ask our experts a question on this part and we'll respond as soon as we can.