The drain pump and motor assembly may also be known as the washer drain pump and is a part for your washer. The drain pump helps expel water from the washing machine. The drain pump is activated after...
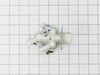
This valve is used for cold water, bleach dispenser and prewash cycles. It has a standard hose fitting inlet with 2 outlets facing 45 degrees to the right and one outlet facing 45 degrees to the left.
This washer hose with bellows, also known as a dispenser hose, is a genuine OEM replacement part for your washer. Replacing this part can be helpful if your washer is leaking. The dispenser hose conne...
This part is the replacement connector hose or clean-out drain hose for your washer. It is black in color and is sold individually. The connector hose drains water out of the washer if the drain cycle...
This part is the replacement rear tub gasket for your washer. It is made of black plastic and is approximately 3-1/4 inches in diameter. The rear tub gasket forms a watertight seal between the rear tu...
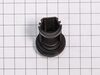
This drain hose plug, also known as a hose cap, is a genuine OEM part for your washing machine. This plug caps the drain hose from the pump housing, and helps prevent leaks from your washer. Before be...
$10.26
In Stock
Questions And Answers for WM5005HKA
Be the first to ask our experts a question about this model!
✖
Ask a Question
Ask our experts a question on this model and we'll respond as soon as we can.
Removed the top of the washer by removing the 4 back screws and 2 small brackets. Then I removed the front panel, this was actually the hardest part, 2 screws and 8 tabs that you pop out carefully from the top of the panel. I only disconnected the power button and was able to rest the panel on top of the washer. The rest of the washer came apart quickly just moving down the front of the washer and removing the door, latch, tub gasket, drain cover. Removing the pump was just a mater of disconnecting the drain hoses, and one clip under the drain assembly. 3 screws attach the drain to assembly to the pump and only 2 wires that are clearly marked. Reassembly is just going back through in reverse order of disassenbly. The best thing about this is that it all comes apart with a standard phillips screwdriver.
Thank you for the very helpful YouTube video. After watching the video, I was able to diagnose the problem, buy the part from your website, and complete the repair. This is my personal machine - I am not a professional repairman.
Pull washer away from wall. Unplug cord and remove drain hose from receptacle. Remove 4 screws holding panel to rear of washer. Squeeze and slide back hose clamps on each end of drain hose and loosen center clamp with screwdriver. Remove old hose. Reinstall new hose in reverse order using existing clamps. Re-install back panel.


 LG Washer")
 LG Washer")
 LG Washer")