This washer hose with bellows, also known as a dispenser hose, is a genuine OEM replacement part for your washer. Replacing this part can be helpful if your washer is leaking. The dispenser hose conne...
This part is the replacement rear tub gasket for your washer. It is made of black plastic and is approximately 3-1/4 inches in diameter. The rear tub gasket forms a watertight seal between the rear tu...
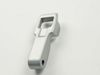
This levelling leg is a genuine replacement part. It is used to help keep your washing machine stable and balanced. It helps support your appliance. It screws into the base of your washer, and you can...
Ask our experts a question about this model and we'll get back to you as soon as possible!
2 questions answered by our experts.
< Prev
1
Next >
Sort by:
Search filter:
Clear Filter
Your search term must have 3 or more characters.
Keep searches simple. Use keywords, e.g. "leaking", "pump", "broken" or "fit".
Sorry, we couldn't find any existing answers that matched.Try using some different or simpler keywords, or submit your new question by using the "Ask a Question" button above!
Phil
November 26, 2023
control knob is not always working not sure whats the part #
For model number WM3500CW
Hello Phil, thank you for getting in touch. The control knob you are looking for is part number PS12078391. We would recommend checking the display PCB assembly before replacing the control knob. Glad to be of assistance!
My washer doesn't make any noise anymore, when you switch from normal load to another. Also, it doesn't chime at the end of washing either. It does wash efficiently though. How can I fix it?
For model number WM3500CW
Hello Karen, thank you for reaching out. Based on the description that you have provided, the issue is with the buzzer. The buzzer comes along with the display control board. The display control board for your model is part number PS12589971. You may need to replace it to fix the issue. We hope this information helps!
Pull washer away from wall. Unplug cord and remove drain hose from receptacle. Remove 4 screws holding panel to rear of washer. Squeeze and slide back hose clamps on each end of drain hose and loosen center clamp with screwdriver. Remove old hose. Reinstall new hose in reverse order using existing clamps. Re-install back panel.
Wife called me and said the washing machine just flooded the Landry room. I looked at it and didn't see anything wrong. Took the top off and the back off and started looking for a leak, did not see anything. Took the front part of the washer apart thinking the drain hole was plugged up where the rubber boot is. It was ok after taking the big rubber boot off or whatever that is called i was not getting anywhere. I put it back together left the top and the back off. I turned the water on and started the washer on a quick cycle looking for a leak. I found the bellows at the inlet had a small leak fixed that and started the washer again. So what i found out was the clean out drain plug was not in tight letting water out as it was washing after i tightened it all was ok. So i did find a leak that was small that we never saw. The hardest part was putting that wire clamp on the rubber boot it took two people to do that.
To put the new spring on requires two people. One to pull the drum up as far as possible and hold it in place and the other to attach the spring to the drum and the into the slot on the side of the washer frame. It takes a lot of leverage and strength to get the spring into the slot. We used a screw driver as leverage to get the spring extended to slip into the slot. You might also need the plastic holder part# 4930FR3040A. If the washer door boot has come off due to spring breaking, you will need to reset it. That requires also removing front panel. There is a large wire ring that holds the boot in place. You either need a special pair of pliers to expand the spring to reset the boot or a lot of strength to do it with a couple screw drivers.


 LG Washer")
 LG Washer")
 LG Washer")