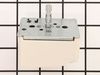
This control switch controls the stove top 8" surface burner. 8.9- 11.0 amp. This surface burner element switch is for an 8-inch surface burner on an oven, stove, or range. The element switch control...
$121.70
In Stock
Order within the next 1 hr and 8 mins and your part ships today!
This 18 ml bottle of white appliance touch-up paint is used to cover scratches or marks on your appliance. The white touch-up paint can be used on refrigerators, microwaves, ranges, clothes dryers, an...
$10.20
In Stock
Order within the next 1 hr and 8 mins and your part ships today!
This temperature sensor detects the temperature within the oven cavity. This oven temperature sensor, for ranges, works together with the oven control board to measure and regulate the oven temperatur...
$120.73
In Stock
Order within the next 1 hr and 8 mins and your part ships today!
This is a multi-use and multi-appliance screw. It can be used on a microwave, refrigerator, range/oven, air conditioner, dehumidifier, washer, or dryer. The measurements of this screw are 8 x 1/2 inch...
$26.51
In Stock
Order within the next 1 hr and 8 mins and your part ships today!
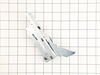
This is a door hinge active with spring, for your range. The hinge controls the opening and closing of the oven door. If your oven door seems to be sticking, you may want to consider replacing this pa...
$74.93
In Stock
Order within the next 1 hr and 8 mins and your part ships today!
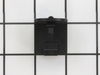
The light socket on your electric range connects the power source to the light bulb. If your oven light is malfunctioning, you may need to replace the light socket. The light socket is located in the ...
$76.05
In Stock
Order within the next 1 hr and 8 mins and your part ships today!
Order within the next 1 hr and 8 mins and your part ships today!
Questions And Answers for WFE525S0JS0
Ask our experts a question about this model and we'll get back to you as soon as possible!
5 questions answered by our experts.
< Prev
1
Next >
Sort by:
Search filter:
Clear Filter
Your search term must have 3 or more characters.
Keep searches simple. Use keywords, e.g. "leaking", "pump", "broken" or "fit".
Sorry, we couldn't find any existing answers that matched.Try using some different or simpler keywords, or submit your new question by using the "Ask a Question" button above!
Richard
March 17, 2023
Oven will not heat up to right temp. What part or parts do I need to replace.
For model number WFE525S0JS0
Hello Richard, thank you for getting in touch. We believe your oven is having this problem because of a bad temperature sensor. It monitors the temperature inside the oven cavity in order to maintain an accurate temperature. If the temperature sensor is faulty, the oven may not heat at all. The sensor can be tested for a proper ohm reading at a set temperature with a multimeter to help determine if the part is defective; if found defective, replace the temperature sensor, part number PS11749737. Also check the safety thermostat, part number PS11740991. If these do not fix the issue, we suggest replacing the bake element, part number PS12348633, to resolve the issue. We hope this helps, good luck with this repair!
No power. House breaker seems fine as it was not tripped when problem started. Oven was on at 400F for about 30minutes when the timer beeped unprompted and then the range powered off and won't power back on.
What component failure will cause this?
For model number WFE525S0JS0
Hello Jordan, thank you for getting in touch. Based on our research, the issue could be with the thermal fuse, part number PS11740991. It shuts off the range if it overheats. We would recommend replacing it to fix the problem. Glad to be of assistance!
Hello Jim, thank you for reaching out. The error code "f3e0" shows that the temperature sensor or the electronic control board is defective. To fix this issue, please follow these instructions:
1. Disconnect the power or unplug the range. 2. Reconnect the oven temperature sensor wire harness connection if loose. Replace the wire harness if damaged. 3. Measure the temperature sensor resistance using a multimeter. If the resistance isn't 1000-1200 ohms at room temperature (70 degrees F), replace the oven temperature sensor, part number PS11749737. If the oven temperature sensor resistance and wire harness connections are good, replace the electronic control board (ECB), part number PS16620223. We hope this helps, good luck with this repair!
Do I need a specific female spade connector (I believe it's called) to repair a broken terminal that connects to the heating element. New heating element has already been bought but, also noticed cable needs to be repaired. Will any high temp connector work? Or does it have to be the same connector with the release clip on it?
For model number WFE525S0JS0
Hello Kay, thank you for your question. The connector is part of the PS12578056 Wire Harness and is not sold individually. Good luck with this repair.
I got an error message E1 F6 during the Cleaning cycle. Do I need to buy another oven sensor?
For model number WFE525S0JS0
Hello Courtney, thank you for a very interesting question. If your error code is F6 E1, then it indicates a faulty temperature sensor. We would recommend replacing the temperature sensor, part number PS11749737, to solve the problem. Glad to be of help!
Opened up the back of the stove. Unpluged the sensor. Replaced the sensor. Replace the back of the stove.
The sensor that has been replaced is not what is expected. After reading all of the instructions for adjusting the temperatures, the only temp that stays steady is when we first turn on the oven to 350 degrees. That stays steady but when I turn it to 400 it slowly goes up to 425 degrees.
I numbered every part. ex: 1 L., for first part removed left side. I used a magic marker to circle the holes and wrote the number of screws used on the part, set the srews in a separete place, so that I new where these screws went to. The cleanup was pretty time consuming, but I was able to keep my stove, when every repairman I called to fix my stove told me I was better off buying a new stove. ($600.00 stove 2 years old)Please Note: The insulation blanket needed for the entire stove is two pieces, the sides and top are one part # and the bottom and back, are another part #. I did not know this. I just purchased the top and sides. I got lucky, the back and bottom were still in good shape. So I guess I should have read the description of the part more carefully to see what it covers, before I ordered it. It took two people two hours to do the work, it was really nice to have an extra set of eyes, to remember what direction pieces of metal from the stove went. I would do it all over in a heart beat instead of buying a new stove.
removed the screws holding the back metal panel, this exposed the wires to the switch. tested the wires to find that they were live when the switch was in the off position. ordered a new switch. UNPLUGED THE STOVE. removed the knob on the front of the stove. this exposed 2 screws, removed screws and the switch came away from the stove. removed each wire from the old switch and replaced them in the same position on the new switch. inserted new switch into the stove and attached the 2 screws. replaced back panel and pluged in stove. all tested well