This dryer repair kit consists of five commonly replaced dryer parts: one multi-rib belt (part #661570V and measures 93 1/2 inches long), four drum support rollers, one idler assembly, nine tri-rings,...
This drum support roller is sold individually. Most dryers require two. The tri-rings are included. This is a drum support roller for a dryer. It is a genuine replacement part. The part includes the d...
This thermostat may differ in appearance, but functions the same as the original part. This part controls the temperature of the inside of the dryer drum and prevents the dryer from overheating.
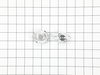
If you notice that your dryer is noisy or will not tumble, you may need to replace the tri ring. This part is triangular, and is less than an inch in size. Tri rings can be found both on the idler pul...
Also known as Thermal Cut-Off kit. The thermostat acts as a safety mechanism that keeps the dryer from overheating and the fuse is like a backup system - it's set to trip at a higher temperature than...
This is the moisture sensor for your dryer. It helps detect the amount of moisture in your clothes during the dryer cycle. If you notice your clothes are still wet after an automatic dryer cycle is do...
This 18 ml bottle of white appliance touch-up paint is used to cover scratches or marks on your appliance. The white touch-up paint can be used on refrigerators, microwaves, ranges, clothes dryers, an...
After a few years of slamming the dryer door (at least that is what my husband says), the catch on the dryer door broke. Using pliers (I used needle nose) squeeze the outer edges of the catch together (vertically). With it compressed, it should slide out easily. My husband had jacked with ours prior to the repair, so the broken piece in the door was actually sideways and would not fit through the hole. Using a screwdriver, I pushed that piece into the door (it lives in the door somewhere now). I was then able to slide out the rest of the old catch. Compress the new catch and insert it into the hole in the door. Push it in until it clicks into place. DONE! Happy Drying!
The issue was the idler pulley. First I began opening up the front panel based on a youtube video but soon realized the model was slightly different and required a lot more items to remove. I saw the pulley in the back with nothing in the way so I put the front panel crap back on and removed the rear panel. There it was, very simple to remove and replace. I'm not looking forward to drum rollers though. Hopefully they're aren't as difficult as they appear.


 Diagram and Parts List for Whirlpool Dryer")