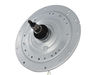
T1772HFFSP5 (ASSEPUS) LG Washer - Overview

Diagrams for T1772HFFSP5

See every part. Know exactly what you need.

Enter a part description. DIY Heroes keep it simple, eg. "belt" or "pump".

Search filter:
Clear Filter
Your search term must have 3 or more characters.
Pulsator Cap – Part Number: 5006EA3009B
$45.05
In Stock
Pulsator Cap
★★★★★
★★★★★
(1)
Part #5006EA3009B
This part is known as a pulsator cap or washplate cap, and is designed for your LG washer. It fits over the washplate mounting bolt and prevents clothes from getting caught on the washplate during a wash cycle. It is round in shape, and approximately 3 inches in diameter.
Washer Water Inlet Valve – Part Number: AJU75152601
$125.28
In Stock
Washer Water Inlet Valve
★★★★★
★★★★★
(4)
Part #AJU75152601
This is an authentic LG water inlet valve for a top-load washer. It is designed to control the flow of water into the washer. If your washer is filling slowly, making loud noises, overflowing, or stopping in the middle of a cycle, you may need to replace the water inlet valve. Be sure to disconnect the power and water supply before you begin this repair.
Pulsator Assembly – Part Number: AGZ72909711
$184.45
In Stock
Pulsator Assembly
★★★★★
★★★★★
(8)
Part #AGZ72909711
This is a pulsator assembly, also known as an agitator, for your washing machine. This pulsator sits at the bottom of your washer and is what is used as the main driving force to wash your clothes. If the pulsator in your washer is broken, it will need replacing immediately to continue to wash and clean your clothes evenly. The cap that sits in the center of this part is sold separately.
Washer drain Hose Assembly – Part Number: AEM73732901
$58.25
In Stock
HOUSING ASSEMBLY,CLUTCH COUPLING – Part Number: AEN73651402
$381.76
In Stock
HOUSING ASSEMBLY,CLUTCH COUPLING
★★★★★
★★★★★
(3)
Part #AEN73651402
This clutch housing assembly with mode shifter, or washer drive shaft and shifter assembly, is made for your washer. It connects the appliance wash plate to the motor so the washer can shift the drive system between the appliance spin and agitate cycles. Is measures 14.5 inches in diameter. You may need to replace this part if you hear strange noises or if the washer will not spin or agitate.
Washer Switch Assembly sensor – Part Number: 6501EA1001R
$57.15
In Stock
Tub-to-Pump Hose – Part Number: AEM73213001
$60.45
In Stock
Motor Stator Bolt – Part Number: 4011FA4353B
$13.15
In Stock
Motor Stator Bolt
Part #4011FA4353B
COUPLING ASSEMBLY – Part Number: ACP72929002
$54.95
Special Order
COUPLING ASSEMBLY
Part #ACP72929002
Common Washer – Part Number: FAF30369201
$13.15
In Stock
Common Washer
Part #FAF30369201
Washer Motor Stator – Part Number: AJB73816004
$279.17
On Order
Washer Motor Stator
★★★★★
★★★★★
(1)
Part #AJB73816004
The motor stator works with the motor rotor to rotate the spin basket.
Motor Assembly Clutch – Part Number: 4681EA1009C
$63.75
In Stock
Motor Assembly Clutch
Part #4681EA1009C

Common Symptoms of the T1772HFFSP5

How this model fails, and the parts that fix it.

See how others fixed this model. Time, tools, difficulty, and steps that lead to victory! View More

Search repair tips from other customers using simple keywords like "replace", "fit", "remove", "inspect". DIY doesn't mean you have to do it alone!

Search filter:
Clear Filter
Your search term must have 3 or more characters.
Water continued leaking into washer after the end of cycle through the water inlet valve.
14 of 19 people found this instruction helpful.
  • Flora from MIAMI, FL
  • Very Easy
  • 30 - 60 mins
  • Screw drivers, Wrench (Adjustable)
Did the repair Myself. Saved $ 400.00 in the process.
Was this helpful?
Thank you for voting!
Water overflow in washer basin
11 of 15 people found this instruction helpful.
  • Ed from LAKE WORTH, FL
  • Really Easy
  • 30 - 60 mins
  • Pliers, Screw drivers
I diagnosed by running a full wash. I watched it and when the water should have stopped it kept running. I unplugged the washer from the power and the water kept running. This told me the inlet valve was the issue and not an electronic issue. I stopped the water by closing the water valve manually. Replacing the inlet valve was very easy . Hardest part is moving the washer out of the laundry room. The videos online show very simple steps. Maybe 8 screws to remove and a couple of hoses and five electronic connectors. Take a photo of connectors before removing them to ensure you reconnect properly.
Was this helpful?
Thank you for voting!
LOUD GRINDING/ROARING NOISE, INTERMITTANT SPIN
10 of 13 people found this instruction helpful.
  • MIKE from LANDENBERG, PA
  • A Bit Difficult
  • More than 2 hours
  • Pliers, Screw drivers, Socket set
Watch this video on youtube:https://www.youtube.com/watch?v=8ZKgP6hu8Fk very similar

Keep all parts separate and in order in a plastic box with dividers
1. Disconnect washer from wall. (electrical and hot/cold hoses, drain tube)
2. Remove center cap from bottom tub plate
3. Remove small bolt under cap
4. R emove bottom Tub Plate
5. Remover washer
6. Remove larger 38mm nut (I bought the correct deep well socket) Ive seen other video use a pipe wrench)
6a. Remove the large washer under nut
NOTE- I did not remove the tub, total hassle, found it unnecessary, Yes the washer was heavier but nothing that cant be managed.
7. Place a blanket on the floor and lay the washer on its back to access the bottom.
NOTE Everthing is nuts and bolts at this point. 10mm socket worked on all
8. Remove Nut & washer on rotor. Remove rotor-its has a line of magnets and the edges are sharp. Just wiggle it a bit. wear gloves if need be.
9. Remove bolts from Stator, user a small flat blade screw driver to undo 1 or 2 (some) electrical connections. Lay the stator aside. Move the electric connector(s) out of the way.
10. Remove the grounding wire at 6 oclock position
11.Remove the rectangular pack and the 3 oclock position by removing 2 bolts. It has a small arm that reaches out to the clutch arm, slide the piece out to the widest part of hole in clutch arrn an wiggle it loose.
Almost there....
12. Remove all the 10MM headed bolts from the clutsh and drive assemble The inner bolts are a slightly different style, keep the two sets separate.
13. Remove the clutch and drive.

NOTE: if the drive doesnt come out with a slight pull, you have missed a bolt(s)-inspect and remove as need be

14 Wipe clean the pocket in the outer wash tub that accepts the seal on the top of the drive. Lubricate the new drives seal completely with a little dishwasher detergent so it slides smoothly and seals well.

15. Assembly is the reverse:

Last Notes:
*Install all bolts for the clutch and drive hand tight as you get everything lined up.
*Once all bolt are in the clutch and drive are hand tight, tighten the bolts in a cross pattern as you would a wheels lug nuts
*Snug the bolts used to attached the clutch and drive firmly 1/8 to 1/4 turn past snug
*Make sure you clock the stator to the correct position, again hand tighten bolts then final tighten in a cross pattern.
*The nut and washer in the rotor tighten to 1/4 to 1/2 turn past snug, its tight.
*The large 38 MM nut on the top of the drive assembly torque is 88 ft lbs. Have a partner or friend hold the tub while you torque the large nut. If you don't have a torque wrench you can rent one from a number of auto-part chain stores.
*I used a 1/2 Impact gun to remove the 38mm nut, Never use that kind of power to reassemble as it will damage parts.


Good luck, you can do it.
Was this helpful?
Thank you for voting!