This is a multi-use and multi-appliance screw. It can be used on a microwave, refrigerator, range/oven, air conditioner, dehumidifier, washer, or dryer. The measurements of this screw are 8 x 1/2 inch...
$26.52
In Stock
Order within the next 4 hrs and your part ships today!
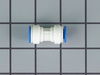
This light switch may also be known as a refrigerator door switch or a light switch kit, and is compatible with your refrigerator. The function of the refrigerator door switch is to turn on the light ...
$35.26
In Stock
Order within the next 4 hrs and your part ships today!
In addition to the solenoid (115V), this kit also comes with a door strike and an ice door assembly. Please be advised the spring and roll pin are not included with this kit.
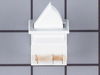
This part is the replacement natural door closer for your refrigerator. It is black in color and is approximately 3 inches by 2 inches in size. The natural door closer allows your refrigerator door to...
$23.07
In Stock
Order within the next 4 hrs and your part ships today!
I could see that a tab was broken from the round chute that opens for ice dispensing and closes to seal off freezer ice chute when not in use. With the tab broken, the round door would not shut to seal the freezer chute and dispensing water would spatter everywhere. I looked for just the round door part, but is only sold in the "Ice dispenser solenoid and door kit" I only had to use the round chute/flap from the kit. The instructions were easy to follow and I had the fridge back working in about 10 minutes. It took me longer to find the right star headed screwdriver that I needed to remove the Maytag star screws (5) total. Because I didn't have to replace the solenoid or the spring mechanism, this was especially easy, and now I have those parts on hand if one day I need them!!
I removed the ice maker from the refrigerator, by removing one screw on the underside bracket and loosening the two screws at the top side, then lifting the ice maker off the loosened screws. I then unplugged the electrical harness that supplies power from the refrigerator to the ice maker. I then disassembled the ice maker by removing the front cover which is snapped in place, then removing two recessed screws at the front. I removed the broken part, I then reassembled the ice maker with the new part. I replaced the two recessed screws at the front and snapped on the cover. Then I reinstalled the ice maker in the refrigator by plugging in the harness, slipping the ice maker over the loosened screws in the refrigerator and replacing the screw that was removed from the underside bracket. Tightening all the screws completed the project.
I used a flat-head screwdriver to pop out the old light rocker switch. Then, I unplugged the wires, plugged them into the new light rocker switch, and then popped the new switch into the hole. That's it! Lights began working again.