Models > PTC22LFDARWW

PTC22LFDARWW General Electric Refrigerator - Overview

Sections of the PTC22LFDARWW

[Viewing 8 of 8]
Keep searches simple, eg. "belt" or "pump".
Light Bulb - 40W – Part Number: 40A15
Light Bulb - 40W
★★★★★
★★★★★
(2)
PartSelect #: PS217532
Manufacturer #: 40A15
This 40-Watt light bulb is sold individually and is a genuine OEM replacement option for your home appliances. It is specially designed to withstand extreme temperatures, so this bulb is compatible wi...
$5.85
  Special Order
Ice Maker – Part Number: WR30X10093
Ice Maker
★★★★★
★★★★★
(5)
PartSelect #: PS1993870
Manufacturer #: WR30X10093
Replacement icemaker kit - electronic. This kit includes a 4 pin round plug-in connector, 6 post plug-in connector, tube and fill cup.
$275.72
  Special Order
Dispenser Door Assembly or Flapper – Part Number: WR17X11653
Dispenser Door Assembly or Flapper
★★★★★
★★★★★
(1)
PartSelect #: PS964304
Manufacturer #: WR17X11653
This part mounts in the ice dispenser. The crank no longer comes with this part but you can use original crank. The crank is sold separately depending on the model number of your appliance.
$19.87
  Special Order
Run Capacitor – Part Number: WR55X24064
Run Capacitor
PartSelect #: PS11764031
Manufacturer #: WR55X24064
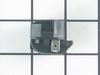
This part helps the compressor kick on and off while maintaining a constant temperature to keep things frozen in your freezer. This part has been updated by the manufacturer and may appear different t...
  No Longer Available
Defrost Timer – Part Number: WR9X483
Defrost Timer
★★★★★
★★★★★
(1)
PartSelect #: PS310852
Manufacturer #: WR9X483
This refrigerator defrost timer will cycle for thirty minutes after every ten hours of run time.
$39.60
  Special Order
Screws - Package of 12 – Part Number: WR1X1763D
Screws - Package of 12
PartSelect #: PS294595
Manufacturer #: WR1X1763D
This is a package of twelve replacement screws. They are designed as replacement screws for refrigerators. Be sure to check that your appliance model is compatible with these screws. The screws are ap...
$14.95
  Special Order
Light Socket – Part Number: WR2X9391
Light Socket
PartSelect #: PS299782
Manufacturer #: WR2X9391
This part is a replacement light socket for your refrigerator. It connects to the power source, and holds the light bulb. If the light in your refrigerator is not working, you could have a faulty sock...
$13.72
  Special Order
Dispenser Control Board - 2 Slide Switches – Part Number: WR55X129
Dispenser Control Board - 2 Slide Switches
PartSelect #: PS304236
Manufacturer #: WR55X129
It is used with those refrigerators that have an ice and water dispenser in the door.
  No Longer Available
Actuator Pad – Part Number: WR2X8702
Actuator Pad
★★★★★
★★★★★
(1)
PartSelect #: PS299261
Manufacturer #: WR2X8702
Note: This part is now ONLY available in black.
$20.17
  Special Order
WHEEL MOBILITY – Part Number: WR02X10480
WHEEL MOBILITY
PartSelect #: PS284924
Manufacturer #: WR02X10480
$21.88
  Special Order
Relay PTCR - 3 Wire – Part Number: WR07X10055
Relay PTCR - 3 Wire
PartSelect #: PS963826
Manufacturer #: WR07X10055
Also known as the Start Relay. The start relay briefly boosts the compressor, and then shuts off as soon as the motor gets up to speed.
$33.96
  Special Order
DEFROST THERMO - WR9M417 – Part Number: WG03F02118
DEFROST THERMO - WR9M417
PartSelect #: PS9862660
Manufacturer #: WG03F02118
$33.89
  In Stock

Questions And Answers for PTC22LFDARWW

Be the first to ask our experts a question about this model!

Common Symptoms of the PTC22LFDARWW

[Viewing 20 of 20]
Ice maker not making ice
Fixed by
these parts
Fixing Fixing Fixing
Show All
Ice maker won’t dispense ice
Fixed by
these parts
Fixing Fixing Fixing
Show All
Leaking
Fixed by
these parts
Fixing Fixing Fixing
Show All
Will Not Start
Fixed by
these parts
Fixing Fixing
Show All
Door Sweating
Fixed by
these parts
Fixing
Show All
Light not working
Fixed by
these parts
Fixing
Show All
Not dispensing water
Fixed by
these parts
Fixing Fixing Fixing
Show All
Fridge too warm
Fixed by
these parts
Fixing Fixing Fixing
Show All
Freezer section too warm
Fixed by
these parts
Fixing Fixing Fixing
Show All
Frost buildup
Fixed by
these parts
Fixing
Show All
Door won’t open or close
Fixed by
these parts
Fixing
Show All
Noisy
Fixed by
these parts
Fixing Fixing Fixing
Show All
Freezer not defrosting
Fixed by
these parts
Fixing
Show All
Fridge and Freezer are too warm
Fixed by
these parts
Fixing
Show All
Ice maker dispenses too little ice
Fixed by
these parts
Fixing Fixing
Show All
Ice maker dispenses too much ice
Fixed by
these parts
Fixing Fixing
Show All
Clicking sound
Fixed by
these parts
Fixing
Show All
Fridge runs too long
Fixed by
these parts
Fixing
Show All
Too warm
Fixed by
these parts
Fixing
Show All
Won’t start
Fixed by
these parts
Fixing
Show All
Keep searches simple. Use keywords, e.g. "leaking", "pump", "broken" or "fit".
No power to the fan and compressor
I have a fridge in my garage. I have found that a glass of ice water or a cold drink outside is very important to me. When I discovered melting ice dripping onto the garage floor I was very upset. I spun the fridge and found that the compressor and fan weren't starting. I got out my multi-meter and discovered that power was not making it to these components. I did some research and found the wiring diagram online. There really isn't too much going on with a fridge and the most likely candidate seemed to be the run capacitor. I ordered the part, replaced it in a few minutes and the fridge began working again.
Parts Used:
Run Capacitor Light Socket
  • Christian from Kearneysville, WV
  • Difficulty Level:
    Really Easy
  • Total Repair Time:
    Less than 15 mins
  • Tools:
    Screw drivers
222 of 297 people found this instruction helpful.
Was this instruction helpful to you?
Thank you for voting!
Ice cubes do not dispense because auger does not turn. Bad switch on control board.
1) Turn off water line and unplug power.
2) Pop off front panel plate at ice cube select switch area.
3) Unscrew 4 screws that holds control panel housing in place.
4) Remove panel assembly by disconnecting two different wiring plugs.
5) Unscrew 2 screws that allows access to control circuit board at end cap.
6) Remove circuit board by sliding it out of the assembly housing.
7) Install new circuit control board in assemble housing and screw on end cap retainer.
8) Attach two electrical wiring plugs.
9) Install control board assemble housing into frig opening and secure with 4 screws.
10) Install front panel plate (pops on).
11) Plug in power and turn on water line.
Parts Used:
Dispenser Control Board - 2 Slide Switches
  • Michael from Allen, TX
  • Difficulty Level:
    Really Easy
  • Total Repair Time:
    Less than 15 mins
  • Tools:
    Screw drivers
90 of 99 people found this instruction helpful.
Was this instruction helpful to you?
Thank you for voting!
ice stalactites were drooling out of the icemaker and gumming up the cubes in the receiving tray.
I first shut off water flow to the fridge. Examination of the package (which was not exact in appearance to the original) demonstrated that the electrical connectors were well-insulated so I arrogantly and successfully proceded without disconnecting the power. My fridge is old enough that the model doesn't appear exactly on anyone's list so I wasn't alarmed that it took an extra 10 minutes or so to noodle out how to adapt the slightly different inlet cowling and electrical cord with extension, but the device is pretty simple.
Soon I loosened the two mounting screws with a nut driver, used a screwdriver to pry away the plastic snap-in housing over the electrical socket on the fridge inner wall and pulled away the electrical plug. The original water fill tube remained in its cavity, ready for re-use.
The new unit's mounting points matched the original screw locations perfectly, as did the fill cowling - which on the replacement icemaker has two possible attachment points. The new unit's electrical connector required an extension pigtail to adapt to my socket, but it was included in the package. The extra cable posed a minor cosmetic issue because it hangs in the collection basket a bit, but that will soon be remedied with a tie wrap.
After the water was restored and an anxious wait of a few hours, we had well-formed ice cubes that weren't all stuck together and the stalactites haven't reappeared.
Parts Used:
Ice Maker
  • Gerald from Benicia, CA
  • Difficulty Level:
    Easy
  • Total Repair Time:
    15 - 30 mins
  • Tools:
    Nutdriver, Screw drivers
89 of 122 people found this instruction helpful.
Was this instruction helpful to you?
Thank you for voting!