This an authentic OEM 40-Watt replacement light bulb, used in a number of household appliances. It is specially designed to withstand extreme temperatures, which is why these replacement bulbs are mos...
$14.96
In Stock
Order within the next 5 hrs and your part ships today!
The lower door closing cam is used in refrigerator doors, it can be located on the fresh food side or the freezer side. It helps hold the door open. This cam is made out of plastic, so it might crack ...
$9.83
In Stock
Order within the next 5 hrs and your part ships today!
The Door Cam is a black plastic part which helps the door pivot shut while keeping the door and hinge in proper alignment. Lubricating this part upon installation may help it move easier. It attaches...
$13.47
In Stock
Order within the next 5 hrs and your part ships today!
This OEM, clear convertible meat drawer can be used to store meats or vegetables and is designed for the lower portion of your refrigerator, generally. It has its own cold air duct to allow cold air f...
$85.67
In Stock
Order within the next 5 hrs and your part ships today!
This 18 ml bottle of white appliance touch-up paint is used to cover scratches or marks on your appliance. The white touch-up paint can be used on refrigerators, microwaves, ranges, clothes dryers, an...
$10.20
In Stock
Order within the next 5 hrs and your part ships today!
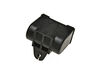
Note: This valve has been updated by the manufacturer and no longer includes the removable pre-filter bracket connector. It must be ordered separately; part number WPW10445062.
$140.70
In Stock
Order within the next 5 hrs and your part ships today!
Thanks to the pictorial diagram, I was able to order correct parts. It was just a matter of removal of broken parts and replacing them. Ice maker now working and air is no longer getting into freezer which was freezing up ice maker. Thanks for timely delivery, now I am able to use ice dispenser, which I haven't used for long time. Thanks
Remove the icemaker service door... gently pry the door pins from the hinge sockets. Remove the 3 screws from the under side of the icemaker with a nut driver (1/4"). Gently remove the icemaker . It's a tight fit between the top of the compartment and the icemaker lower support tray. Next, disconnect the electrical connector at the right side. You're done! Reverse procedure for installing. Good luck. Remember, your working with cold plastic...take your time and don't force too much.


 Diagram and Parts List for Maytag Refrigerator")