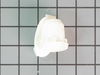
This water filter purifies water going to the water dispenser and sometimes the icemaker as well. This part should be replaced if it is causing reduced water flow or just replaced periodically per the...
This an authentic OEM 40-Watt replacement light bulb, used in a number of household appliances. It is specially designed to withstand extreme temperatures, which is why these replacement bulbs are mos...
NOTE: This replacement ice maker mechanism does NOT come with a cover, shut off arm, a wire harness, or the mounting hardware. Those must be ordered separately, or you can use the existing parts.
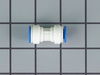
The water inlet valve is a solenoid-operated switch that, when activated, releases water from the supply line to the water valve and into the compact icemaker mold and to the water line.
This includes both the run capacitor and the start relay. The capacitor helps the compressor kick on and off while maintaining a constant temperature to keep things frozen in your freezer.
The start ...
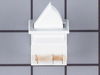
This light switch may also be known as a refrigerator door switch or a light switch kit, and is compatible with your refrigerator. The function of the refrigerator door switch is to turn on the light ...
This evaporator fan motor is located in the back of the freezer, and circulates air over the refrigerator coils. These coils will covert the heat into cool air, which is then circulated.
If your refrigerator or freezer is too warm, or making noises, you may need to replace the fan blade. The fan blade attaches to the evaporator motor, which is in the freezer section, to help circulate...
$47.43
In Stock
Questions And Answers for MSD2352KEW
Ask our experts a question about this model and we'll get back to you as soon as possible!
4 questions answered by our experts.
< Prev
1
Next >
Sort by:
Search filter:
Clear Filter
Your search term must have 3 or more characters.
Keep searches simple. Use keywords, e.g. "leaking", "pump", "broken" or "fit".
Sorry, we couldn't find any existing answers that matched.Try using some different or simpler keywords, or submit your new question by using the "Ask a Question" button above!
Jackie
March 16, 2023
Refrigerator is running compressor is running but isn't cooling don't feel air blowing inside of freezer or fridge could this be evaporator fan is out?
For model number MSD2352KEW
Hi Jackie, thank you for the question. Based on our understanding of the issue, we would suggest you check the condenser coils for dirt. The condenser coils are usually located under the refrigerator. They dissipate heat as refrigerant passes through them. If the condenser coils are dirty, they will not dissipate the heat effectively. As debris builds up on the coils, the refrigerator becomes less efficient, causing it to work harder to cool down. If the coils are not dirty, then you may need to check the evaporator fan motor, part number PS11748697. The evaporator fan motor draws air over the evaporator (cooling) coils and circulates it throughout the refrigerator and freezer compartments. To determine if the evaporator fan motor is defective, try turning the fan blade by hand. If the fan blade does not turn freely, you may need to replace the fan motor. If the evaporator fan motor is not faulty, you may need to check the temperature control thermostat, part number PS11743620, which sends voltage to the evaporator fan motor. If that is not causing the issue, you may need to check the defrost heater assembly, part number PS11743602. The defrost heater assembly turns on several times throughout the day to melt away any frost that may have accumulated on the evaporator coils. If the defrost heater assembly is defective, the defrost system will not work, and frost will continue to accumulate on the evaporator coils. This will result in the refrigerator not cooling properly. We hope this helps!
Our in door water and ice control had a melt down. We can still get water, but no ice. The filter light stays red and can’t be reset. The auto light still works. Troubleshooting is no help. Think it may have had a static shock.
For model number MSD2352KEW
Hello Angie, thank you for getting in touch. Make sure you are resetting the filter light correctly. Press and hold both the Lock and Water buttons simultaneously for four seconds. The green filter status indicator light will flash three times when the function has successfully reset. If the ice maker is making ice, but the dispenser is not dispensing ice, we would recommend checking the auger motor, part number PS11743528. We hope this sorts out your problem!
I know how to reset the filter, we’ve had this refrigerator since 2008 and change it every 6 months, sooner if needed. The ice maker doesn’t work because the circuit board got shocked and fried. We will need a new board.
For model number MSD2352KEW
Hi Angie, thank you for reaching out. We would recommend replacing the control board, part number PS11738652, to fix the issue. Good luck with this repair!
Hi Jack,
Thank you for your question. There is no defrost timer listed for your refrigerator, but there is a defrost control board, part number PS12349580 and a defrost thermostat, PS11743599. We hope this helps! If you have any questions, please let us know.
Pressed in the end of the filter cover, lowered it down part way. Twisted the old filter 1/4 turn and removed it. Set in the sink to drain. Inserted new filter and twisted it to lock. closed cover. Done. Total time @ 1 Minute.
Interior surface of ice tray felt rough & flaky (coating deteriorated) so cubes would not release. Unplug appliance. Remove timer cover by hand pressure @ edge. Remove single attachment screw & bracket at lower front of icemaker. Disconnect wiring harness from socket @ rear of compartment. Tricky part was determining what type of connection held the other two attachment points along the long edge of the icemaker. I did not have repair manual or useful drawing but looked @ PartsDirect pic of side brackets & used a small mirror to confirm that mine were also some sort of "snap in" attachment. Remove icemaker unit by pushing upward and outward on the unit. I takes a good bit of pressure and will pop loose, but be careful not to break attachment bracket from freezer wall. Scavenge shut off bar and wiring harness from old icemaker once you have it out & attach to new one before installing it back in freezer. Again, you might find a mirror useful to align those pesky snap-in brackets with the new unit. Since you probably kept your freezer running while waiting for the part, the plastic snap-ins will be cold and brittle. I warmed them up first by applying a dampened cloth heated in the microwave to make them a little more pliable. A good push of the new unit towards the snap-ins along with some upward force will get it stable. Reattach the metal screw in bracket & connect the wiring harness to rear plug... and don't forget to plug the whole thing back in. It will take awhile for the first batch of cubes dump as the timer may need to cycle completely around to get to the fill cycle... be patient. Dump the first couple of batches of cubes just to make sure you're free of any residue.
unplugged refrigerator and shut off water, removed one screw and loosened two more, after removing one side of the ice bucket rail, unplugged electrical from old ice maker. Then I removed the bail and out on new one, reinstalled ice maker in reverse order from taking it out.


 Diagram and Parts List for Maytag Refrigerator")


.gif "SUPPLEMENTAL INFORMATION Diagram and Parts List for Maytag Refrigerator")