This drum support roller is sold individually. Most dryers require two. The tri-rings are included. This is a drum support roller for a dryer. It is a genuine replacement part. The part includes the d...
This thermostat may differ in appearance, but functions the same as the original part. This part controls the temperature of the inside of the dryer drum and prevents the dryer from overheating.
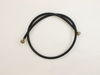
This gas dryer ignition coil set comes with two ignition coils: one three-terminal boost/hold coil, and one two terminal secondary coil. Usually only one of them burns out but you should replace them ...
If you notice that your dryer is noisy or will not tumble, you may need to replace the tri ring. This part is triangular, and is less than an inch in size. Tri rings can be found both on the idler pul...
This is the moisture sensor for your dryer. It helps detect the amount of moisture in your clothes during the dryer cycle. If you notice your clothes are still wet after an automatic dryer cycle is do...
This 18 ml bottle of white appliance touch-up paint is used to cover scratches or marks on your appliance. The white touch-up paint can be used on refrigerators, microwaves, ranges, clothes dryers, an...
This part senses the flame for heat allowing the gas valve to open.This flame sensor is three inches long and is used for many gas clothes dryers.This flame sensor assembly is made of both plastic and metal.
This silicone carbide igniter with ceramic holder kit includes the 3" flat igniter, bracket, 4" wire leads, and the plug. It can replace both round and flat igniters. This kit is used for many gas clothes dryers.
$51.69
In Stock
Questions And Answers for MGDB725BW0
Ask our experts a question about this model and we'll get back to you as soon as possible!
2 questions answered by our experts.
< Prev
1
Next >
Sort by:
Search filter:
Clear Filter
Your search term must have 3 or more characters.
Keep searches simple. Use keywords, e.g. "leaking", "pump", "broken" or "fit".
Sorry, we couldn't find any existing answers that matched.Try using some different or simpler keywords, or submit your new question by using the "Ask a Question" button above!
Kim
April 27, 2023
It sometimes makes a screeching sound like metal rubbing metal
For model number MGDB725BW0
Hi Kim, thank you for reaching out. A screeching noise when you turn the dryer on is usually caused by a broken idler pulley, part number PS11756154, sometimes called a tensioner. If this part is faulty, you may need to replace it. We hope this helps!
Maytag Gas Dryer will heat for a short period, but incomplete drying.
1) Is there a way to observe the flame while running a test load to confirm ignition?
2) Does this dryer model have diagnostic codes? How to access them?
3) I can think of three sensors which might have failed. How do I tell which one it is?
For model number MGDB725BW0
Hello Bill, thank you for the question. The easiest way to diagnose a flame sensor is to observe the operation of the burner. Remove the small front panel (if option is available, if not, then the front of the dryer panel will need to be removed. Select highest temperature and start the dryer. Observe the burner. The switch should begin to glow shortly after starting the dryer. If it comes on for a few seconds (up to 15 seconds) and then goes off, the problem is probably the solenoids (coils). If the igniter burns and stays on after the flame has been started, the problem is usually the flame sensor. To access the diagnostic mode on your washer, follow these steps:
1: The washing machine needs to be plugged in and in a standby mode, with all indicators off.
2: Choose any one button on the washer console except Power, Start, or Stop. Press/Hold 3 Seconds - Release 3 Seconds - Press/Hold 3 Seconds - Release 3 Seconds - Press/Hold 3 Seconds.
3: If the diagnostic test mode has been successfully entered, all the indicator lights will glow for five seconds with 88 on the time display. (If it didn't work, try #2 again One one thousand…Two one thousand…Three one thousand).
4: If there are any saved fault codes, they will be displayed. If there are no save fault codes, all indicator lights will turn off for a moment, then back on with 88 displayed, and the automatic diagnostic test mode will begin in five seconds.
5: If you are unable to enter the diagnostic test mode, press the power button and verify that the button you were trying to use operates properly to program the washer's cycle function. There may be something wrong with that function button. Find another button on the control that appears to work and try to enter the diagnostic mode with that button. You may also want to verify that the user interface has a good connection with the washing machine control board at the P11 terminal.
Note: Pressing the STOP or POWER button at any time to exit the washing machine's diagnostic mode.
You can test your sensors with a multi-meter to check that whether they are working or not. Set a multimeter to the lowest ohms of resistance settings. Your radiant flame sensor should be testing 0 ohms to be working. For moisture sensor testing with a multimeter, if you get a reading that is close to 0 or exactly 0, your moisture sensor might be dead. Good luck with your repair.
Was this helpful?
Thank you for voting!
< Prev
1
Next >
✖
Ask a Question
Ask our experts a question on this model and we'll respond as soon as we can.
PartSelect showed seven different possibilities why the dryer wouldn't heat. I removed the two screws to remove the bottom panel and turned the dryer on and noticed that the heating element that ignites the gas was working fine. This meant that it was not getting gas so it could be the gas valve or one of the two gas valve coils which are located on top of the gas valve. I borrowed my neighbor"s ohm meter and touched the two probes on the coils terminals to check for continuity and found that one of the coils read zero. I then took both of the coils out by removing two screws and tested each coil again. One coil read 500-850 and the other read zero. This meant that it was no good so I called for the part and received it in three days. I reassembled the parts and turned the dryer on and it fired up after a few seconds. It works as good as new. The part plus shipping was less than $30. My repairman would have charged me $150-$200. While the dryer was apart I gave it a good cleaning with a vacuum and a toothbrush in delicate areas. I also removed and cleaned the lint trap housing by removing two nuts. I didn't know much about gas dryers, but thanks to PartSelect I easily fixed it myself.
There was no problem with lint build-up within the dryer & the exhaust vent. I removed the gas cycling thermostat & thermal fuse from system & dryer still was not operating correctly. The radiant sensor & hi-limit thermostat both seemed to be operating correctly. That left either of the two coils as the culprits. I replaced both coils & the problem was corrected.


 Diagram and Parts List for Maytag Dryer")