Models > LRGL5825D

LRGL5825D ((FBDELGA)) LG Range - Overview

Sections of the LRGL5825D

[Viewing 5 of 5]
Keep searches simple, eg. "belt" or "pump".
Temperature Sensor – Part Number: EBG61305805
Temperature Sensor
★★★★★
★★★★★
(4)
PartSelect #: PS11732697
Manufacturer #: EBG61305805
$111.65
  In Stock
Oven Igniter – Part Number: MEE61841401
Oven Igniter
★★★★★
★★★★★
(3)
PartSelect #: PS3535362
Manufacturer #: MEE61841401
$336.45
  In Stock
FOOT – Part Number: 4778W1N001B
FOOT
PartSelect #: PS3635599
Manufacturer #: 4778W1N001B
$22.95
  In Stock
Window,Glass – Part Number: 4890W1N005A
Window,Glass
★★★★★
★★★★★
(1)
PartSelect #: PS3524129
Manufacturer #: 4890W1N005A
$211.63
  In Stock
TRANSFORMER ASSEMBLY,POWER – Part Number: EBJ64465501
TRANSFORMER ASSEMBLY,POWER
PartSelect #: PS16732632
Manufacturer #: EBJ64465501
The spark module controls the spark for lighting the cooktop surface burners.
$71.70
  In Stock
Common Nut – Part Number: 1NHB0500032
Common Nut
PartSelect #: PS3517437
Manufacturer #: 1NHB0500032
$10.42
  In Stock
Screw,Taptite – Part Number: 1SBF0402418
Screw,Taptite
PartSelect #: PS3517460
Manufacturer #: 1SBF0402418
$10.42
  Special Order
BURNER ASSEMBLY – Part Number: ABF72909012
BURNER ASSEMBLY
PartSelect #: PS16545474
Manufacturer #: ABF72909012
$139.38
  In Stock
VALVE ASSEMBLY,GAS – Part Number: AJU74852813
VALVE ASSEMBLY,GAS
PartSelect #: PS16223303
Manufacturer #: AJU74852813
$81.02
  In Stock
FOOT – Part Number: MDP62447004
FOOT
PartSelect #: PS16224134
Manufacturer #: MDP62447004
$45.37
  In Stock
GUIDE,RAIL – Part Number: MEA66170001
GUIDE,RAIL
PartSelect #: PS16224200
Manufacturer #: MEA66170001
$14.64
  In Stock
LED DISPLAY MODULE – Part Number: EAV64012008
LED DISPLAY MODULE
PartSelect #: PS16732626
Manufacturer #: EAV64012008
$142.22
  In Stock

Questions And Answers for LRGL5825D

Ask our experts a question about this model and we'll get back to you as soon as possible!

2 questions answered by our experts.
  • 1
Sort by:
Sorry, we couldn't find any existing answers that matched.Try using some different or simpler keywords, or submit your new question by using the "Ask a Question" button above!
Glen
November 10, 2023
Temp is running low compared to setting
For model number LRGL5825D
PartSelect logo
Hello Glen, thank you for the question. Based on our understanding of the issue, we would recommend checking the temperature sensor, part number PS11732697, to fix the issue. We hope this helps!

Was this helpful?
Thank you for voting!
Related Parts:
Donna
December 20, 2023
what material is the griddle made of?
For model number LRGL5825D
PartSelect logo
Hello Donna, Thank you for writing. This Griddle is a Cast Iron with a Teflon coating. We hope this helps!

Was this helpful?
Thank you for voting!
  • 1

Common Symptoms of the LRGL5825D

[Viewing 6 of 6]
Little to no heat when baking
Fixed by
these parts
Fixing Fixing
Show All
Oven not heating evenly
Fixed by
these parts
Fixing
Show All
Element will not heat
Fixed by
these parts
Fixing Fixing
Show All
Gas igniter glows, but will not light
Fixed by
these parts
Fixing
Show All
Oven is too hot
Fixed by
these parts
Fixing
Show All
Will Not Start
Fixed by
these parts
Fixing
Show All
Keep searches simple. Use keywords, e.g. "leaking", "pump", "broken" or "fit".
Replace Inner Oven glass because it shattered
Go onto youtube, such as https://www.youtube.com/watch?v=-ITkrwhDNMQ and watch similar videos for DYI. The process is very similar to other models.

Once the door is removed, place oven door on a towel or soft place so it does not scratch the door. Unscrew the screws and make sure you notice where each screw goes, so you know the process of where each screw goes when you re-assemble.

Once the inner cover is removed, remove the insulation, too so you don't damage it. Use Wet/Dry Shop Vac to clean the shattered glass. (WORD OF ADVICE: I did not remove the insulation and the suction of the Shop Vac removed part of the insulation, so now instead of a quick turn around repair turns into a few weeks repair, because the insulation is on back order 10-14 days from the supplier. DON"T MAKE THE SAME MISTAKE!)

Once the glass has been removed, the new inner glass is replaced, begin by re-assemble the oven door with the correct screws and attached the oven door to the range.

Hope this helps
Parts Used:
Window,Glass
  • Jeffrey from CERRITOS, CA
  • Difficulty Level:
    Really Easy
  • Total Repair Time:
    30 - 60 mins
  • Tools:
    Screw drivers
9 of 15 people found this instruction helpful.
Was this instruction helpful to you?
Thank you for voting!
Oven wouldn't ignite
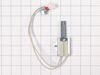
Took off the oven door then took out the racks and two screws in the oven bottom and removed it . Then removed the heat deflector. Then un plugged the old igniter and removed the burner to make it easier to remove the old igniter. Then installed the new igniter and reversed the process
Parts Used:
Oven Igniter
  • Martin from KEWASKUM, WI
  • Difficulty Level:
    Easy
  • Total Repair Time:
    15 - 30 mins
  • Tools:
    Nutdriver
6 of 7 people found this instruction helpful.
Was this instruction helpful to you?
Thank you for voting!
Oven would not light
As soon as my husband put it in the oven, the very thin prongs broke. There was no guard on either side of the prongs for protection like the one that had been in there. Very costly to us of $185 with no fix. Very disappointed in that ignitor. It would have been an easy fix. Had replaced one previously but it only lasted 6 months. Now we have a new stove
Parts Used:
Oven Igniter
  • Sheila from HOPKINTON, MA
  • Difficulty Level:
    Very Easy
  • Total Repair Time:
    30 - 60 mins
6 of 10 people found this instruction helpful.
Was this instruction helpful to you?
Thank you for voting!