This kit contains 4 grate feet for a range. These are the feet to fit your burner grates so the burner will not scratch your cooktop. The are black in color and made of rubber. These feet are fitted with a specific fire-resistant adhesive. If necessary, be sure to order adhesive separately. Be sure your burners are off and have cooled down to the touch before replacing these parts.
This is a replacement light bulb to illuminate the inside of your oven. It is 25 watts and 120 volts. Please wear gloves during replacement if your existing bulb is shattered. Consider ordering a spare as this is a common wear part.
This cooktop cleaner will cut through tough grease and baked-on residue. The cleaner will leave a protective coating of silicone on the cooktop surface as it cleans. This 10oz bottle is safe for all glass, porcelain, and ceramic cooktops. Just apply a small amount to your cooktop and use a circular motion by using a sponge or a rag and ge...Read morently press until the grease or baked residue has been removed. Please remember to wear gloves to protect your hands while working with the cooktop cleaner.
If your oven isn’t heating properly or seems to be getting too hot, the high-limit thermostat might be the issue. This part helps keep things safe by shutting off the heat if the temperature gets too high. It’s built to last and helps protect your oven from damage. Replacing a faulty thermostat can fix problems like uneven cooking or an o...Read moreven that won’t start. Just be sure to unplug the oven before installing the new part.
Ask our experts a question about this model and we'll get back to you as soon as possible!
We may have answered a similar question already! Search questions and answers left by others using simple keywords like "fit", "broken", "easy", or "quality" to find questions that match.
Search filter:
Clear Filter
Your search term must have 3 or more characters.
Sort by:
Prev
1
Next
Sorry, we couldn't find any existing answers that matched.Try using some different or simpler keywords, or submit your new question by using the "Ask a Question" button above!
Michael - For model number KDRS463VSS03
May 9, 2022
Commercial oven light won't go out when shutting door, thus the oven won't start. We use a magnet to attach to door inside.
Hello Michael, Thank you for your inquiry. We would recommend checking the door lock assembly and switch, the oven light assembly, and the oven control board. Check the board for any visible damage, and you can test the other parts with a multimeter. If you are unfamiliar with how a multimeter functions, we have videos available to assist you. We hope this helps and if you need help placing an order, customer service is open 7 days a week. Please feel free to give us a call. We look forward to hearing from you!
See how others fixed this model. Time, tools, difficulty, and steps that lead to victory!View More
Search repair tips from other customers using simple keywords like "replace", "fit", "remove", "inspect". DIY doesn't mean you have to do it alone!
Search filter:
Clear Filter
Your search term must have 3 or more characters.
Burners kept clicking after ignited
32 of 36 peoplefound this instruction helpful.
Robert from Ranchos de Taos, NM
Really Easy
15 - 30 mins
Screw drivers
This problem was driving me crazy for months. Of course, after I bought and installed the part and it still was not fixed I finally found a website that told me how to fix the clicking. The problem is that the removable head burners (#8 on the top assembly diagram) are not making good electrical contact with the base burners (#22). What I
... Read more did was grab the head burners and grind them back and forth into the base burners with the weight on the heal of my hand. Steel wool or sandpaper would work too--you just want to clean the surfaces to restore electrical contact. If you still want to know how to replace the spark module start by removing #24. This will allow the removal of #9 (after you take the knobs off). You may have to do some fiddling cause the rubber gasket is sticky. Next there are 2 obvious regular screws for #14 and 2 not so obvious star screws in the space where the burner valves are. After #14 is off there are 2 screws on the spark module to be removed and one that you can't loosen that is in a slot. You wriggle the module out of that one.
Read less
Was this helpful?
Thank you for voting!
faulty meat probe
38 of 69 peoplefound this instruction helpful.
Kent from Seattle, WA
Really Easy
Less than 15 mins
Not a repair. Just needed to replace the meat probe sensor for the programmable oven. Quick and easy purchase and very fast delivery took care of the problem. I was back in business.
Was this helpful?
Thank you for voting!
bought floor model with loose cord that melted block terminal
19 of 21 peoplefound this instruction helpful.
larry from alexandria, IN
Easy
15 - 30 mins
Nutdriver, Screw drivers, Socket set
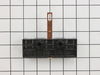
Safety first always shut breaker off at box. I unplugged stove, disconnected wires keeping in mind the color placement. Unscrewed one ground screw and removed terminal block. Attached new block with ground screw, replaced wires in correct order, re-attached plug. Then reattached safety cover. Pretty simple for d.i.y.



 My Orders